Spring Car Care Checklist: A 22-Point ASE Master Tech's Post-Winter Inspection (2026)
An ASE Master Tech's complete 22-point spring car care checklist — battery, tires, brakes, fluids, exhaust, undercarriage, paint decontamination, and the OBD2 scan every driver should run before May.
Updated
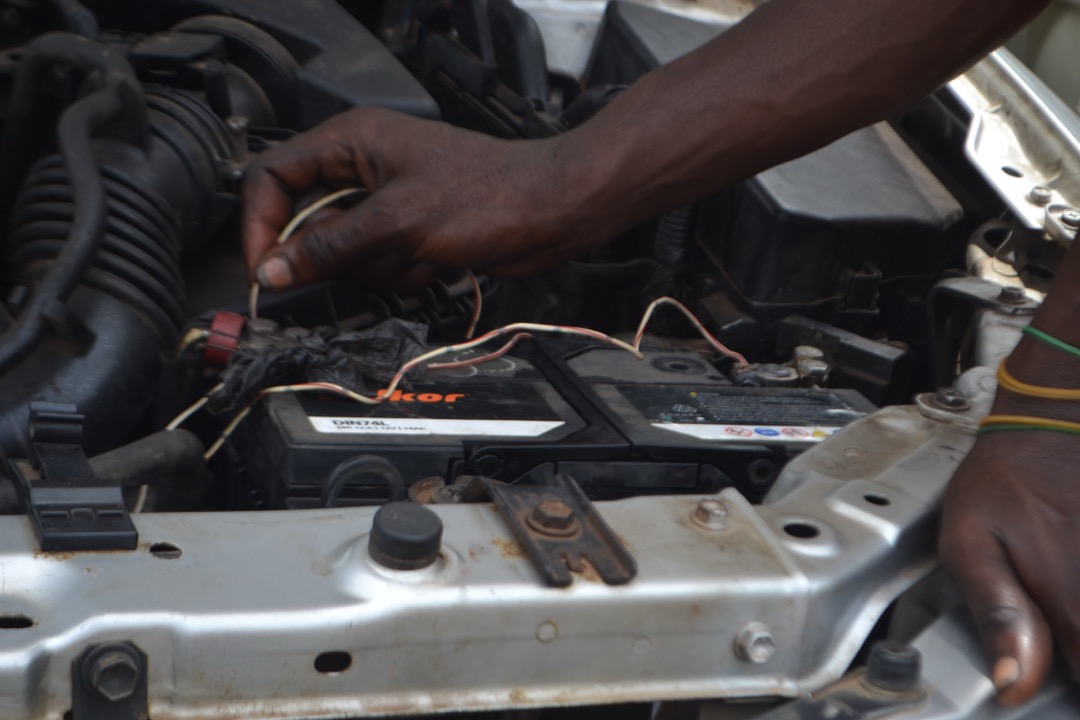
A few springs ago, on the first warm Saturday in April, a regular customer pulled into the bay with what he called “a noise.” His Honda Pilot, 110,000 miles, had wintered in Connecticut and survived four months of road salt without complaint. The noise was a soft, rhythmic clicking from the front left wheel that he could only hear at slow speeds in parking lots. By the following Friday — the day his family was supposed to leave for a college tour drive to Virginia — that click had become a grinding metallic whine and the steering had started pulling to the left under acceleration. The CV joint on that side had been running on a cracked boot since late February, spraying grease out with every turn and pulling road salt and grit into the bearing. The joint was destroyed. The axle assembly was $640 plus labor, and the trip had to be postponed for parts. A 30-second visual check in March — looking at the inside edge of the front wheels for grease spray and the rubber boots for cracks — would have caught the cracked boot for a $40 replacement.
Winter is the season that creates the problems. Spring is the season that finds them. Everything that quietly degraded between November and March — battery capacity, brake fluid moisture, tire pressure, CV boots, exhaust hangers, the paint on the rocker panels, the rubber on the wiper blades — is now either resolved before summer or waiting to fail at the worst possible moment. Summer heat is harder on batteries than winter cold. Summer rain at highway speed is more dangerous on worn tires than winter snow. Summer road trips are longer, hotter, and farther from home than anything you did in winter. The spring inspection is where you make sure the vehicle survives the next six months as readily as it survived the last six.
I am Mike Reeves, an ASE Master Technician with over twenty years on the shop floor. This is the spring car care checklist I would give a family member — twenty-two specific things to check, in priority order, with the honest reasoning for each one. No marketing fluff. No padding about “the importance of regular maintenance.” Read it once before Memorial Day weekend, work through it on a Saturday, and your vehicle will start every hot morning, stop in every emergency, see through every summer storm, and get you to and from every trip. That is the deal.
Spring Car Care at a Glance
The full 22-point checklist in one scannable table. Detail by section follows.
| Task | What to Check | DIY or Shop | When to Do It |
|---|---|---|---|
| OBD2 diagnostic scan | Stored and pending codes from winter | DIY with scanner | Before any other work |
| Battery load test | CCA capacity, age, terminal corrosion | DIY (parts store does it free) | Late March |
| Battery terminal cleaning | Clean, tight, no corrosion | DIY — 10 min | Late March |
| Tire pressure | Set to door-jamb spec, recheck monthly | DIY — gauge and inflator | Monthly |
| Tire tread depth | 4/32” minimum, 6/32” preferred | DIY — quarter test | Early April |
| Tire sidewall inspection | Ozone cracking, bulges, cuts | DIY visual | Early April |
| Winter tire swap (if applicable) | When daytime temps hold above 45°F | Shop — 60 min | When temps allow |
| Wheel alignment | Pothole damage check, drift symptoms | Shop — 60 min | If symptoms present |
| Brake pad thickness | Above 4mm front, 5mm rear | DIY visual or shop | Early April |
| Brake rotor surface | Smooth, no deep scoring or pitting | DIY visual | Early April |
| Brake fluid moisture test | Below 2% water content | DIY with tester strips | Every 2 years |
| CV boot inspection | No cracks, no grease spray | DIY visual | Early April |
| Exhaust system inspection | Hanger integrity, joint corrosion | DIY visual + listen | Early April |
| Coolant freeze and boil point | Refractometer test for 50/50 mix | DIY — 5 min | Annually |
| Engine oil change (if due) | Per interval, full synthetic preferred | DIY or shop | Per schedule |
| Engine air filter | Restriction test, not just visual | DIY — 5 min | Annually |
| Cabin air filter | Spring pollen makes this priority | DIY — 10 min | Annually |
| Wiper blades | Front and rear, replace if streaking | DIY — 5 min | Late March |
| Windshield chip inspection | Repair before heat cycles spread cracks | DIY or shop | Early April |
| Headlight clarity | Restoration kit for yellowed lenses | DIY — 1 hour | If oxidized |
| AC system test | Cold output below 45°F at center vent | DIY temp probe | Early April |
| Exterior decontamination | Wash, iron, clay, then protection | DIY — 3 hours | Early April |
Now the detail. Skip ahead to whatever section matters most for your vehicle.
Start Here: Run an OBD2 Scan Before You Touch Anything
This is the step no other spring car care guide tells you about, and it is the single highest-leverage action on the checklist. Plug an OBD2 scanner into the port under the dash and read both stored and pending codes before you start any other inspection or maintenance.
Winter generates a long list of fault codes that often clear themselves once warm weather returns — cold-start misfires, oxygen sensor codes from cold cats, EVAP leaks from frost-cracked fuel lines or fuel cap seals, transmission codes from cold ATF behavior. Pending codes are even more valuable than stored ones because they represent issues the engine control module is watching but has not yet escalated to a check engine light. A pending P0420 catalyst efficiency code in March often becomes a confirmed code with a check engine light in July, when you are halfway through a road trip and the nearest emissions shop is two states away.
The scan also catches the issues that did throw a light during winter and that you cleared without addressing — repeated misfires, intermittent sensor failures, transmission shift quality issues — all of which become more pronounced under summer heat and load. Twenty minutes with a basic scanner saves the diagnostic fees and waiting-room time you would otherwise pay a shop. Our best OBD2 scanners guide covers compact Bluetooth dongles that pair with a phone app for casual use, and full handheld units with bidirectional control for owners who do their own diagnostic work.
Battery and Charging System
Number one cause of summer breakdowns is the same as the number one cause of winter no-starts — battery failure. Counterintuitively, summer heat is actually harder on lead-acid batteries than winter cold. Heat accelerates internal corrosion of the lead plates, evaporates electrolyte, and causes the same self-discharge that drains marginal batteries to nothing over a long weekend in a hot parking lot.
Why Winter Stresses the Battery and Summer Finishes It Off
Every cold-start in winter pulled more cranking current than a summer start would have, and reduced battery temperatures meant slower recharging during driving. A battery that entered winter at 85 percent of rated capacity often exits winter at 70 percent or below, even if it never failed to start the engine. That 70 percent capacity battery is the one that strands you in August.
The right test is a load test, performed free at any parts store in about 10 minutes. Voltage at rest does not tell the full story — a battery can read a healthy 12.6 volts and still fail under load. The load test applies roughly half the battery’s rated cold-cranking amps for 15 seconds and measures whether the voltage holds above 9.6 volts. Healthy batteries pass. Marginal batteries sag. Failing batteries collapse. Our best car battery testers guide covers handheld units that perform load tests in your driveway if you would rather not make the trip to the parts store every spring and fall.
Terminal Cleaning — The Free Capacity Recovery
Corrosion on the battery terminals — the white, green, or blue crusty deposits — adds resistance to the circuit and effectively reduces available cranking amps independent of battery health. A 10-minute terminal cleaning with a wire brush often recovers a noticeable amount of starting performance from a marginal battery. Disconnect the negative cable first, then positive. Wire brush the posts and the inside of the cable clamps to bare metal. Reattach positive first, then negative. A coating of dielectric grease or terminal protection spray on the finished connection slows future corrosion.
Pre-Emptive Replacement Decision
If your battery is past four years old and the load test comes back marginal, replace it in spring rather than wait for the summer failure. The cost of the battery is a fraction of one tow plus one missed appointment plus the inconvenience of a no-start in a hot parking lot. Vehicles that sat parked through winter or are about to sit through summer (vacation homes, second cars) benefit from a quality battery maintainer that keeps the charge topped up without overcharging — covered in our best car battery chargers roundup. And if your worst-case scenario is a no-start far from home, a compact lithium jump starter in the trunk turns that into a five-minute inconvenience.
Tires: Pressure, Tread, Sidewalls, and the Spare
The four contact patches between you and the road are the last thing standing between control and a crash when conditions turn. Tire prep is non-negotiable and goes well beyond what most spring checklists cover.
The 1 PSI per 10°F Rule
Tire pressure changes about 1 PSI for every 10-degree change in ambient temperature. A tire set to 35 PSI on a 25-degree morning in January will read 40 PSI on a 75-degree afternoon in May. Overinflated tires reduce the contact patch and wear unevenly down the center of the tread, hurting both grip and tire life. Reset pressure to the door-jamb spec on cold tires — driven less than a mile — at the first warm week of spring, and recheck monthly through summer. A quality pressure gauge that reads accurately within 1 PSI is the most leveraged tool on this list; our best tire pressure gauges roundup covers digital and analog options.
Penny vs. Quarter Test — Why 4/32” Matters in Spring Rain
The classic penny test measures whether tread is at the legal minimum of 2/32 inch. That is the legal threshold, not the safe one. The better test for spring is the quarter test — insert a quarter into the tread groove with Washington’s head pointing down, and if you can see the top of his head, the tread is at or below 4/32 inch. Below 4/32, wet-weather and hydroplaning performance fall off a cliff. Summer thunderstorms at highway speed are more dangerous on 3/32-inch tread than winter slush, because the speeds are higher and the water depth on the road can be greater.
Sidewall Ozone Cracking — The Failure Mode Nobody Checks
This is the inspection that almost no driver runs and that occasionally catches a tire that looks fine on tread depth alone. Look at the sidewall of each tire — both inner and outer — for fine cracks running perpendicular to the circumferential direction. These are ozone cracks, caused by UV exposure, parking near electric motors and air compressors (which generate ozone), and normal aging of the rubber compound. A tire with healthy 6/32-inch tread but severe sidewall cracking is structurally compromised and can fail catastrophically at highway speed. Tires that sat parked through winter on outdoor pavement are at the highest risk. If you see cracks deep enough to insert a fingernail or that extend more than an inch in length, the tire needs replacement regardless of tread depth.
Spare Tire and Rotation
Pull the spare out of its well and check the pressure — spares lose air over time and are commonly half-flat when you need them. Set to the spare’s specified pressure (often higher than the main tires, usually 60 PSI for compact spares). And finally, rotate the tires now if you have not in 5,000 miles. Even wear extends tire life by thousands of miles and improves wet-weather performance. When the time comes to replace, our best all-season tires and best tire brands guides cover the options that handle summer heat and rain along with shoulder-season cold.
Brakes
Every braking event in summer happens at higher speed and on hotter pavement than winter braking. Worn brakes that were marginal in winter become dangerous in summer. The inspection takes 20 minutes and covers three things.
Pad Thickness and Rotor Surface
Pad thickness should be above 4mm of remaining friction material front and 5mm rear. Measure through the wheel spoke with a flashlight, or remove the wheel briefly for a clearer view. Below 4mm, replace before summer — heat reduces friction-material performance and pads that were marginal in cold weather often squeal and fade significantly when hot. Our best brake pads roundup covers ceramic and semi-metallic options sorted by vehicle type and driving style.
Rotor surfaces should be smooth and uniformly worn. After a salt-belt winter, surface rust on rotors is normal — a few firm stops in a parking lot will clean it off. What is not normal is deep scoring (grooves you can catch a fingernail in), hot spots (visible blue or purple discoloration), or obvious lip wear at the outer edge (a raised ridge of unworn metal where the pad does not reach). Any of those means rotor replacement, not just pads.
Brake Fluid Moisture Test
Brake fluid is hygroscopic and absorbs moisture from the atmosphere continuously. Two-year-old fluid in a typical climate has often absorbed enough water that the boiling point has dropped from new-fluid spec (above 400°F) to potentially below 300°F. Heavy braking in summer — long mountain descents, towing in heat, panic stops on hot pavement — generates brake temperatures that exceed contaminated fluid’s lowered boiling point. The result is vapor in the brake lines, a brake pedal that goes to the floor with no resistance, and brake failure exactly when you need brakes the most. Test with a moisture-test strip annually; flush every two years regardless of mileage. There is no skip-it option on this one.
Suspension and Drivetrain After Winter Potholes
Winter potholes do hidden damage to suspension, steering, and drivetrain components. Spring is when that damage becomes visible.
Alignment Symptoms and the Real Cost of Skipping It
A vehicle pulled out of alignment by a hard pothole hit will pull subtly to one side at highway speed, wear the inside or outside edge of one or two tires faster than the rest of the tread, and have a steering wheel that is not centered when driving straight. Any of these symptoms means alignment is overdue. The cost of skipping it is dramatic: a misaligned vehicle can wear an entire set of tires 10,000 to 20,000 miles early, replacing $600 to $1,200 of rubber to save $100 in alignment cost. Alignment is a shop job, but it is the highest-ROI shop job on the spring checklist for any vehicle that hit a serious pothole this winter.
CV Boot Inspection — The 30-Second Check That Saves Hundreds
CV boots are the rubber bellows that seal the constant-velocity joints at the ends of front and AWD axles. They hold in joint grease and keep out water, dirt, and salt. Winter potholes crack them. A cracked boot leaks grease (visible as black grease spray on the inside of the wheel and on suspension components), and once the joint runs dry it destroys itself within a few thousand miles. A $40 replacement boot turns into a $500 to $800 axle replacement.
Check by turning the steering wheel full left, then full right, and looking at the inner and outer CV boot on each front wheel for cracks, splits, or grease residue. Repeat the visual for the rear axles on AWD vehicles. The check takes less than two minutes per side and prevents the most expensive avoidable repair on this list.
Suspension Component Quick Check
Bounce each corner of the vehicle firmly and release — the suspension should rebound and settle within one to two oscillations. Continued bouncing means worn shocks or struts. Listen for clunking over speed bumps at low speed (often worn strut mounts or sway bar links) and groaning during full lock-to-lock steering at low speed (worn tie rod ends or ball joints). Any of those symptoms means a suspension inspection at a shop is overdue.
Exhaust System Inspection
Almost no spring checklist mentions exhaust inspection in detail. After a salt-belt winter, this is one of the most likely places for actual failure.
Where Salt Kills Exhaust Systems First
Salt eats exhaust components in a predictable order. The mild-steel hanger brackets and rubber-isolator hangers go first — they corrode and break, allowing the exhaust to sag and rattle. Pipe joints go next, where two pieces meet with a slip-fit and a clamp; the slip-fit traps moisture and salt and rusts through from the inside out. Catalytic converter heat shield fasteners corrode and the shield rattles. Muffler bodies eventually rust through from the bottom, where condensation collects.
What to Check
Walk around the vehicle with the engine cold and grab the exhaust pipe at the rearmost accessible point. Try to rotate and shift it gently. More than about half an inch of play indicates hanger failure somewhere upstream. Visually inspect every accessible hanger for cracked rubber or rusted-through metal brackets. Look at every pipe joint for rust streaks running down the pipe from the joint — those streaks mean the joint is starting to leak. Crawl under far enough to look at the muffler body underside for thin spots or visible holes. A flashlight makes the inspection 10 times faster.
Why It Matters Beyond the Noise
A loose exhaust system is annoying. A leaking exhaust system upstream of the oxygen sensors causes the engine to run rich, which throws fault codes and ruins fuel economy. A leak in the exhaust system anywhere ahead of the catalytic converter can damage the converter from the back side. And in the worst case, a leak that allows exhaust gas into the cabin (typically through corroded floor pans or a rusted-through muffler with a tailgate-equipped vehicle traveling at low speed) creates carbon monoxide risk. None of this is dramatic until it is, and the inspection is free.
Fluids: Test, Change, and Top Off
Fluids are where winter quietly accumulates the most damage. The spring fluid pass takes an hour and catches the problems before summer heat compounds them.
Engine Oil — Spring Is Often the Right Change Interval
If you are within 1,000 miles or 30 days of your oil change interval, do it in spring. Winter oil typically carries higher fuel dilution and moisture than summer oil because short trips never fully boil off contamination. Fresh oil at the start of summer heat starts the season clean. The viscosity decision matters less in summer than winter — use what the owner’s manual specifies. For high-mileage vehicles, our best motor oil for high mileage roundup covers formulations with seal conditioners that matter more as engines age. If you handle your own changes, the DIY oil change guide walks through the process step by step.
Coolant — Test Both Freeze and Boil Points
Most owners check coolant level and call it done. The right test is a refractometer reading that confirms both freeze protection (still relevant in transition climates where late frosts happen) and boil-over protection (about to become critical with summer heat). A 50/50 mix of standard coolant raises the boiling point of pure water from 212°F to roughly 265°F, and the pressurized cooling system raises it further to roughly 270°F. Diluted or degraded coolant loses both protection levels. Test with a refractometer (fast, accurate, lasts forever) or a float-style tester for a fast indication. Our best coolant and antifreeze guide breaks down the chemistry types — and emphatically, never mix types when topping off, regardless of what color the bottle is.
Brake Fluid, Power Steering, Transmission, and Washer Fluid
Brake fluid moisture test as discussed in the brakes section. Power steering and transmission fluids get visual checks — color and level. Both should be clean fluid at the correct level on the dipstick or sight glass. Burned smells or dark, dirty fluid mean service is overdue. Washer fluid gets drained completely of winter blend (which often has a methanol smell and a blue or pink tint) and refilled with summer formula that includes bug-removal detergents.
Filters
Filter changes are the lowest-effort, highest-impact maintenance on the checklist. Spring is the right time for two of them.
Engine Air Filter — Restriction Test, Not Color
The conventional wisdom of “look at the filter and replace it if it looks dirty” is wrong. Modern paper filters often look dirty long before they are actually restricting airflow. The real test is the restriction indicator (on diesels and some gas engines), or simply the manufacturer’s recommended interval — typically 15,000 to 30,000 miles. Replacing too early wastes money; waiting too long reduces fuel economy and engine performance. Our best engine air filters guide covers OEM-equivalent and high-flow options.
Cabin Air Filter — Spring Pollen Makes This a Spring Job
Almost every car built in the last 20 years has a cabin air filter, and most owners have never replaced it. Spring pollen makes the cabin filter the worst-performing component in the car at exactly the time when allergy sufferers most need it working. A clogged cabin filter also restricts AC airflow, making the system work harder than it should all summer. Replacement is typically a 10-minute job behind the glovebox or under the dash, covered in our best cabin air filters roundup. If you have never changed it, the first replacement is often dramatic — leaves, twigs, and accumulated pollen come out of a filter that has been there since the vehicle was new.
Fuel Filter Where Applicable
Many modern vehicles have lifetime in-tank fuel filters. Older vehicles, diesels, and some performance applications still have serviceable inline filters that should be replaced at the manufacturer’s interval. Check the owner’s manual to confirm whether yours needs attention.
Visibility: Wipers, Windshield, and Headlights
Summer thunderstorms at highway speed demand more from visibility components than winter snow. Spring is when you make sure those components are ready.
Wipers — Three Distinct Failure Modes
Wipers fail in three ways, each with a different diagnostic. Streaking horizontally across the windshield means the rubber edge is worn or contaminated. Chattering (rapid skipping back and forth) means the blade is too stiff for the cold or the wiper arm spring tension is wrong. Smearing (a thin film of water that obscures vision) means the rubber is glazed or the windshield itself has wax or other contamination on it. The fix for the first two is new blades. The fix for the third is new blades plus a thorough cleaning of the glass with an automotive glass cleaner that removes wax residue. Our best windshield wipers guide covers traditional, beam, and hybrid blades.
Windshield Chip Repair Before Summer Heat
Any rock chip on the windshield should be repaired in spring before summer heat cycling expands it into a full crack. The repair window is typically before the chip exceeds about the size of a quarter; beyond that, full windshield replacement is the only option. Repair kits are available for DIY work, covered in our best windshield repair kits roundup, and the work takes about 30 minutes. Insurance often covers the repair fully (no deductible) because preventing the crack saves them the cost of full replacement.
Headlight Restoration
Cloudy, yellowed headlight lenses reduce light output by 40 to 70 percent in independent testing. The reduction in summer matters less for nighttime visibility (longer days) but matters significantly during summer thunderstorms in low-light conditions. A headlight restoration kit is a one-evening DIY job that recovers most of the lost output. Our best headlight restoration kits guide covers chemical and abrasive options.
Air Conditioning — Test It Now, Not in July
The single most predictable summer service-bay queue is AC repair in late May and June, when the first hot week of the year reveals every system that has been quietly leaking refrigerant over the past two seasons. Getting ahead of it in March or April means the work gets done quickly and at normal labor rates; waiting until June means a two-week wait and premium pricing.
The Center-Vent Temperature Test
Start the engine. Set the AC to maximum cold, maximum fan, recirculate mode, and let it run for five minutes with the windows down. Place a thermometer in the center dashboard vent. A healthy system on a 70-degree ambient day should produce vent-air temperatures in the low 40s. Anything above 50°F means the system is low on refrigerant or has another issue. The diagnostic is fast and definitive.
Recharge vs. Repair Decision
A system that is slightly low on refrigerant might benefit from a recharge — but the “low” almost always means there is a leak somewhere, and a recharge that ignores the leak typically lasts one or two summers before needing another recharge. The right path is a leak test (with UV dye or electronic detection) at a shop, followed by repair of the leak and a proper recharge. Shops can do this in an hour or two when they are not slammed. They cannot do it in June at any reasonable timeline.
Exterior: Salt Removal, Paint Decontamination, and Protection
Winter put road salt, brake dust, rail dust, tar, and tree sap onto your paint. Washing alone does not remove all of it, and a wax applied over bonded contamination just traps the damage underneath. The correct spring exterior service is a four-step process that takes about three hours and lasts for months.
Step 1: Two-Bucket Wash
The two-bucket method uses one bucket for clean soapy water and one for rinse water — the wash mitt goes into the rinse bucket between passes on the paint so grit does not transfer back to the clean soap. Use a dedicated car wash soap, not dish soap (which strips wax and is harder on clear coat). Our best car wash soaps guide covers options for ceramic-coated paint, wax-protected paint, and standard clear coat.
Step 2: Iron Decontamination
Iron remover sprays are purple when applied and turn red as they dissolve embedded ferrous particles — brake dust, rail dust, and similar metal contamination that has bonded to the clear coat over winter. Apply to a cool, dry paint surface (in the shade), let it dwell for the time specified on the product, agitate gently with a mitt, and rinse thoroughly. The first time you use one on a vehicle that has never had iron decontamination done, the amount of color change can be dramatic.
Step 3: Clay Bar Pass
After iron decontamination, run a clay bar over the paint with a clay lubricant. The clay physically pulls remaining bonded contamination off the clear coat — tar, tree sap, paint overspray, industrial fallout. Clean paint feels glass-smooth to bare fingers after claying; contaminated paint feels rough or gritty. Our best clay bar kits roundup covers traditional clay and modern clay alternatives like synthetic mitts and blocks.
Step 4: Fresh Protection
Now the paint is ready for protection. Three tiers, in order of duration and cost. Carnauba and synthetic waxes last two to three months, are inexpensive, and produce a warm, deep gloss — covered in our best car wax guide. Synthetic paint sealants last four to six months, are slightly more expensive, and produce a sharper, more reflective shine — covered in best car paint sealants. Ceramic coatings last one to five years, are more expensive and demand careful prep, and produce the highest-gloss, longest-lasting protection — covered in best ceramic coating for cars. For the actual full-process detail, the step-by-step is in our how to detail your car guide.
Touch-Up Paint on Chips
Stone chips and rust starts on the paint should be touched up in spring before summer heat accelerates the underlying corrosion. Clean the chip down to bare metal with a small wire brush, apply a thin layer of primer, then matching touch-up paint. The repair will not be invisible, but it stops corrosion progression and prevents a small chip from becoming a quarter-sized rust bubble by fall.
Undercarriage: Where Salt Actually Kills Cars
The undercarriage is where road salt does the structural damage that eventually totals a vehicle. Spring is the one time of year to do a thorough wash and inspection.
What to Wash and How
A high-pressure rinse under the vehicle, with particular attention to wheel wells, the area behind the bumpers, frame rails, subframe mounting points on unibody vehicles, and the bottom of door sills. Self-service car washes with an undercarriage spray are the easiest option. Lawn-sprinkler-style undercarriage attachments connect to a regular garden hose and work too. The goal is removing salt that has accumulated in the seams and cavities where it sits all winter and continues to corrode metal during humid summer weather.
What to Inspect
After washing, with the vehicle on jack stands or a lift, walk around with a flashlight and look at four high-failure areas. Frame rail seams where two pieces of metal overlap — water traps that develop rust from the inside out. Brake line routing where lines pass through clips on the frame or subframe — salt pools at the clips and pits the line walls. Subframe mounting points on unibody vehicles — corrosion here is structural and progresses faster than most owners realize. Rocker panel pinch welds at the bottom of the door sills — rust propagates inward and becomes invisible from outside until it pops through.
Any active rust (orange flaking) needs treatment now — wire brush it down, apply rust converter, then a rust-inhibitor coating. Brake line corrosion is the most safety-critical of these and may need shop attention. A vehicle that fails the underbody inspection seriously may not be worth further investment.
Interior
Winter tracked salt, road grit, and snowmelt into the cabin. Spring cleaning catches it before mold and stains set in.
Floor Mats and Carpet
Pull every floor mat out of the vehicle. Vacuum the carpet underneath thoroughly and check for trapped moisture — wet carpet pads grow mold within days in summer heat. If the carpet is damp, leave the mats out and the windows cracked on a dry sunny day until everything is fully dry. Replace salt-stained or torn rubber winter mats with summer-appropriate mats — or leave the all-weather mats in if you live somewhere with frequent rain.
Cabin Air Quality
The cabin air filter swap (covered above) is the largest single intervention for cabin air quality. Beyond that, a thorough vacuum, a microfiber pass on all interior surfaces with an interior cleaner, and an enzyme-based odor neutralizer on the carpet and upholstery if winter mats left smells behind. Our best car interior cleaners guide covers fabric and leather safe options.
Spring Maintenance Schedule for the Rest of the Year
Spring service is the foundation, not the end. The rest of the maintenance year flows from what you check now. Our car maintenance schedule guide covers the full annual cadence — what to inspect monthly, quarterly, and at each major mileage interval. If you handle your own work, the essential tools for DIY car maintenance roundup covers the toolkit that makes spring service efficient instead of frustrating. And the how to winterize your car guide is the bookend to this checklist — the fall version, designed to put the vehicle into winter in good shape so next spring’s service is recovery rather than repair.
Final Thoughts from the Shop
Every spring I see the same vehicles roll into the bay for the same preventable failures from the season before. Cracked CV boots that the owner could have caught in March. AC systems that started losing refrigerant in February and now refuse to cool in June. Brake fluid that absorbed moisture for three winters and finally failed under heavy use on a summer road trip. Cabin filters black with two years of pollen and dust, allergic kids in the back seat. None of these are dramatic failures in isolation. They are the slow, predictable consequences of skipping the inspection that takes an afternoon.
If you do nothing else from this guide, do these five things. First, run an OBD2 scan and read both stored and pending codes — twenty minutes for a free diagnostic that catches problems no other check finds. Second, get a battery load test and replace the battery if it is marginal — summer heat finishes off marginal batteries faster than winter cold does, and the no-start in August is not just inconvenient, it is hot and far from home. Third, check tire pressure and tread depth and look at the sidewalls for cracks — summer rain at highway speed is what kills people on worn tires, not winter snow. Fourth, look at the CV boots for cracks — 30 seconds of inspection that prevents the most expensive avoidable repair on the list. Fifth, test the AC now, in March or April, while shops have appointment slots — not in late May when every shop is booked out two weeks.
Spring is when the bill comes due for winter, and where you set up the next six months. The honest checklist is twenty-two items, the work is one Saturday, and the payoff is a vehicle that handles every summer road trip, every thunderstorm, every hot commute, and every emergency the way it should. That is the deal spring offers — preparation, or the same flatbed call I see come into the bay every July. Choose the easy one.
Buyer's Guide
Six factors determine which items on the 22-point checklist actually matter for your specific situation and which can be skipped. Match prep to risk rather than running every check on every vehicle.
Regional Winter Conditions
What your roads were treated with this winter determines half the checklist. Rust-belt drivers — anyone from the Mid-Atlantic north, plus the upper Midwest, mountain states, and any area that uses road salt or brine treatments — face accelerated corrosion on every undercarriage component, salt contamination on paint, and brake-line pitting that is invisible from above. Sun Belt drivers in Florida, Texas, southern California, and Arizona face the opposite problem set — UV degradation of rubber components (tires, belts, hoses) is the dominant wear mechanism, and AC system health is the top spring priority rather than an afterthought. Transition-zone drivers in the lower Midwest, Mid-Atlantic south, and Pacific Northwest see some of both. The checklist below covers everything, but a Sun Belt driver can skip the undercarriage rust inspection while a Buffalo driver needs to spend most of their Saturday there.
Vehicle Age and Mileage
A vehicle under 60,000 miles in good condition needs the standard spring prep — fluid checks, filter swaps, battery test, tire inspection. A vehicle in the 60,000 to 120,000 range needs the same checks plus closer inspection of components that fail with age and winter stress: original-equipment battery (likely on its second one by now and worth pre-emptive replacement after a hard winter), serpentine belt and hoses (rubber stiffens and cracks in cold), CV boots (winter potholes crack them), and brake fluid (two-year interval regardless of mileage). Anything past 120,000 miles needs honest mechanical inspection in spring — small problems tolerable in summer become roadside breakdowns in extreme heat. Older vehicles also need more attention to exhaust system corrosion after a salt-belt winter, where rust-through happens fastest at hangers and pipe joints.
Winter Driving Pattern
How you used the vehicle through winter changes what needs attention in spring. Daily commuters who put on highway miles through cold months have engines that reached full operating temperature regularly, batteries that received consistent recharging, and tires that wore evenly across the tread. Their spring checklist focuses on consumables and accumulated salt exposure. Short-trip commuters with mostly under-five-mile drives have engines that rarely reached full temperature, oil that has been heavily diluted with fuel and moisture, batteries that never fully recharged from each cold-cranking event, and accumulated condensation in the exhaust system. Their spring checklist prioritizes oil change (often overdue regardless of mileage), battery health, and a longer recovery drive to dry out the exhaust. Vehicles that sat parked for most of winter have a different problem set entirely — flat-spotted tires, drained battery, stale fuel that may need stabilizer treatment or fresh fuel, and brake rotors that may be deeply rust-pitted.
DIY Skill and Available Tools
Most of the spring checklist is DIY-friendly with basic tools, a flashlight, and a Saturday morning. Battery terminal cleaning, tire pressure adjustment, wiper blade replacement, filter swaps, and fluid checks all fit on a workbench with hand tools. The items that genuinely need a shop are honest about it: alignment requires a rack and laser measurement, AC service requires a recovery and recharge machine, brake fluid flushing on ABS-equipped vehicles benefits from a proper scan-tool bleeding procedure, and any cooling system work with a complex air-bleed procedure needs a vacuum filler. A driver willing to invest a couple of hours and basic tools can complete roughly 80 percent of this checklist in their driveway. The remaining 20 percent is what shops are for, and the right question to ask is which shop visits to bundle to minimize labor charges.
Garage or Outdoor Storage Through Winter
A vehicle that wintered in a heated garage faces dramatically less spring prep than one that wintered outdoors. Garaged vehicles avoided salt exposure on the undercarriage, kept rubber components warm enough to age normally, and had a battery that started under less load each morning. Their spring checklist is mostly the consumable items — fluids, filters, wipers. Outdoor-stored vehicles faced the full winter on every component. Their checklist includes everything in the garaged column plus thorough undercarriage washing, exterior paint decontamination, deep cabin cleaning (snow, road grit, and salt that tracked in on shoes), and closer inspection of any rubber and seal that was exposed to repeated freeze-thaw cycling. The cost of a thorough spring service scales with how exposed the vehicle was during the cold months.
What Summer Will Demand of the Vehicle
Spring is not just about recovering from winter — it is about preparing for the workload summer will impose. Vehicles that will tow a boat or camper need the cooling system in better-than-average shape, brakes verified to spec, and transmission fluid checked. Vehicles that will take a long road trip need every safety system verified and the emergency kit updated. Vehicles that will sit in stop-and-go commuter traffic in 95-degree weather need the AC system at full performance and the battery in solid condition (summer heat kills more batteries than winter cold does). Vehicles used by teenage drivers or aging parents need an extra margin of safety on brakes, tires, and visibility. Identify the most demanding thing the vehicle will be asked to do between May and September, and prepare for that worst case rather than for average use.
Frequently Asked Questions
What is the most neglected spring car maintenance item?
Do I really need to change my oil every spring?
How do I know if my car battery survived winter?
When should I switch from winter tires to all-season or summer tires?
Is spring a good time to get my car detailed or just washed?
Related Articles
How to Detail Your Car Like a Pro: An ASE Master Tech's Complete Walkthrough (2026)
car-care-detailing
How to Winterize Your Car: A 20-Point ASE Technician's Checklist (2026)
roadside-safety
Essential Tools for DIY Car Maintenance: An ASE Master Tech's Honest Guide (2026)
tools-car-owners
How to Change Your Own Oil: A Step-by-Step Guide from an ASE Master Tech (2026)
maintenance-parts
How to Choose the Right Car Wax for Your Paint Type (2026): An ASE Master Tech's Guide
car-care-detailing
About the Reviewer

Mike Reeves, ASE Master Technician
A.A.S. Automotive Technology, Universal Technical Institute (UTI)
Mike Reeves is an ASE Master Technician with 15 years of hands-on experience in automotive repair and diagnostics. He earned his A.A.S. in Automotive Technology from UTI and runs his own independent shop in Denver, Colorado. Mike founded RevRated to help everyday car owners make smarter parts decisions -- every recommendation comes from real-world testing in his garage.