How to Change a Flat Tire: A Master Tech's Roadside Walkthrough (2026)
An ASE Master Tech's flat tire guide: safe shoulder setup, jack points on unibody and EV platforms, the star pattern explained, real lug torque, the 50-mile re-torque, TPMS relearn, and what to do with no spare.
Updated
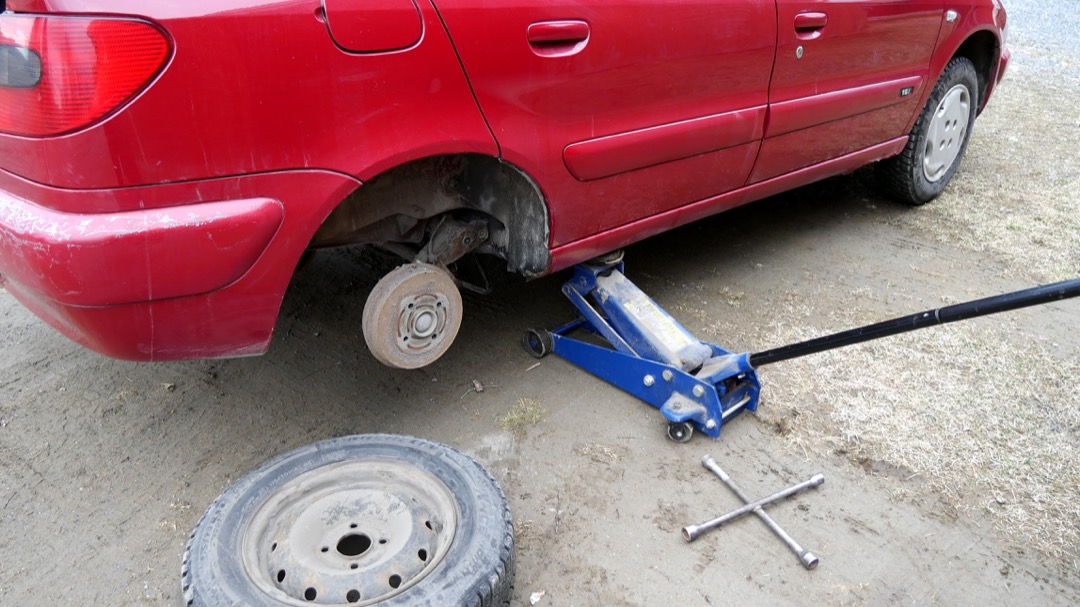
Every guide on the first page of Google for this question was written by an insurance company or a tire retailer. Read a few of them and you will notice they all run the same nine to fifteen numbered steps, in the same order, with the same stock photo of a smiling person kneeling next to a sedan. None of them was written by somebody who has actually torqued a wheel for a living, and it shows in what they leave out.
The steps themselves are not wrong. Pull over, hazards on, loosen the nuts, jack it up, swap the wheel, tighten in a star pattern, drive away. That is the job. But the steps are the easy part, and they are not where people get hurt or where they wreck something expensive. That happens in the gaps: choosing a jack point on a unibody car and finding a battery pack instead, tightening lug nuts with a gun because it is faster, never re-torquing them, driving 300 highway miles on a donut, or reaching into the trunk for a spare that has not existed since the vehicle left the factory.
This guide covers the standard sequence because that is what you came for, and then it covers the layer underneath it. Torque, the re-torque nobody mentions, why the star pattern is a physics requirement rather than a tradition, what your TPMS light is actually telling you, and what to do when your car has a can of goo instead of a wheel.
Get Safe First
More people are injured or killed at the roadside than by anything that happens to the wheel. Deal with position before you deal with the tire.
Keep driving until you find a safe place, even on a flat. A ruined tire and possibly a ruined wheel is a cheaper outcome than stopping in a live lane. Reduce speed gradually, avoid braking hard, and steer with a firm grip, because a deflated tire pulls. Aim for a wide shoulder, an exit ramp, a parking lot, a side street. Get as far right and as far off the pavement as you can.
Hazards on before you slow down, not after you stop. You want traffic behind you to understand what is happening while there is still distance to react.
Level, solid ground only. A jack on soft shoulder gravel, on a slope, or on hot summer asphalt will sink or slide. If the ground will not support a jack, do not use one.
Park it properly. Transmission in park, or in gear for a manual. Parking brake set, unless you are changing a rear wheel on a vehicle where the parking brake acts on the rear, in which case it needs to be released and you rely on chocks. Engine off.
Chock the wheel diagonally opposite the one you are removing. A wheel chock, a rock, a piece of lumber, anything that stops the vehicle rolling. This is the step every guide lists and nobody does. It is the one that keeps the car from moving off the jack.
Everyone else gets out and stands well away from the road, uphill and behind a barrier if there is one. Not in the car. Not standing beside you on the shoulder.
Put reflective triangles or flares behind the vehicle if you carry them, and you should. On a surface street 100 feet back is reasonable. On a highway go 200 to 300 feet, further on a curve or a rise so approaching traffic sees the warning before it sees you.
Work on the side away from traffic wherever possible. If the flat is on the driver’s side of a highway shoulder, that is a strong argument for calling for assistance rather than kneeling with your back to closing traffic.
What You Need and Where It Actually Is
Find all of this in your driveway, not on a shoulder in the rain.
The spare. Under the trunk floor on most cars, under the cargo area on many SUVs, or slung under the bed on pickups and larger SUVs where a winch mechanism lowers it. That winch is operated by a rod that threads through a hole in the bumper or the tailgate, and it seizes with rust on vehicles that live in salt country.
The jack and the lug wrench. Usually packed with the spare, sometimes in a side compartment behind a trim panel. Know which it is.
The owner’s manual. This is the part nobody says out loud. It contains your jack point locations, your lug torque, your spare’s speed and distance limits, and your TPMS reset procedure. Photograph the relevant pages and keep them on your phone if the manual lives in the glovebox and you would rather not read it by flashlight.
The locking lug nut key. This is the item that strands people. If your wheels have locks, one nut per wheel needs a specific keyed adapter, and it is usually loose in a glovebox or a tool kit where it can go missing after a tire rotation or a shop visit. No key means no wheel change, for you or for the tow driver. Find it, confirm it fits, photograph the code stamped on it, and put it somewhere permanent. If you are running or considering wheel locks, that key discipline is the whole cost of ownership.
A verified spare pressure. Compact spares typically want around 60 psi and lose air sitting in a trunk. Check it monthly with a real tire pressure gauge as part of your normal routine, and keep a 12-volt tire inflator in the vehicle so a low spare is a two-minute problem instead of a tow. Our full tire pressure guide covers cold versus hot readings and where to find your placard.
Worth adding: gloves, a flashlight or headlamp, a reflective vest, a small tarp or mat to kneel on, and a jump starter that doubles as a power bank if you are stopped long enough to matter.
The Step-by-Step Sequence
Step 1: Loosen the lug nuts before you jack
Break each nut loose about a quarter turn while the tire is still on the ground and carrying weight. Counterclockwise. Do not remove them.
The reason is friction. On the ground, the tire’s contact patch holds the wheel from spinning while you apply force. In the air it just rotates, and the alternative is trying to hold the tire with one hand while you heave on a wrench with the other, which either fails or rocks the car off the jack.
If a nut will not move, stand on the wrench arm with your weight over it rather than jerking on it, and keep the force steady. A cheater bar or a breaker bar with a proper socket is a better answer than a longer L-bar, and a decent socket set in the trunk turns this from a fight into a task. If a nut rounds off or the stud starts to turn with it, stop. That is now a shop job.
Step 2: Find the correct jack point
This is where a routine job turns into body shop work. There is one right place per corner and a lot of wrong ones.
Unibody cars, crossovers and most modern SUVs lift on a reinforced pinch weld seam that runs along the underside of the rocker panel, just behind the front wheel and just ahead of the rear. Look for a notch, a raised tab, an arrow, or a molded cutout in the plastic rocker cladding. The factory scissor jack has a slot in its saddle designed to straddle that seam. Put a jack anywhere else on a unibody floor pan and you will fold sheet metal.
Body-on-frame trucks and large SUVs lift on the frame rail itself, or on the specified axle housing point. There is a lot more usable structure under a truck, but it is still specified, and control arms, differential covers, sway bars and fuel or brake lines are not lift points.
Hybrids and EVs need a specific warning. The battery pack on a modern EV occupies essentially the entire floor between the axles, and it is a structural, sealed, extremely expensive assembly with high-voltage contents. Jack points on these vehicles are usually marked with a distinct pad, arrow or triangle, and they are placed deliberately clear of the pack. Missing one and putting a jack saddle against a battery case damages the pack itself, with a real risk of a thermal event, and the repair bill runs into five figures. Some EVs also require a hockey-puck style jack pad adapter to protect the lift point. Read your manual for this specific vehicle before you lift it, and if you cannot positively identify the point, call for assistance instead of guessing.
Whatever you are lifting, the jack sits on level solid ground, straight up under the point, with the saddle fully seated before any load goes on it.
Step 3: Raise the vehicle
Lift until the flat tire clears the ground by roughly half an inch to an inch. Higher than that is unnecessary height and unnecessary instability, but remember the inflated spare has a taller rolling radius than the flat, so leave enough clearance to slide it on.
Watch the jack as it rises. If it leans, if the saddle shifts on the pinch weld, or if the ground compresses under the base, lower it and start again. Nothing about a leaning jack fixes itself.
Nobody puts any part of themselves under the vehicle at any point in a roadside tire change. If you are doing this at home for a rotation or a brake job, that is different work and it needs jack stands under rated points, with a proper floor jack doing the lifting.
Step 4: Remove the nuts and the flat
Spin the loosened nuts off by hand and put them somewhere they cannot roll away. A pocket, a cup holder, the upturned hubcap. Losing one on a dark shoulder is a real problem.
Pull the wheel straight off the hub. If it is stuck, which is common on alloy wheels that corrode to a steel hub, do not lever it with a screwdriver or hit the face of the wheel. Give the tire sidewall a firm kick from behind, or strike the inside of the tire with the heel of your hand around the circumference until the corrosion breaks. If it will not release, that is a stop-and-call situation.
Set the flat under the car near the frame rail if you can. It costs nothing and it is a physical backstop if the jack ever fails.
Step 5: Mount the spare
Lift it on with the valve stem facing out and line the bolt holes up with the studs. Compact spares are light. Full-size spares are not, and lifting one onto a hub at an awkward angle is where people hurt their backs. Use your legs, rest the tire on your feet, and roll it into position.
Push it fully flush against the hub face. A wheel that is hanging on one stud is not seated, and starting nuts on a wheel that is not flush cross-threads studs.
Step 6: Hand-tighten in a star pattern
Thread every nut on by hand, all the way, before you use a wrench on any of them. Hand-starting is what prevents cross-threading, and a cross-threaded stud on a shoulder ends the job.
Then snug them in a star pattern, meaning you tighten one, then the one roughly across from it, then work around in that alternating sequence rather than going around the circle in order. On a five-lug wheel that is a star. On a four-lug it is a diagonal cross. On six or eight lugs, always take the one opposite.
Here is why, and it is not tradition. The wheel has to seat flat against the hub face, and the tapered seats on the nuts have to pull it there evenly. If you fully tighten one nut, then its neighbor, then the next around the circle, the first nut pulls that one section of the wheel tight against the hub while the opposite side is still standing off. You end up clamping the wheel in a slightly cocked position, held there by the friction of the fasteners. That is lateral runout. You feel it as a vibration at speed, and on a car with disc brakes it also loads the rotor unevenly and gives you a brake pulsation that people replace rotors over. Alternating across the wheel pulls it down evenly all the way around, so it seats square before anything is at final tension.
Step 7: Lower partially and set the torque
Lower the vehicle until the tire touches the ground and takes enough weight that the wheel cannot spin, but the suspension is not yet fully loaded. Now tighten properly, still in the star pattern.
Do it in two passes. First pass to roughly half your target, all the way around. Second pass to full spec, all the way around. Two passes matter for the same reason the star pattern matters: it lets the wheel settle evenly rather than getting pulled to final tension one point at a time.
If you carry a compact click-type torque wrench in the vehicle, this is where it earns its space. If you only have the factory L-bar, apply firm steady force with your hands rather than standing on it, and treat the re-torque step as mandatory rather than optional.
Step 8: Lower fully and do the final check
Take the jack out, stow everything including the flat, and walk the wheel one more time. Every nut present, every nut tight, hubcap or center cap either fitted or in the trunk. Check the spare’s pressure with a gauge if you have one, because you are about to find out whether that monthly check happened.
Then take the flat tire seriously. It is not trash and it may be repairable. A puncture in the tread area, away from the shoulder, is usually fixable with a proper plug and patch from the inside. A sidewall puncture, a cut, or a tire that was run flat for any distance is finished.
The Torque Step Everyone Skips
Ask ten drivers what their lug torque is and nine will not know. This is the difference between a wheel that stays on and one that does not, and it takes thirty seconds to get right.
Typical passenger cars land around 80 to 100 lb-ft. Light trucks and SUVs commonly run 100 to 140. Some heavy-duty pickups and larger wheels go higher. These are ranges, not your number. Your number is on the driver’s door jamb sticker or in the owner’s manual, and it is vehicle-specific enough that trim levels of the same model can differ.
An impact gun is the wrong tool for tightening, full stop. It is a fine removal tool and I use one every day for that. But it has no idea how much clamping force it applies. Output changes with battery charge or line pressure, with trigger time, with socket mass, with temperature, and with where the anvil is in its rotation when it hits. Two nuts on the same wheel come out different. The usual outcome is overtightening, which stretches studs past their elastic limit so they no longer clamp correctly, distorts the rotor hat into the pulsation people call warped rotors, and seizes the nut hard enough that the factory wrench cannot break it on a shoulder six months later. Torque sticks help but they are a limiter, not a measurement. If you own an impact wrench, use it to remove and a torque wrench to install. That is the whole rule.
Re-torque after 50 to 100 miles. This is the step almost no guide includes and every shop that cares about comebacks does. New mating surfaces bed in: the wheel against the hub face, the tapered nut seats against the wheel, any residual corrosion crushing down under load and heat. That bedding shows up as lost clamping force, and a nut that was at spec can measure noticeably below it after a heat cycle or two. Loosen each nut a fraction of a turn and bring it back to spec in the star pattern. It takes five minutes. It matters most on alloy wheels, on a hub that had rust on the mating face, and on a compact spare with a steel wheel and different seat geometry from the alloy it replaced.
Your TPMS Light Might Still Be On
You put the spare on, the pressure is right, and the tire pressure light is still there. In most cases nothing is wrong.
Compact spares almost never carry a TPMS sensor. A direct system is polling for four sensors and hearing three, so it either flags a system fault or holds the low pressure warning because it cannot confirm that corner. On many vehicles this appears as a light that flashes for about a minute at each start and then goes solid, and that flashing pattern specifically means a sensor is missing or not communicating rather than a tire being low.
Once the repaired wheel goes back on, most direct systems relearn on their own. Drive above roughly 20 mph for ten or fifteen minutes and the sensors broadcast, the module picks them back up, and the light clears. Some vehicles instead need a deliberate relearn: a menu sequence in the instrument cluster, or a TPMS activation tool held at each valve stem in a specified order, usually starting front left and going clockwise.
Indirect systems work differently. They have no pressure sensors at all and infer a low tire from wheel speed differences via the ABS sensors. These need a manual reset after you have set every tire to the correct cold pressure, usually a button under the dash or a menu item labeled something like TPMS reset or set. Reset with a tire low and the system learns the wrong baseline.
When it is a real problem: the light stays on after the correct wheel is back on and you have verified all four pressures with a gauge. That points to a sensor with a dead battery, which is normal after seven to ten years, a sensor damaged during tire mounting, a sensor fouled by tire sealant, or an actual leak. Worth diagnosing rather than living with, because a system you have learned to ignore cannot warn you.
If You Don’t Have a Spare Tire
Roughly a third of new vehicles ship without one. Manufacturers dropped the spare for weight, fuel economy numbers and cargo space, and replaced it with a sealant canister and a small 12-volt compressor in a foam tray.
What those kits can fix: a small puncture in the tread area, roughly a quarter inch or less, from a nail or a screw, with the tire still on the bead. You remove the object if it is visible, connect the canister through the valve, inject sealant, inflate to pressure, and drive a short distance at low speed so rotation carries the sealant into the hole. It gets you off the shoulder and to a shop. That is a genuinely useful outcome.
What they cannot fix: anything in the sidewall, because a sidewall flexes constantly and no sealant holds there. A gash, a cut, or a tear. A tire that has come off the bead. A blowout. A tire that has been driven on flat long enough to destroy the inner liner. In all of those cases the kit does nothing and you are calling for a tow regardless.
Two things people are not told. First, sealant fouls the TPMS sensor inside the wheel. The pressure port on the sensor is exactly where sealant collects, and many shops charge to clean it or simply replace the sensor. That is a fair price for getting off a highway at night, but budget for it. Second, the canister has an expiry date, usually a few years out, because the chemistry degrades. An expired canister may not seal. Check yours and replace it on schedule.
If your vehicle has no spare, carry more than the factory kit. A proper tire plug kit with a reamer and rope plugs handles a tread puncture more reliably than sealant and does not contaminate the sensor, and a compact inflator gives you air without spending the one-shot canister. Both live in a small bag. This belongs on your road trip essentials checklist alongside everything else you check before a long drive.
Run-Flats and Donut Spares
A compact spare exists to get you to a tire shop and nothing more. The sidewall says 50 mph and the guidance is around 50 miles. Both numbers are real. The tire is narrow, shallow-treaded, built to a low speed rating and inflated to around 60 psi, and it does not shed heat the way a full-size tire does. Beyond speed there is a drivetrain issue: a donut is a different rolling diameter from the other three, which means continuous differential action, and on all-wheel drive that puts real load on the center coupling or transfer case. Some manufacturers warn against it explicitly. It also feeds wrong wheel speed data to ABS and stability control. Keep speed down, take it easy in corners and under braking, avoid the highway if you can, and get the real tire sorted.
Run-flats are a different proposition. They have reinforced sidewalls stiff enough to carry the vehicle’s weight with no air, typically rated for about 50 miles at 50 mph after a total pressure loss. Vehicles equipped with them usually have no spare at all, which is the point. Two cautions. A run-flat that has been driven on while deflated is generally not repairable, because the sidewall reinforcement has cooked, so plan on buying a tire rather than fixing one. And you cannot tell a run-flat is flat by feel or by looking at it, which is exactly why a working TPMS matters so much on these vehicles.
Full-size spares have their own trap. If your car came with a matching full-size spare, check two things before you need it. Directional tires have an arrow on the sidewall and are mounted to rotate one way, so a directional spare fitted to the wrong side runs backward and loses wet-weather performance. And staggered setups, common on performance cars, use different sizes front and rear, which means a single spare only fits one axle. Neither is something to discover on a shoulder. If you are shopping for replacements, our roundups of the best all-season tires and the best tire brands cover what is worth fitting, and if you run a seasonal set, the best winter tires guide covers that swap.
When to Stop and Call a Professional
Being able to do this does not mean you should, every time. These are the situations where I would stop.
A stripped or rounded lug nut, or a stud that turns with the nut. You have now moved from a tire change to a stud replacement, and forcing it makes it worse.
A wheel rusted solidly to the hub that will not break free after reasonable persuasion. Levering with a screwdriver damages the wheel and the hub face, and hitting the wheel face damages the finish.
No confidence in the jack point. Especially on an EV or hybrid, where the wrong point is a damaged high-voltage battery, and on a lifted truck where the factory jack may not have the range or stability for the ride height.
A shoulder you cannot get safely clear of. Narrow shoulder, blind curve, crest of a hill, driver’s side against traffic, heavy rain or fog, or nowhere to stand away from the lane. Stay belted in the vehicle with hazards on and call.
A destroyed tire or a damaged wheel. A blowout that shredded the tire often damages the wheel, the fender liner and sometimes brake or ABS lines, and that needs eyes on it before the vehicle moves.
Soft, sloped or unstable ground. No jack is safe on ground that will not hold it.
Keep the roadside assistance number in your phone, keep the phone charged, and understand that the cost of a call is trivial next to the alternatives. A well-stocked vehicle helps here too: a flashlight, a vest, a blanket, and a car escape tool within reach of the driver’s seat are cheap insurance for the times you are stopped somewhere you would rather not be.
Common Mistakes
Jacking on the wrong point. Number one for expensive damage. Folded pinch welds, bent floor pans, crushed rocker cladding, and on an EV a jack saddle against the battery case.
Skipping the chock. Everyone lists it and almost nobody does it. It is the thing that stops the car rolling off a jack.
Removing the lug nuts before lifting. The wheel spins in the air and you end up fighting it.
Tightening in a circle instead of a star. Seats the wheel cocked against the hub, which shows up as vibration and brake pulsation later.
Torquing at full height. With the wheel in the air you cannot apply real force without rocking the vehicle. Lower it until the tire touches first.
Using an impact gun to tighten. Stretched studs, distorted rotors, seized nuts. Removal only.
Never re-torquing. Fifty to a hundred miles, five minutes, and it is the step nobody tells you about.
Ignoring the spare until you need it. A spare at half pressure is not a spare. Check it monthly with everything else.
Losing the wheel lock key. No key, no wheel change, not even for the tow driver.
Driving too far or too fast on a donut. Fifty and fifty. It means what it says.
Not knowing what is in your trunk. Spare, sealant kit, or nothing at all. Find out today.
Final Thoughts from the Shop
The mechanics of changing a wheel take fifteen minutes and you can learn them from any page on the internet. What separates a clean job from a call to a tow truck is the preparation you do before it happens and the two steps at the end that nobody talks about.
The preparation is thirty minutes on a Saturday. Open the trunk and find out whether you have a spare, a sealant can or nothing. Check that spare’s pressure with a gauge and its date code on the sidewall. Locate the jack, the wrench and the wheel lock key, and confirm the key actually fits. Photograph the jack point diagram and the door jamb torque sticker so they live on your phone. That is the whole checklist, and doing it once means the roadside version is a straightforward job instead of a discovery process in the dark.
The two steps at the end are torque and re-torque. Get the wheel seated square with a star pattern, bring the nuts to your vehicle’s actual spec rather than to feel, and come back to them after 50 to 100 miles. Everything else on this page is safety and judgment, but those two are the mechanical difference between a wheel that stays where you put it and one that does not.
And know where your line is. A shoulder you cannot get clear of, a rounded nut, a jack point you cannot positively identify on an EV, ground that will not hold a jack. Those are all reasons to sit in the vehicle with your belt on and make a phone call, and none of them reflect on your ability. If you want the tools that make this and everything like it routine, our guide to the essential tools for DIY car maintenance is the place to start, and the car maintenance schedule puts tire inspection in context with the rest of what the vehicle needs. Before any long drive, run through preparing your car for a road trip, because a tire that is going to fail usually gives you warning in a driveway rather than at 70 mph.
Buyer's Guide
Changing a flat is a roadside skill, but almost everything that determines how badly it goes gets decided in your driveway weeks earlier. Work through these six before you ever need them, because every one of them is either a purchase or a five-minute check that cannot be done on a shoulder in the dark.
Whether Your Vehicle Even Has a Spare
Go and look right now. Lift the trunk floor, or on a truck or SUV find the winch mechanism that lowers a spare from under the bed. Roughly a third of new vehicles ship with no spare at all, and instead carry a sealant canister and a small compressor in a foam tray. Some carry a compact temporary spare, the narrow steel wheel usually called a donut. A few, mostly trucks and older sedans, carry a full-size spare on a matching wheel. Each of those three answers changes what you should keep in the vehicle and what you can actually do when a tire lets go. No spare means you need to understand the limits of a sealant kit before you rely on it, and it is worth carrying a proper tire plug kit and a compact inflator as a genuine backup rather than treating the factory canister as the whole plan. A donut means a speed and distance limit you need to know in advance. A full-size spare means checking that it is not a directional tire mounted for the wrong side and not part of a staggered setup where front and rear sizes differ. Answer this question in daylight, in your driveway, once.
The Factory Jack and Lug Wrench Versus Real Tools
The scissor jack and stamped-steel wrench in your trunk are emergency equipment, engineered down to the last gram and the last cent. They will lift the car once, and the wrench is usually a short L-bar with barely enough leverage to break a lug nut that a tire shop ran down with an impact gun. There is nothing wrong with keeping them for a genuine roadside emergency, because they are what fits in the well. But if you rotate your own tires, do brake work, or change to winter wheels seasonally, buy real tools and leave the factory kit alone. A proper hydraulic floor jack lifts faster, sits stable on a wider footprint, and does not require you to crouch and crank a scissor mechanism for two minutes. A four-way lug wrench or a breaker bar with the correct socket gives you leverage the factory L-bar does not. And understand the hard line here: a jack of any type lifts a car, it does not hold one. Any work that puts part of your body under the vehicle needs jack stands rated above the corner weight, on solid level ground. A roadside wheel change does not put you under the car, which is why the factory jack is acceptable for it and unacceptable for anything else.
Spare Tire Pressure Maintenance
A spare that is flat is not a spare, and this is the single most common way people end up calling for a tow with a perfectly good wheel in the trunk. Tires lose air on their own, roughly a psi or two per month through the rubber and the valve, and a spare that has sat in a trunk well for four years since the car was new can easily be at half its intended pressure or lower. Compact spares are worse than regular tires here, because they are usually specified around 60 psi, far higher than the tires on the car, and there is no TPMS sensor watching them and no dash light to tell you. Nothing prompts you. Put it on the same schedule as your regular tire pressure check, which should be monthly and always with the tires cold. Check it with a real gauge rather than by squeezing it with your thumb, because a spare at 35 psi feels firm to the hand and is dangerously underinflated for its design. If it needs air, a compact inflator that plugs into a 12-volt socket handles it in your driveway in two minutes. Also check the date code on the sidewall: a spare that has never touched the road still ages, and rubber more than about ten years old should be replaced regardless of tread.
The Torque Wrench Question
Lug nuts are the fasteners that keep the wheel attached to the car, and they are the fasteners most often guessed at. On the roadside with the factory wrench you have no choice but to do your best, which is why the re-torque step exists. But at home, every wheel that goes back on should see a calibrated tool. A click-type torque wrench covering roughly 20 to 150 lb-ft handles every wheel on almost any passenger vehicle, and the same tool covers brake work, suspension fasteners and most of what else you will do. Overtightening is the failure mode people underestimate. It stretches studs beyond their elastic range so they no longer hold correct clamping force, it distorts the rotor hat enough to produce a pulsation you will feel weeks later and misdiagnose as a warped rotor, and it makes the nuts impossible to remove with the emergency wrench when you actually need to. Undertightening is rarer and much worse, because a wheel that works loose comes off. Use a star pattern in two passes, half torque all the way around and then full torque all the way around, and confirm the spec on the door jamb sticker rather than from a generic chart. Then store a click wrench wound back to its lowest setting so the spring keeps its calibration.
Wheel Locks and the Key
Wheel locks are a single specially keyed nut on each wheel, and they do a genuinely useful job of making an alloy wheel a poor target for theft. They also strand people, constantly. The key is a small splined or patterned socket adapter, and it fits nowhere except in that one application. It commonly lives in the glovebox, in the center console, in the trunk tool kit, or clipped into the spare tire well, which means it commonly ends up in none of those places after the last tire rotation, or the last time the car went to a shop, or the last time someone cleaned out the glovebox. Without it, a roadside tire change is impossible and even a tow truck driver cannot help you. Find yours today. Confirm it actually engages the lock nut on each wheel, because keys do wear and the pattern can round off. Photograph the key code stamped on it and store the photo somewhere you can reach from your phone, because most manufacturers can supply a replacement from that code. Then put the key somewhere it lives permanently and tell whoever else drives the car where that is. If you have already lost yours, a removal kit or a shop visit sorts it out, and you get to choose whether the replacement set is worth having.
Knowing Your Limits on the Shoulder
The mechanical skill of changing a wheel is easy. Judging whether you should is the harder part, and the honest answer is sometimes no. A vehicle stopped on a narrow shoulder with traffic passing at highway speed is the most dangerous condition in this entire job, and no amount of competence makes a bad shoulder position safe. If you cannot get fully clear of the travel lane, if you are on the driver's side of the vehicle facing traffic, if you are on a blind curve or the crest of a hill, if the ground is soft or sloped, or if visibility is poor because of rain, fog or darkness, the correct move is to stay in the vehicle with your seatbelt on, hazards running, and call for assistance. That is also the right call for a stripped or rounded lug nut, a wheel rusted solidly to the hub that will not break free, a lifted truck or an EV where you are not confident about the lift point, a damaged wheel or a blown-apart tire, and any situation where the jack does not feel stable. Know your roadside assistance number before you need it, keep your phone charged, and keep a jump pack, a flashlight and a reflective vest in the vehicle. Getting this wrong has consequences a tire does not.
Frequently Asked Questions
What's the correct torque for lug nuts, and do I need to re-torque them later?
How fast and how far can I drive on a donut spare?
What if my car doesn't have a spare tire?
Why is my TPMS light still on after I put on the spare?
Can I use an impact wrench to tighten lug nuts on a spare?
Related Articles
How to Change Brake Pads: A Master Tech's Complete Walkthrough (2026)
maintenance-parts
How to Change Spark Plugs: An ASE Master Tech's Step-by-Step Guide (2026)
maintenance-parts
8 Best Tire Pressure Gauges of 2026
tires-wheels
7 Best Tire Inflators of 2026
tires-wheels
Tire Pressure Guide: What PSI Your Car Actually Needs (2026)
tires-wheels
About the Reviewer

Mike Reeves, ASE Master Technician
A.A.S. Automotive Technology, Universal Technical Institute (UTI)
Mike Reeves is an ASE Master Technician with 15 years of hands-on experience in automotive repair and diagnostics. He earned his A.A.S. in Automotive Technology from UTI and runs his own independent shop in Denver, Colorado. Mike founded RevRated to help everyday car owners make smarter parts decisions -- every recommendation comes from real-world testing in his garage.