How to Change Spark Plugs: An ASE Master Tech's Step-by-Step Guide (2026)
An ASE Master Tech's full spark plug guide: real torque numbers by seat type and head material, why anti-seize does not belong on modern plugs, the Ford 3-valve Triton warning, and reading the old plugs.
Updated
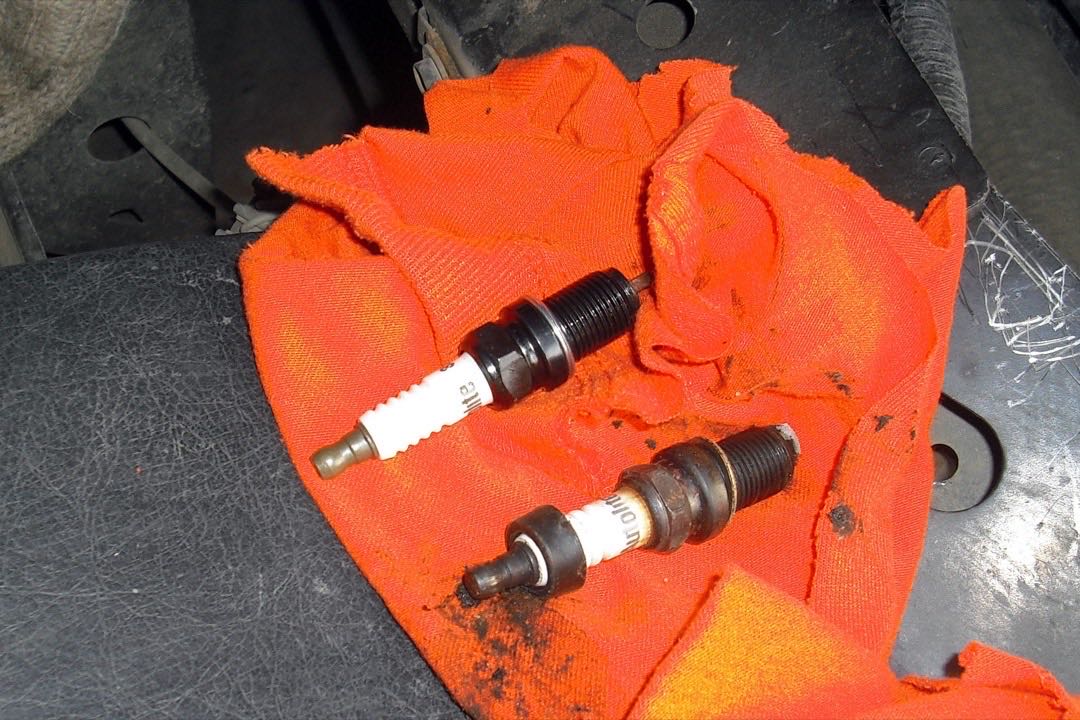
Changing spark plugs is a straightforward job on most engines and a genuinely difficult one on a few. On a four-cylinder with coil-on-plug ignition it is an hour of work with a socket, an extension, and a torque wrench: pull the coils, blow out the wells, unscrew four plugs, put four new ones in at the correct torque, and put the coils back. There is no fluid to drain, nothing to lift the car for, and no bleeding or relearning afterward on the majority of vehicles.
The reason this job earns a shop bill several times the cost of the parts is the small number of ways it can go badly wrong. All of them involve the threads in the cylinder head, which on nearly every modern engine is aluminum. Get the torque wrong, work on a hot engine, drop grit into an open cylinder, or attack a plug that has seized into a head after a hundred thousand miles, and a maintenance item becomes a cylinder head repair. This guide covers the whole procedure, the actual published torque numbers rather than a vague instruction to snug it, and the one engine family I will tell you outright to think twice about.
Spark Plug Replacement at a Glance
Time required: About one hour on a four-cylinder with coil-on-plug ignition and good access. Two to three hours on most V6 and V8 engines. Considerably longer on any engine where the rear bank sits under an intake manifold.
Difficulty: Moderate. The mechanical work is simple. The consequences of doing it carelessly on an aluminum head are not.
Tools: Spark plug socket in 5/8 or 13/16 inch, ratchet, extensions, a swivel or wobble extension, a torque wrench that reads accurately at low values, gap gauge, compressed air or a vacuum, dielectric grease, eye protection.
What it fixes: Misfires and rough idle caused by worn or fouled plugs, hesitation under load, hard cold starting, and the fuel economy loss that comes with incomplete combustion. On a vehicle well past its plug interval, the improvement in smoothness is often obvious on the first drive.
What it does not fix: A misfire caused by a failed ignition coil, a leaking or clogged fuel injector, a vacuum leak, low compression, a failing crankshaft or camshaft position sensor, or a burnt valve. Plugs are the cheapest thing in that list and often the first thing replaced, which is why so many people replace them and still have a misfire. Diagnose before you buy parts.
When it is due: Depends entirely on plug material. Copper and nickel roughly 20,000 to 30,000 miles, single platinum roughly 40,000 to 60,000, double platinum and iridium commonly 60,000 to 100,000 or beyond. The owner’s manual for your specific vehicle is the authority, and severe-duty driving shortens all of these.
Read This First If You Drive a 2004+ Ford with the 3-Valve Triton
If your vehicle has a 4.6 or 5.4 liter 3-valve Triton V8, which covers a great many 2004 through 2008 F-150s, Expeditions, Navigators, Mustangs, and Super Duty trucks, stop and read this section before you touch anything. This is the one engine family where I will not tell you that spark plugs are routine maintenance.
Ford used a two-piece plug design on these engines with an unusually long swaged shell and a ground electrode tip that sits deep in the bore. Over tens of thousands of miles, carbon builds up on the exposed lower section of that shell and effectively welds it into the cylinder head. When you apply removal torque, the upper part of the plug turns and the lower part does not, and the plug shears in two. The bottom half stays in the head. Ford considered this common enough to publish TSB 08-7-6, an eleven-page technical service bulletin devoted entirely to removing these plugs.
The bulletin’s approach, in outline, is patience rather than force. Bring the engine to normal operating temperature, then let it cool completely. Break each plug loose only about an eighth to a quarter turn, no more. Soak the plug with a penetrant, and Ford specifically calls for Motorcraft Carburetor Tune-Up Cleaner. Let it sit and work its way down. Then work the plug back and forth, tightening slightly and loosening slightly in small increments, rather than trying to pull it straight out in one continuous motion. That back-and-forth is what breaks up the carbon rather than shearing the shell.
Even done correctly, some of them break. I have pulled more broken Triton plugs than I care to count. When one snaps you need a dedicated extractor kit, the Lisle 65600 being the one most shops keep on the shelf, and the extraction runs about an hour per plug on a good day. On a bad day you are looking into a cylinder with a broken shell wedged sideways and deciding how to get it out without dropping debris into the bore.
My honest counsel: if you own one of these engines and the original plugs are still in it at high mileage, this is a job where a shop with the extractor already in the drawer and the experience to use it may genuinely be the cheaper outcome. There is no shame in that call, and it is the one I would make on someone else’s truck. If you do take it on yourself, buy the extractor before you start rather than after you need it, and set aside a full day rather than an afternoon.
Tools You’ll Need
- Spark plug socket, 5/8 inch or 13/16 inch depending on your engine. These have a rubber insert or a magnet inside that holds the plug and protects the porcelain insulator. A standard deep socket does neither and will crack an insulator.
- Ratchet and a set of extensions, typically 3, 6, and 10 inch, so you can reach down into the plug wells.
- A universal joint or wobble extension. This is the tool that makes rear-bank V6 and V8 plugs reachable at all. Without one, some cylinders are simply not accessible from above.
- Torque wrench that reads accurately at low values. Spark plug specs run from single digits into the low thirties in lb-ft, well below the useful range of a typical brake-job wrench. A wrench covering roughly 5 to 80 lb-ft is right for this. Our best torque wrenches guide covers which units are actually accurate near the bottom of their scale, which is where most cheap wrenches fall apart.
- A complete socket set for the coil hold-down bolts, engine cover fasteners, and anything else that has to come off first. A good socket set or a full mechanic tool set covers this job and everything around it.
- Compressed air or a shop vacuum to clear the plug wells before removal, plus eye protection.
- Gap gauge, either a wire-loop gauge or feeler blades. Not a round coin-style tool if you have iridium plugs.
- Dielectric grease for the inside of the coil boots.
- A short length of rubber fuel hose that fits snugly over the plug terminal. This is the best thread starter there is, because it grips well enough to turn the plug in but slips before it can cross-thread anything.
- A torque wrench you trust and an anti-seize tube you leave in the drawer. More on that below.
- An OBD2 scanner if you are chasing a misfire rather than doing scheduled maintenance. Our best OBD2 scanners roundup covers which readers give you live misfire counters per cylinder rather than just a stored code.
Before You Start: Cold Engine, and Why It Matters
Work on a completely cold engine. Not warm, not recently shut off. Cold.
NGK is explicit about this in their installation guidance, and the reason is metallurgy rather than comfort. A spark plug is a steel shell threaded into an aluminum cylinder head, and steel and aluminum expand at different rates. When the head is hot, the aluminum has expanded more than the steel, which changes the fit of the threads and increases the chance of galling or tearing them on removal. Aluminum is also considerably softer at elevated temperature. Pulling plugs out of a hot aluminum head is one of the more reliable ways to damage threads, and thread damage in a cylinder head is a repair measured in hours, not minutes.
The other reason is simpler. The exhaust manifold is inches from where your hands will be. Give the engine several hours, or leave it overnight and do the job first thing in the morning.
The exception is the Ford 3-valve Triton procedure above, where Ford calls for bringing the engine to operating temperature and then letting it cool before starting. That heat cycle is intended to help break the carbon bond, and the removal still happens on a cool engine.
Two more things before the first plug comes out. Disconnect the battery negative terminal if you will be unplugging coil connectors, or at minimum turn the ignition fully off and take the key out. And park somewhere with good light, because a lot of this job is done by feel with your hand down a dark well and you want to be able to see what you are doing when you can.
Step-by-Step: Replacing Spark Plugs
Step 1 - Get Access and Identify Your Ignition Type
Remove the plastic engine cover if there is one. Underneath, you will find one of three arrangements. Individual coils bolted directly on top of each plug is coil-on-plug, which is what nearly every engine built after roughly 2000 uses. Thick insulated wires running from a coil pack or two to each plug is a wasted-spark or coil-pack system. A single central distributor with wires radiating out from a cap is a distributor system, found on older vehicles.
Clear whatever is in the way. On some engines this is nothing. On others it is a strut brace, an air intake tube, a wiring loom, or a plenum. Photograph everything before you disconnect it.
Step 2 - Work One Cylinder at a Time
This is the discipline that prevents the most embarrassing failure in the job. On any engine with plug wires, remove and replace one plug at a time, completely, before moving to the next. Never pull all the wires off at once. The firing order is not intuitive on most engines and getting two wires swapped produces a violent misfire that can also damage a catalytic converter.
On coil-on-plug systems the risk is lower because each coil sits on its own cylinder and cannot easily be mixed up, but working one cylinder at a time is still good discipline. It also keeps exactly one cylinder open to the air at any moment.
Step 3 - Remove the Coil or Wire
For coil-on-plug, unplug the electrical connector by pressing its release tab, remove the single hold-down bolt, and pull the coil straight up with a slight twist to break the boot’s grip on the porcelain. If a boot is stuck, twist rather than yank. A boot torn off inside a plug well is its own small nightmare to retrieve.
For plug wires, grip the boot, never the wire itself, and twist a quarter turn before pulling. Pulling on a wire separates the conductor from the terminal inside the boot and ruins the wire, and a hairline separation is invisible from outside.
Step 4 - Blow Out the Plug Well Before You Loosen Anything
This step is skipped constantly and it is one of the two or three that actually matter. The plug well is a deep pocket that collects sand, grit, leaf debris, and rust flakes over the years. The moment the plug leaves the head, that pocket drains straight into an open cylinder, and anything that lands on a piston crown or a valve seat is going to get hammered into the aluminum on the next start.
Use compressed air or a vacuum with a narrow attachment to clear each well completely before you loosen the plug. Wear eye protection, because compressed air into a well sends whatever is down there straight back at your face. If oil has collected in the wells, that means failed valve cover gaskets or plug tube seals, and it needs cleaning out and addressing separately.
Step 5 - Break the Plug Loose and Remove It
Seat the spark plug socket fully on the plug, square with no side load, and add extensions until the ratchet is somewhere comfortable. Break the plug loose with a steady, controlled pull. It will take real force to start moving and then free up.
Pay attention to what you feel here. A plug that breaks loose and then turns smoothly is fine. A plug that breaks loose and then gets progressively harder to turn is dragging on corroded or damaged threads, and forcing it is how threads come out with the plug. If that happens, stop, thread it back in a turn, apply penetrant, wait, and work it back and forth in small increments. If it will not free up, that is where the job stops and a shop starts.
Once it is loose, back it out by hand or with the ratchet and lift it straight out. Set it aside in cylinder order rather than dropping it in a bucket. You are going to read these in a few minutes.
Step 6 - Check the New Plug and Start It by Hand
Take the new plug out of the box and look at it before it goes anywhere near the head. Check the insulator for cracks or chips, especially if the box has been knocked around. Verify the gap against the specification on the underhood emissions label with a wire gauge or a feeler blade, without forcing the tool into the gap. Compare the new plug to the old one side by side: same thread diameter, same thread length, same seat type, same overall height.
Then start it by hand. Slip a short length of rubber fuel hose over the plug terminal, lower the plug into the well, and turn the hose to thread the plug in. The hose grips well enough to run the plug down but slips before it can generate enough force to cross-thread aluminum. If you do not have hose, use the socket and extension with no ratchet attached, turning the extension with your fingers. Under no circumstances should the first few turns of a spark plug come from a ratchet.
The plug should turn freely by hand for most of its travel and then stop when the gasket or the taper contacts the head. If it binds early, back it out completely and start over. It is cross-threading.
Step 7 - Torque It
Attach the torque wrench, set to the correct value for your plug’s thread diameter, seat type, and cylinder head material, and pull smoothly to the click. Stop at the first click. Do not give it an extra pull for confidence, because on a spark plug that extra pull is exactly what stretches the shell or strips the threads.
The full table is in the next section. If you do not know your specification, look up the value for your plug’s thread size and seat type rather than guessing.
Step 8 - Apply Dielectric Grease and Reinstall the Coil or Wire
Put a thin film of dielectric grease inside the rubber boot, on the interior wall that grips the plug’s porcelain. That is the only place it goes. It seals the boot against moisture, stops the rubber bonding itself to the porcelain over the next hundred thousand miles, and means the boot comes off intact at the next service instead of tearing.
A thin film is the whole instruction. Dielectric grease is non-conductive, and packing it onto the plug terminal or down onto the coil post can bridge the insulator ribs, cause flash-over, and create the misfire you were trying to fix.
Push the coil or wire boot down until you feel it click onto the plug terminal, refit the hold-down bolt, and reconnect the electrical plug.
Step 9 - Move to the Next Cylinder, Then Put It All Back Together
Repeat the whole sequence one cylinder at a time until all of them are done. Then reinstall whatever came off for access, working from your photographs, reconnect the battery if you disconnected it, and check that every coil connector is seated and every wire is routed where it was.
Step 10 - Start It and Clear the Codes
Start the engine and let it idle. It should settle within a few seconds. A rough idle for the first several seconds after the battery has been disconnected is normal while the module relearns idle. A rough idle that persists means a connector is not seated, a wire is on the wrong cylinder, or a plug is not fully torqued.
If you were chasing a misfire, clear the stored codes and drive it. If the same cylinder code returns, the plug was not the problem and the diagnosis continues at the coil or the injector.
Torque: The Number Nobody Else Publishes
Most spark plug articles tell you to tighten until snug and then give it a bit more. That is not a specification. NGK publishes actual numbers, and they vary by thread diameter, by seat type, and by whether your cylinder head is cast iron or aluminum. Here they are.
Flat seat plugs, the type with a crush gasket:
| Thread size | Cast iron head | Aluminum head |
|---|---|---|
| 18mm | 25.3 to 32.5 lb-ft | 25.3 to 32.5 lb-ft |
| 14mm | 18.0 to 25.3 lb-ft | 18.0 to 21.6 lb-ft |
| 12mm | 10.8 to 18.0 lb-ft | 10.8 to 14.5 lb-ft |
| 10mm | 7.2 to 10.8 lb-ft | 7.2 to 8.7 lb-ft |
| 8mm | not specified | 5.8 to 7.2 lb-ft |
Conical or taper seat plugs, the type with no gasket:
| Thread size | Cast iron head | Aluminum head |
|---|---|---|
| 18mm | 14.5 to 21.6 lb-ft | 14.5 to 21.6 lb-ft |
| 14mm | 10.8 to 18.0 lb-ft | 7.2 to 14.5 lb-ft |
| 12mm | not specified | 7.36 to 14.75 lb-ft |
Two things jump out of those tables. First, taper seat plugs take substantially less torque than gasket seat plugs of the same thread diameter, because there is no gasket to crush and the taper itself does the sealing. Confusing the two is a real way to strip a head. Second, aluminum heads consistently take equal or lower torque than cast iron for the same plug, which is why knowing your head material matters.
Note the low end of those numbers. A 12mm plug in an aluminum head wants as little as 10.8 lb-ft, and a 10mm plug wants under 9. Most click-type torque wrenches sold for general automotive work start at 20 lb-ft and are not accurate anywhere near their lower limit. If your engine uses small-diameter plugs, you need a wrench sized for the range, and our best torque wrenches guide covers which ones hold calibration at the bottom of the scale.
If you genuinely have no torque wrench, the manufacturer fallback is turn-past-finger-tight. Thread the plug in by hand until the gasket first contacts the head, then turn a gasket seat plug about half to two thirds of a turn further. For a taper seat plug, thread it to contact and then turn only about a sixteenth of a turn. That method works and it is what mechanics did for decades. It is not equal to a torque wrench, it depends on being able to feel the exact moment of contact through a long extension, and I would use it only to get a car home rather than as a routine practice. Buy the wrench.
The Gap Question: When to Check and When to Leave It Alone
The gap is the distance between the center electrode and the ground strap, and it determines the voltage needed to create a spark. Too wide and the coil cannot reliably jump it under cylinder pressure, which shows up as a misfire under load. Too narrow and the spark is weak and the mixture may not light cleanly.
On modern plugs the correct answer is usually to check and leave it alone. Platinum and iridium plugs come pre-gapped from the factory for a specific application, and NGK does not recommend re-gapping fine-wire plugs at all. The reason is physical: an iridium center electrode is a very small diameter piece of an extremely hard, brittle metal, and levering a tool against it chips or snaps the tip. Denso states it directly for their iridium plugs. Never use a round coin-style gapping tool on them, and never let any tool contact the iridium center electrode or the porcelain.
What you can safely do is verify. Slide a wire-loop gauge or a feeler blade through the gap with no force and compare against the specification on the underhood emissions label. If it matches, install it. If it is obviously wrong, which usually means the plug was dropped or crushed in shipping, either exchange the plug or correct it by moving only the ground strap with a proper tool that never touches the center electrode.
Copper and nickel plugs are the exception and always have been. Their center electrodes are thick and robust, they are frequently sold with a generic gap that needs setting for the application, and a standard gap tool is entirely appropriate. Check every one out of the box.
One more note. Some engines specify a different gap for forced induction or for a performance calibration than the stock number on the label. If the engine has been modified, the tune determines the gap, not the emissions sticker.
Anti-Seize vs Dielectric Grease: They Are Not the Same Thing and Only One Belongs on Threads
These two products get confused constantly, and the confusion causes real damage.
Anti-seize goes on threads. Dielectric grease goes inside boots. Neither one substitutes for the other, and on modern plugs, one of them should not be used at all.
On anti-seize, NGK’s technical bulletin from their aftermarket division tells installers not to use it on their plugs. Their shells carry a trivalent zinc-chromate plating, which is the silver, chrome-looking finish on the threads, and that plating already does both jobs anti-seize would do. It resists corrosion and it acts as a release agent so the plug comes back out cleanly. Adding a thread compound on top is redundant.
The harm is in the torque. Anti-seize is a lubricant, and a lubricated thread reaches a given clamp load at a lower indicated torque reading. NGK puts the error at up to 20 percent. A plug torqued to the published number with anti-seize on the threads is therefore effectively overtightened by roughly a fifth, which is enough to break threads or to stretch the metal shell of the plug itself. Shell stretch is the part that surprises people. Stretching the shell changes the internal heat path out of the plug, which changes its effective heat rating, and a plug running hotter than the engine was designed for becomes a source of pre-ignition. Pre-ignition damages pistons.
Champion has historically been more permissive about anti-seize than NGK, and that disagreement between two respected manufacturers is real rather than internet folklore. My ruling in the bay, on modern plated plugs: none. If you have a specific application that calls for it, use the smallest possible amount on the middle threads only, drop your torque target accordingly, and keep it away from the electrode and the insulator entirely.
Dielectric grease is a completely different product with a completely different job. It is non-conductive silicone grease and it belongs as a thin film on the inside wall of the rubber coil boot, where the boot grips the plug’s porcelain insulator. It seals out moisture, keeps the boot from vulcanizing itself to the porcelain over a hundred thousand miles of heat cycles, and means that at the next service the boot comes off in one piece.
Where people go wrong is quantity and location. Packing dielectric grease onto the plug terminal or down onto the coil post can bridge across the insulator ribs, which are there specifically to lengthen the surface path and prevent the spark from tracking down the outside of the plug. Defeat those ribs and you get flash-over and a misfire. A thin film on the boot’s inner wall is the whole instruction. It never goes on threads, and anti-seize never goes in a boot.
Reading the Old Plugs Before You Throw Them Away
This is the free diagnostic that most people skip, and it is genuinely one of the most useful things in the job. Lay the old plugs out on the bench in cylinder order and look at the insulator tip and the electrodes.
Light tan or grey-brown on the insulator tip is normal and correct. The engine was running the right mixture at the right temperature and the plug was the right heat range.
Dry black soot, dull and sooty rather than shiny, means a rich condition or a cylinder that has not been burning cleanly. Look at fuel delivery, a stuck injector, a failed sensor telling the module to add fuel, or a plug that was too cold a heat range for the engine.
Wet and oily, with a shiny, slick film, points at oil getting into the combustion chamber. On a single cylinder it usually means valve stem seals or piston rings on that cylinder. This one is not fixed by new plugs and the new plug will foul the same way.
Wet with fuel, smelling of gasoline, means that cylinder was not firing at all. The spark was missing, so the fuel went in and came back out unburned. Look at the coil for that cylinder first.
Chalky white with blistering, or a melted or rounded electrode edge, means excessive heat, and this is the one that needs attention before new plugs go in. It points at a lean condition, a plug that is the wrong heat range for the engine, or overadvanced ignition timing. Installing new plugs into an engine that is running hot enough to blister an insulator just resets the clock on the same damage, and the next thing to melt is more expensive than a plug.
Ash-like deposits, crusty and light-colored, usually come from oil or fuel additives burning in the chamber. Often harmless in small amounts, worth watching if heavy.
The single most useful observation in this entire job is a plug that looks different from the other seven. Seven tan plugs and one black one tells you which cylinder has a problem more precisely than most scan tool data will, and it tells you before the misfire ever sets a code. If you find one, photograph it, note the cylinder, and diagnose that cylinder rather than assuming new plugs solved it.
If a stored code brought you here in the first place, our check engine light codes guide explains what the common codes mean and how to read OBD2 codes walks through pulling them yourself.
Coil-on-Plug, Coil Packs, and Distributors: Finding Your Ignition Type
The plugs are the same job in all three systems. What sits on top of them is not.
Coil-on-plug is what nearly everything built since about 2000 uses. Each cylinder has its own small coil bolted directly over the plug, with a rubber boot reaching down to the terminal and a two or three wire connector on top. There are no plug wires at all. This layout is the easiest to work on and the easiest to diagnose, because a misfire on one cylinder can be tested by swapping that coil to a neighboring cylinder and seeing whether the code follows.
Coil pack or wasted spark systems use one or two coil assemblies mounted somewhere on the engine, with thick insulated wires running out to each plug. The wires are the weak point in this design. They age, crack, and start leaking spark to ground, especially in damp weather. When you have this system, inspect the wires while you are in there: look for cracked insulation, corroded terminals, and boots that have hardened. Wasted spark systems fire two cylinders at once, one on compression and one on exhaust, which is why they usually call for double platinum plugs with precious metal on both electrodes.
Distributor systems are found on older vehicles and route spark from a single coil through a rotating rotor inside a distributor cap out to each wire. If you have one, the cap and rotor are wear items that should be inspected at the same time as the plugs. Carbon tracking inside the cap causes exactly the same symptoms as bad plugs.
On any system with wires, the one-at-a-time rule is not optional. Pull one wire, replace that plug, put the wire back, then move on. Getting two wires crossed on a V6 produces a misfire so severe it can dump raw fuel into the exhaust and damage a catalytic converter within minutes.
What to Expect After the Job
If the plugs were genuinely worn out, the improvement is usually noticeable on the first drive. A smoother idle, less vibration through the steering wheel at a stoplight, cleaner throttle response off the line, and easier cold starting are all common. Fuel economy typically improves modestly, and it takes a couple of tanks of consistent driving to confirm rather than one trip computer reading.
If the plugs were replaced on schedule rather than because of a symptom, you may notice nothing at all. That is the correct outcome. Preventive maintenance that produces no drama is maintenance working.
If the engine idles rough for the first few seconds after starting and then settles, that is usually just the module relearning idle after a battery disconnect. If it stays rough, shut it off and check that every coil connector is seated, every boot is pushed fully onto its terminal, and no wire has been swapped.
If a misfire code returns for the same cylinder after the plugs are in, the plug was not the problem. That points at the coil for that cylinder, the injector, a vacuum leak on that runner, or a compression problem. Swap the coil with an adjacent cylinder, clear the code, and see whether the misfire follows the coil.
While you have the record open, this is a good time to look at where the rest of the maintenance stands. Our car maintenance schedule lays out where plugs sit relative to filters, fluids, and belts, so you can batch a few jobs into one afternoon rather than opening the hood every other weekend.
The Mistakes That Turn a Tune-Up Into a Cylinder Head Repair
Working on a hot engine. Steel plug, aluminum head, different rates of thermal expansion, and aluminum that is softer when hot. NGK says to remove and install only on a cool engine and the reason is thread damage. This is the single easiest mistake to avoid and one of the most expensive to make.
Skipping the well cleanout. Everything sitting in that plug well falls into an open cylinder the moment the plug clears the threads. Grit on a piston crown or a valve seat gets hammered into the aluminum on the next start. Compressed air or a vacuum, every well, every time, and wear eye protection.
Starting the plug with a ratchet. The first few turns of a spark plug should always come from your fingers, ideally through a length of rubber hose that will slip before it can cross-thread anything. A ratchet generates far more force than aluminum threads can survive when the plug is not started square.
Guessing at torque, or adding an extra pull after the click. Undertightened plugs run hot and can back out. Overtightened plugs stretch their shells, which alters the heat rating, or strip the head. Neither shows up while you are standing there. Use the table above and stop at the first click.
Using anti-seize on modern plated plugs. It changes effective torque by up to 20 percent, which is enough to break threads or stretch a shell. The plating already does the job.
Packing dielectric grease onto the terminal. It belongs as a thin film on the boot’s inner wall, not on the electrode, not on the coil post, and never on the threads.
Re-gapping fine-wire iridium or platinum plugs. The precious metal tip is small and brittle, and a coin-style tool against it chips or snaps it. Verify with a wire gauge, adjust the ground strap only if truly necessary, and never touch the center electrode.
Forcing a plug that will not come out. A plug that gets harder to turn as you back it out is dragging on damaged or corroded threads, and what comes out with it may be the threads themselves. Stop, thread it back in, penetrate, wait, and work it back and forth. If that fails, it is a shop job.
Crossing plug wires. One cylinder at a time on any wired system. A crossed pair can damage a catalytic converter in minutes.
Assuming plugs will fix a misfire you have not diagnosed. Plugs are the cheapest part in the ignition system and the most commonly replaced for problems they were never causing. A cylinder-specific code narrows it, and swapping a coil between cylinders tells you whether the coil or the plug is at fault before you buy anything. Our essential tools for DIY car maintenance guide covers the diagnostic kit worth having on the shelf for exactly this.
Downgrading the plug material. An engine designed around iridium plugs in a coil-on-plug system will run on coppers, but the interval collapses and the coils work harder in the meantime. Match or exceed what the manufacturer specified.
Final Thoughts from the Shop
Three things carry this job.
Work cold, and clean the wells. Those two habits prevent the two failures that turn a maintenance item into a cylinder head repair. Neither one costs anything but patience.
Torque to the published number for your thread size, seat type, and head material, and stop at the click. The table on this page is real published data rather than a general instruction to snug it, and the numbers are lower than most people expect, low enough that a typical brake-job torque wrench cannot measure them accurately. If your engine uses small plugs, get a wrench that reads in that range before you start.
Leave the anti-seize in the drawer, and put a thin film of dielectric grease inside the boot. That is the whole chemistry of this job on a modern engine, and getting it backward is one of the more common ways a careful DIY plug change ends up damaging something.
Beyond that, take the extra two minutes to lay the old plugs out in cylinder order and actually look at them before they go in the bin. That is free information about the health of every cylinder in the engine, available exactly once a decade on a modern car, and one plug that does not match its neighbors will tell you more about what your engine is doing than most scan tools will.
For choosing what goes back in, our best spark plugs roundup covers the materials and the applications they suit, and if you are weighing two of the more common brands against each other, Bosch vs ACDelco spark plugs lays out the practical differences. Buy the plug the engine was designed around, install it cold, torque it correctly, and it will do its job quietly for as long as the box says it will.
Buyer's Guide
Six things determine whether a spark plug change is a pleasant two-hour Saturday or the start of a cylinder head repair. Work through all six before you buy a set of plugs, because two of them can change the answer to whether you should be doing this job yourself at all.
Which Engine You Have, and Whether It Has a Known Removal Problem
Most engines take plugs out uneventfully. A few do not, and the difference is worth knowing before your wrench is on the first one. The 2004 to 2008 Ford 4.6 and 5.4 liter 3-valve Triton engines use a two-piece Motorcraft plug with a long swaged shell whose lower section sits deep in the bore, collects carbon, and shears off on removal, leaving the bottom half welded into an aluminum head. Ford issued an eleven-page technical service bulletin, TSB 08-7-6, purely to describe how to get them out. That is not a routine job and should not be treated as one. Other engines have their own quirks: plugs buried under intake manifolds, rear banks on transverse V6 layouts where you cannot see what you are doing, and engines where the coil boots bond to the porcelain over time. Spend ten minutes searching your specific year, engine, and displacement before you order parts. The information is out there and it changes how much time you set aside, what tools you need, and occasionally whether you make the call to a shop instead.
Plug Material and What Interval You Are Buying
The material determines both the service life and, on many engines, whether the plug is even the right part. Copper and nickel plugs have a thick center electrode, conduct heat well, and are inexpensive, but they erode faster and typically want replacing every 20,000 to 30,000 miles. Single platinum plugs put a platinum disc on the center electrode and commonly run 40,000 to 60,000. Double platinum plugs carry platinum on both the center and ground electrodes, which matters for wasted-spark ignition systems where the spark jumps in both directions, and they run longer. Iridium plugs use a very fine center electrode of an extremely hard metal, which concentrates the spark and reduces the voltage needed to fire, and they commonly carry 60,000 to 100,000 mile ratings. Ruthenium is the newest tier and claims the top of that band. The important rule is not to downgrade below what the engine was designed around. An engine calibrated for iridium plugs in a coil-on-plug system will run on coppers, but you will be back under the hood in a fraction of the interval and the coils work harder in the meantime.
Getting the Exact Part Number, Including Heat Range
A spark plug is not a generic part, and the number on the box encodes thread diameter, thread reach, seat type, heat range, and electrode configuration. Any one of those being wrong causes a real problem. A plug with too long a reach can contact a piston or a valve. Too short a reach leaves exposed threads in the combustion chamber that carbon up and make the next installation miserable. The wrong seat type will not seal. And heat range is the one people underestimate: it describes how fast the plug sheds heat into the cylinder head, and a plug that runs too cold fouls with deposits while one that runs too hot becomes an ignition source for detonation. Order by year, make, model, and engine displacement together, then verify against the number printed on the plug you remove. If your engine is turbocharged, modified, or running forced induction, the correct heat range may differ from stock and that is a conversation with the tuner rather than a parts counter lookup. When the old plug and the new plug are side by side on the bench, compare thread length, thread diameter, seat design, and overall body height before anything goes into the head.
The Torque Wrench and a Socket That Fits
You need a torque wrench that reads accurately at the low end, because spark plug specs live well below what most brake and suspension wrenches are designed to measure. Many click-type wrenches in the common 20 to 150 lb-ft range are inaccurate or unusable near their bottom limit, and a 12mm plug in an aluminum head may want as little as 10.8 lb-ft. A smaller wrench covering roughly 5 to 80 lb-ft is the right tool for this job. On sockets, a real spark plug socket has a rubber insert or a magnet inside that grips the plug body and protects the porcelain insulator, and a standard deep socket does not. The two common sizes are 5/8 inch and 13/16 inch, covering most automotive plugs, with 14mm and 16mm thin-wall versions appearing on some newer engines with narrow wells. A universal joint or wobble extension is what makes the rear bank of a transverse V6 or the back cylinders of a V8 reachable at all, and a length of fuel hose slipped over the plug's terminal makes a workable thread starter that cannot cross-thread the way a socket on a ratchet can.
Access, and How Much of the Engine Has to Come Off First
The plugs themselves are rarely the hard part. Getting to them is. On an inline four with coil-on-plug ignition and an open engine bay, all four plugs are visible the moment you pull the plastic engine cover, and the whole job takes under an hour. On a transverse V6, the rear bank sits against the firewall and is often reached only by removing an intake plenum, disconnecting a throttle body, or working blind from underneath. Some engines require removing a strut tower brace, a wiper cowl, or an entire intake manifold. Truck V8s are usually accessible but tight against the inner fender, and the frame rail decides whether you work from above or from the wheel well. Look at the engine before you commit to a timeline. If the rear bank means pulling an intake manifold, you are also buying intake gaskets, you are exposing open intake ports that must be covered, and you are turning a one-hour job into most of a day. That is still a doable job, but it is not the job you thought you were starting.
Knowing When to Hand It to a Shop
A few situations change this from a maintenance item into a repair, and recognizing them beforehand is worth more than any tool. A high-mileage Ford 3-valve Triton with the original plugs still in it is the clearest example, because the failure mode is a broken plug welded into an aluminum head and each extraction is roughly an hour of careful work with a dedicated tool. Any engine where a plug will not break loose with steady, controlled force on a properly seated socket is another. Do not escalate to a breaker bar and body weight on a plug that is not moving in an aluminum head, because what comes out with the plug may be the threads. Oil filling the plug wells means failed valve cover gaskets or spark plug tube seals, which is its own job that should be done at the same time. A plug that comes out with a wet, fuel-soaked or oil-soaked tip, a melted electrode, or a cracked insulator is evidence of an engine problem that new plugs will not fix and may hide temporarily. And if you find a plug well full of debris that you cannot clear before removing the plug, stop and get proper suction on it rather than dropping grit into an open cylinder.
Frequently Asked Questions
Do I need a torque wrench to change spark plugs, or is hand tight good enough?
Should I put anti-seize on spark plug threads?
Do I need to gap new spark plugs before installing them?
How do I know which cylinder is misfiring before I start replacing parts?
How often should spark plugs actually be replaced?
Related Articles
Bosch vs ACDelco Spark Plugs: An ASE Mechanic's Honest Comparison
maintenance-parts
7 Best Spark Plugs of 2026
maintenance-parts
How to Change Your Own Oil: A Step-by-Step Guide from an ASE Master Tech (2026)
maintenance-parts
How to Change Brake Pads: A Master Tech's Complete Walkthrough (2026)
maintenance-parts
How to Change a Flat Tire: A Master Tech's Roadside Walkthrough (2026)
maintenance-parts
About the Reviewer

Mike Reeves, ASE Master Technician
A.A.S. Automotive Technology, Universal Technical Institute (UTI)
Mike Reeves is an ASE Master Technician with 15 years of hands-on experience in automotive repair and diagnostics. He earned his A.A.S. in Automotive Technology from UTI and runs his own independent shop in Denver, Colorado. Mike founded RevRated to help everyday car owners make smarter parts decisions -- every recommendation comes from real-world testing in his garage.