How to Read OBD2 Codes: A Master Technician's Step-by-Step Guide
An ASE Master Tech's complete guide to reading OBD2 codes — scanner types, the step-by-step process, freeze-frame data, the 8 most common codes, and what a mechanic actually does with each.
Updated
The check engine light comes on, and the first thing most people do is panic. The second thing they do is type the code into a search box, read that P0420 means “catalyst efficiency below threshold,” and conclude they need a catalytic converter. Then they buy one, install it, and the light comes right back on — because the converter was never the problem. I have watched this exact sequence play out hundreds of times, and it is the most expensive misunderstanding in all of consumer auto repair.
Here is the thing I have learned in over twenty years of diagnostics: a code has never once told me to replace a part. Not once. A trouble code is the answer to the question “where should I start looking?” — never the question “what should I replace?” The scanner is an interrogation tool. It tells you which system is unhappy and gives you a starting point for an investigation. The mechanic’s job — and yours, if you want to do this right — is everything that happens after the code is read.
I am Mike Reeves, an ASE Master Technician. This guide is going to teach you to read OBD2 codes the way I do on the shop floor: not as a parts-changer who swaps components until the light goes off, but as a diagnostician who uses the code as the first clue in a logical investigation. You will learn the exact step-by-step process, how to read the freeze-frame data that almost nobody talks about, how to decode the five-character structure, and what I actually do first when I see each of the eight most common codes. By the end, the check engine light will stop being a source of panic and start being what it actually is — useful information.
What Is OBD2 and Why Every Car Has It (Since 1996)
OBD2 stands for On-Board Diagnostics, second generation. Every gasoline car and light truck sold in the United States since the 1996 model year is required by EPA mandate to have it, with diesels following shortly after. Before OBD2, manufacturers each used their own proprietary diagnostic systems (now retroactively called OBD1) with different connectors, different code formats, and different procedures for every brand — a nightmare for independent shops and impossible for DIYers.
The genius of the OBD2 mandate was standardization. It forced every manufacturer to use the same 16-pin connector in roughly the same location, the same communication protocols, and the same core set of generic trouble codes that mean the same thing on a Ford as they do on a Honda. That standardization is what makes a single inexpensive scanner able to talk to almost any car on the road, and it is the entire reason a regular person can pull their own codes today. The system was created primarily for emissions monitoring — the EPA wanted a way to verify that pollution-control systems were working — but it monitors the engine, transmission, and dozens of related systems as a byproduct, which is why it has become the universal language of car diagnostics.
First: What the Check Engine Light Is Actually Telling You
The check engine light — formally the Malfunction Indicator Lamp, or MIL — is not a single message. It is two completely different messages depending on how it behaves, and confusing the two is one of the most expensive mistakes a driver can make.
Solid CEL vs. Flashing CEL — The Rule That Matters
A solid, steady check engine light means the computer has stored a fault and wants you to look into it soon. “Soon” means within a few days to a couple of weeks. The vehicle is generally safe to drive in the meantime, and you have time to read the code, do your homework, and plan a repair. Do not ignore it for months — a small problem can cascade — but a solid light is not an emergency.
A flashing check engine light is a different animal entirely. It means a severe misfire is happening right now, and raw unburned fuel is being pumped into your exhaust where it ignites inside the catalytic converter. The converter is not built to burn fuel, and its internal temperature can spike high enough to melt the ceramic substrate within minutes. A flashing light is the car screaming at you. The correct response is to back off the throttle immediately, get off the highway, and either limp gently to a nearby shop or pull over and call a tow. Continuing to drive a vehicle with a flashing CEL is how a forty-dollar ignition coil becomes a several-thousand-dollar repair. When in doubt, stop driving.
What You Need: Scanner Types Explained
Before you can read a code you need a tool, and the tools fall into three tiers. Understanding the tiers keeps you from overspending on capability you will not use — or, worse, underspending and ending up unable to diagnose the problem you bought the tool for.
The entry tier is the basic code reader: it reads stored and pending codes and clears them, and nothing more. The middle tier is the scan tool with live data: everything the reader does plus real-time sensor streaming, freeze-frame access, and I/M readiness monitor status — this is the tier where actual diagnosis becomes possible. The top tier is the bidirectional professional scan tool: it adds active tests, letting you command components directly to confirm whether they work before you replace them. For most people who do their own basic repairs, the middle tier is the sweet spot, and our guide to the best OBD2 scanners for DIYers breaks down specific models across all three tiers with the live-data and coverage features that actually matter. Whatever you choose, buy a tool that can show freeze-frame data — without it you are reading half the story.
How to Read OBD2 Codes: Step-by-Step
The mechanics of pulling a code take about two minutes once you know the sequence. Here is exactly how I do it.
Step 1: Locate the OBD2 Port (DLC)
The Data Link Connector — the OBD2 port — is a 16-pin trapezoid-shaped socket. On the overwhelming majority of vehicles it is under the dashboard on the driver’s side, within reach of the steering column, usually within about a foot of the steering wheel and often just above the pedals. A small number of vehicles hide it behind a panel, inside the center console, or behind the ashtray, but it is always within three feet of the steering wheel by federal requirement. If you cannot find it, your owner’s manual lists the exact location, or a quick search of your make and model will show a photo.
Step 2: Connect the Scanner
With the ignition OFF, plug the scanner firmly into the port — it only fits one way. Then turn the ignition to the ON position: that is one click before START on a key vehicle, the position where the dashboard lights illuminate but the engine does not crank. On a push-button vehicle, press the start button once without your foot on the brake, which powers up the electronics without starting the engine. Wait a few seconds for the scanner to power up and establish communication with the computer.
Do not start the engine. I cannot stress this enough. Starting the engine begins overwriting the freeze-frame data — the snapshot of conditions captured when the fault occurred — and that snapshot is one of the most valuable diagnostic clues you will get. Ignition ON, engine OFF, every time you are pulling stored codes.
Step 3: Navigate to “Read Codes”
Once connected, navigate the scanner’s menu to “Read Codes” or “Trouble Codes.” You will typically see two categories. Stored (or “active”) codes are confirmed faults that have triggered the check engine light. Pending codes are faults the computer has detected once but not yet confirmed across enough drive cycles to illuminate the light — they are early warnings, and they are gold for catching a problem before it becomes a hard failure. Read both.
Step 4: Write Down Every Code Before You Clear Anything
This is the step people skip and regret. Before you touch the “clear” or “erase” function, write down every single code exactly as it appears — every character. If you clear the codes before recording them, you have erased your diagnostic information and you will be waiting for the fault to recur before you can read it again. Record stored codes, pending codes, and which cylinders or banks are referenced. A photo of the scanner screen works too. Clear nothing until everything is written down.
Step 5: Pull the Freeze-Frame Data
If your scanner supports it — and this is exactly why I tell people to buy a tool that does — navigate to “Freeze Frame” or “Freeze Frame Data.” This is the snapshot of operating conditions the computer captured at the precise moment the code set. It is the difference between knowing that something went wrong and knowing when and under what conditions it went wrong, which is most of the diagnosis. We will dig into how to read it shortly.
Decoding the 5-Character Code Structure
Every OBD2 code is five characters — one letter and four numbers, like P0301. The structure is not arbitrary. Each position tells you something, and reading the structure is the first step in understanding what the code is pointing at.
First Character: P / B / C / U
The letter identifies the system. P is Powertrain — engine, transmission, fuel, and emissions — and it covers roughly 95 percent of the codes you will ever see. B is Body — airbags, power seats, climate control, interior electronics. C is Chassis — ABS, traction control, suspension, steering. U is Network/Communication — codes about modules failing to talk to each other across the vehicle’s data network. For most check-engine-light diagnosis you are living in P-code territory.
Second Character: 0 or 1 (Generic vs. Manufacturer-Specific)
The first number tells you whether the code is generic or manufacturer-specific. A 0 means it is a generic SAE code — standardized, meaning the same thing across every make, and decodable by any scanner. A 1 means it is manufacturer-specific — the carmaker defined this code for their own systems, and you need a code library that covers your specific make to decode it (this is exactly why VIN auto-read matters in a scanner). When you see a P1xxx code and your generic reader shows “unknown code,” that is why.
Third Character: The Subsystem
The third character narrows it to a specific subsystem. Roughly: 1 and 2 are fuel and air metering, 3 is the ignition system or misfires, 4 is auxiliary emissions controls, 5 is vehicle speed, idle control, and auxiliary inputs, and 7, 8, and 9 are the transmission. So a code starting P03 immediately tells you “ignition or misfire” before you even look up the specific number.
Fourth and Fifth Characters: The Specific Fault
The last two digits identify the exact fault within that subsystem. In P0301, the “01” tells you it is cylinder number 1 specifically. In P0171, the “71” identifies the specific lean condition on bank 1. These are the digits you look up for the precise definition.
How to Use Freeze-Frame Data
This is the section almost no guide on the internet covers, and it is the single biggest thing separating a real diagnosis from a guess. When a code sets, the computer freezes a snapshot of key operating parameters at that exact moment. Reading that snapshot tells you the conditions under which the fault occurred, which often points straight at the cause.
The parameters that matter most: Coolant temperature tells you whether the fault happened on a cold start or a fully warmed engine — a fault that only appears cold points at very different causes than one that appears hot. Engine load percentage tells you whether the problem showed up at idle, light cruise, or under heavy throttle. Short-term fuel trim is the big one — a positive number means the computer is adding fuel to compensate for a lean condition, a negative number means it is pulling fuel because the mixture is rich. RPM and vehicle speed complete the picture of exactly what the car was doing.
Here is a real-world example of why this matters. A P0171 (system too lean, bank 1) comes in. The freeze-frame shows short-term fuel trim at plus 25 percent at idle, but I know from live data that the trim drops back to near zero at 2,500 RPM. That pattern — badly lean at idle, fine at higher RPM — is the fingerprint of a vacuum leak, not a failing mass airflow sensor. A vacuum leak has its biggest effect at idle when manifold vacuum is highest and airflow is lowest; at higher RPM the unmetered air becomes a smaller percentage of total airflow and the trim normalizes. A bad MAF sensor, by contrast, would skew the trim across the whole RPM range. Without freeze-frame and live data, those two very different problems look identical — and one is a five-dollar vacuum hose while the other is an expensive sensor. That is the diagnostic power most people leave on the table.
The 8 Most Common OBD2 Codes — What a Mechanic Actually Does First
Reading the code is step one. Here is what I actually do when I see the eight codes that walk through my bay most often. Notice that in not one of these does the code tell me what to replace — it tells me where to start.
P0300 — Random/Multiple Cylinder Misfire
A misfire means a cylinder is not burning its fuel-air mixture properly. P0300 is a random or multiple misfire; P0301 through P0308 point at specific cylinders. My investigation order is ignition first: spark plugs, then ignition coils or wires, because worn plugs are the single most common misfire cause and the cheapest thing to rule out. If you are chasing a misfire, fresh plugs are the right first move — our guide to the best spark plugs covers the right heat range and material for different engines. If new plugs do not solve it, I move to coils, then fuel injectors, then compression testing for a mechanical problem. A flashing light with a misfire code means stop driving — see the converter warning above.
P0171 — System Too Lean, Bank 1
Lean means too much air relative to fuel. My first check is a vacuum leak — I spray carburetor cleaner around the intake manifold gaskets and vacuum lines with the engine idling, and if the idle changes, I have found unmetered air sneaking in. Next is a dirty mass airflow sensor under-reporting airflow, then a weak fuel pump or clogged injectors failing to deliver enough fuel. If the injectors are the culprit, sometimes a quality cleaner resolves it before replacement is necessary — our best fuel injector cleaners guide covers formulations that actually move the needle on deposit-related lean codes. Freeze-frame fuel-trim-versus-RPM data, as described above, often tells me which of these it is before I touch a wrench.
P0420 — Catalyst Efficiency Below Threshold
This is the single most misdiagnosed code I see, full stop. In over twenty years I have replaced exactly zero catalytic converters based on this code alone. P0420 means the computer thinks the converter is not cleaning the exhaust efficiently — but it reaches that conclusion by comparing two oxygen sensors, and the cause is far more often a lazy or failing O2 sensor, an exhaust leak upstream of the sensor, or an active misfire that overheated and contaminated the converter than it is a genuinely dead converter. I check the O2 sensors, hunt for exhaust leaks, and rule out any misfire codes first. I replace the converter last, only after everything else is eliminated and the converter is proven bad.
P0455 — EVAP System Large Leak Detected
The EVAP system captures fuel vapors from the tank. A large-leak code has a famous first suspect: a loose, cracked, or missing gas cap. Before I do anything else, I tighten the gas cap until it clicks, clear the code, and drive. A huge percentage of P0455 codes never come back after that. If it returns, I move on to a smoke test to find the leak in the lines, the charcoal canister, or the purge and vent valves.
P0128 — Coolant Temperature Below Thermostat Regulating Temperature
This code means the engine is not reaching proper operating temperature in the expected time, and the overwhelmingly common cause is a thermostat stuck open, letting coolant circulate too freely so the engine never fully warms. The fix is almost always a thermostat — not the coolant itself. That said, P0128 is a good prompt to inspect the whole cooling system while you are in there: check the coolant condition and concentration, because degraded or wrong-spec coolant causes its own problems down the road. Our best coolant and antifreeze guide breaks down the chemistry types so you refill with the correct specification after the thermostat job. Do not chase a P0128 by replacing coolant and skipping the thermostat — that is backwards.
P0113 — Intake Air Temperature Sensor Circuit High Input
The IAT sensor tells the computer how warm the incoming air is. A “high input” code points at the sensor reading an implausibly high resistance — usually a failed sensor, a disconnected or corroded connector, or a broken wire. This is a relatively cheap and quick diagnosis: inspect the connector, check the wiring, and test or replace the sensor.
P0340 — Camshaft Position Sensor Circuit
The camshaft position sensor tells the computer where the cam is in its rotation, which it needs for ignition and fuel timing. P0340 can cause hard starting, stalling, or no-start conditions. The usual suspects are the sensor itself, its connector and wiring, or in some cases timing components. It is a real driveability code that deserves prompt attention because a failing cam sensor can leave you stranded.
P0700 — Transmission Control System Malfunction
P0700 is a flag, not a diagnosis — it is the engine computer’s way of saying “the transmission controller has set its own code, go look over there.” On its own it tells you almost nothing. You need a scan tool that can read the Transmission Control Module separately to pull the actual sub-codes that describe the real fault. This is exactly the kind of code where a basic reader leaves you stuck and a more capable scan tool earns its keep.
When You Get Multiple Codes: Fix Upstream First
This is the most important diagnostic principle in this entire guide, and it is the one that separates a mechanic from a parts-changer. When you pull codes and find four or five at once, do not panic and do not assume four or five problems. In the vast majority of cases, one root cause is cascading downstream and triggering a chain of related codes.
The classic cascade: a single failed ignition coil causes a misfire (P0301), the misfire trips a random-misfire code (P0300), the unburned fuel from the misfire confuses the oxygen sensors and overheats the catalytic converter, which sets an O2 sensor code and a P0420. Four codes, one cause. A parts-changer reads four codes and buys four parts. A diagnostician identifies the single upstream mechanical failure — the bad coil — fixes it, clears the codes, and watches the three downstream codes never return.
The rule is simple: fix upstream first. Address the most fundamental, most mechanical, most “cause-like” code before you touch anything downstream of it. Misfires before catalyst codes. Fuel and air delivery before emissions efficiency. Mechanical before electronic symptoms. Then clear everything and drive — the downstream codes very often clear themselves once the root cause is gone. Chasing downstream codes while ignoring the upstream cause is the single biggest waste of money in DIY repair.
Clearing Codes — When To, and When Not To
Clearing codes is easy. Knowing when not to is the skill.
The right time to clear codes is after you have repaired the underlying problem — you fix the bad coil, then clear the misfire codes to confirm the repair held and the light stays off. Clearing codes without a repair just turns off the light temporarily; the fault will recur and the light will return, and now you have also wiped out diagnostic history. Never clear codes to hide a problem before selling a car or passing it to a family member — that is dishonest and dangerous.
You can clear codes two ways. The clean method is through the scanner’s “Clear Codes” or “Erase” function, which resets the codes and the check engine light deliberately. The crude method is disconnecting the battery negative terminal for several minutes, which dumps the computer’s volatile memory and clears codes as a side effect — but it also resets your radio presets, clock, and on many vehicles the TPMS and power-window relearn settings, and it can require re-teaching the computer’s adaptive fuel trims. I avoid the battery-disconnect method when a scanner is available. If your battery is weak enough that a brief disconnect is a concern, that is its own issue worth checking — our best car battery testers guide covers load testers that tell you whether your battery is healthy before you start pulling terminals.
What I/M Readiness Monitors Are
Here is the trap that catches people right before an emissions test. Your vehicle runs a set of internal self-tests called I/M (Inspection and Maintenance) readiness monitors — typically eight to eleven of them, covering systems like the catalyst, EVAP, oxygen sensors, and EGR. Each must run and complete before it reports “ready.” When you clear codes — by scanner or by battery disconnect — you reset all of those monitors to “not ready.”
A vehicle with monitors in the “not ready” state will automatically fail an emissions test in most jurisdictions, regardless of whether it has any actual fault, because the testing equipment cannot verify the systems are working. The monitors only reset to “ready” after the vehicle completes a full drive cycle — generally 50 to 100 miles of mixed city and highway driving over multiple trips with cold starts. So the smog-test trap is this: do not clear your codes one or two days before an emissions test. I have watched people clear a code the morning of their test, thinking they fixed something, and fail automatically because the monitors had not had time to reset. If you need to clear codes before a test, do it at least a week and a hundred-ish miles of normal driving beforehand.
Reading Codes Without a Scanner
If you do not own a scanner and the light just came on, you have a few options. The most practical is to drive to a national parts-store chain — most will scan your codes for free in the parking lot. It is a genuine convenience, just be aware the counter staff will often steer you toward the most commonly associated part, which lands you right back in parts-changer territory if you take it at face value.
The old key-cycling odometer trick — turning the ignition on and off in a specific sequence to flash codes through the dash — worked on some older vehicles but is unreliable and largely gone on modern cars. My honest recommendation is to simply own an inexpensive Bluetooth reader that pairs with a phone app. It lives in the glovebox, costs about a tank of gas, and pays for itself the first time it shows you the check engine light is nothing more than a loose gas cap.
When to See a Mechanic
Reading your own codes is empowering, but knowing your limits is part of doing it right. See a professional when: the check engine light is flashing (active severe misfire — do not drive); you have a code you cannot reproduce or that keeps returning after a correct repair; you are dealing with P1xxx manufacturer-specific codes that your tool cannot fully decode; you have codes combined with serious driveability symptoms like stalling, no-start, or loss of power; or you have ABS, airbag, or other safety-system codes where a mistake has consequences far beyond a check engine light. There is no shame in using your scanner to understand the problem and then handing an informed, well-described diagnosis to a shop. In fact, that is exactly how to be the best customer a good mechanic can have — and how to avoid being sold repairs you do not need.
A scanner does not replace a mechanic, and it certainly does not replace judgment. What it does is move you from the helpless side of the conversation to the informed side. You will know which system is unhappy, what conditions triggered it, and what a logical first step looks like. That knowledge is the difference between getting a repair and getting taken. Read the code, read the freeze-frame, fix upstream first, and never let a five-character string talk you into buying a part it never actually named. When you are ready to put a real tool in your glovebox, start with our guide to the best OBD2 scanners and buy the live-data tier — your future self, standing in a parking lot with a check engine light, will thank you.
Buyer's Guide
A code reader is an interrogation tool, not a crystal ball — but a better tool asks better questions. Six factors separate a device that just blinks a code at you from one that actually helps you diagnose. Match the tool to how deep you intend to go.
Coverage Level — Read/Clear vs. Live Data vs. Bidirectional
This is the single biggest decision and it maps directly to how much diagnostic work you intend to do. A basic read-and-clear unit only retrieves stored and pending codes and resets the light — fine if all you want is to know why the light is on and turn it off after a repair, but it leaves you guessing about everything else. A mid-range tool adds live data streaming and freeze-frame access, which is the real diagnostic tier — now you can watch fuel trims, sensor voltages, and engine load change in real time, which is how you actually distinguish a vacuum leak from a bad sensor instead of throwing parts at the problem. Bidirectional (active test) capability is the professional tier: it lets the tool command components directly — fire an injector, cycle the EVAP purge valve, run the fuel pump, command the cooling fans — so you can confirm a part works before you replace it. For most DIYers the live-data tier is the sweet spot; bidirectional is worth it if you do your own repairs regularly.
Bluetooth Dongle vs. Standalone Handheld
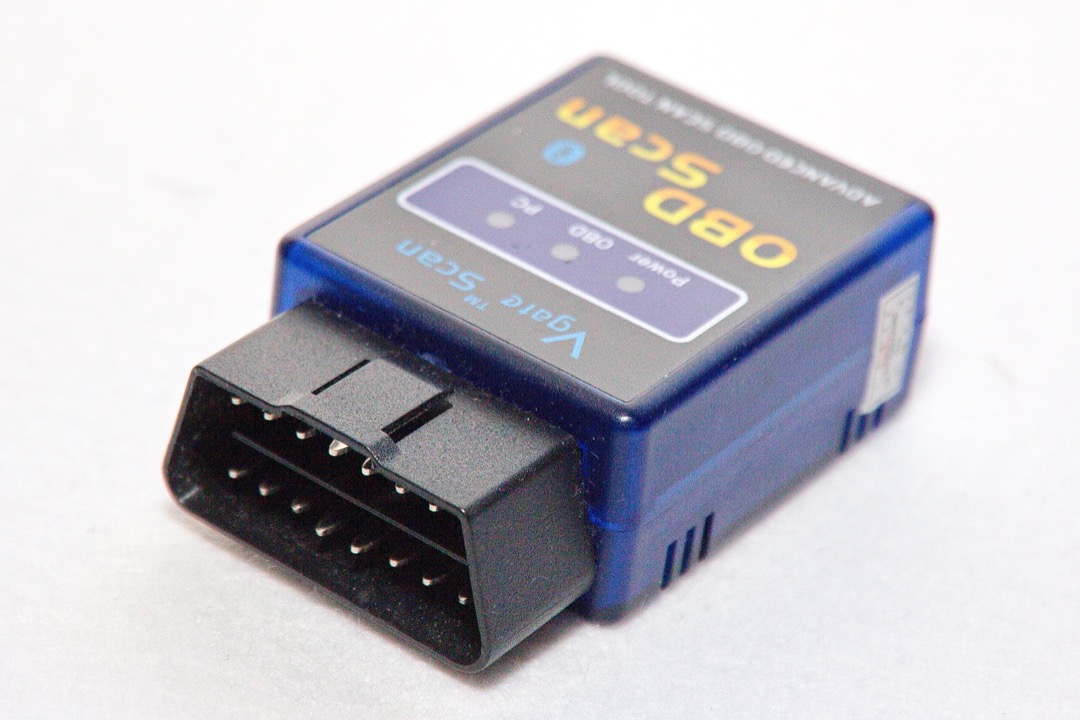
The market splits into two form factors and each has real tradeoffs. A Bluetooth dongle plugs into the OBD2 port and streams data to a free or paid app on your phone — it is compact, cheap, lives permanently in your glovebox, and the phone's big screen displays live data beautifully. The downside is app dependence: free apps are often limited or ad-laden, the better apps cost a subscription, and Bluetooth pairing can be finicky on some phones. A standalone handheld scanner has its own screen and processor, needs no phone or app, boots instantly, and the better units have faster, more reliable code lookups and more polished menus. Handhelds cost more and are bulkier, but they are the more dependable everyday tool and the one I reach for first. Choose the dongle for occasional use and maximum portability; choose the handheld if you want a no-nonsense tool that just works every time without a phone in the loop.
VIN Auto-Read vs. Manual Vehicle Entry
How the tool identifies your specific vehicle matters more than buyers expect, because it determines whether manufacturer-specific codes get decoded correctly. A tool with automatic VIN read pulls your vehicle's identification straight from the computer and loads the correct code library for your exact make, model, and engine — so when you pull a P1xxx manufacturer-specific code, you get the actual factory description instead of an unknown-code dead end. Tools that require manual entry (or do not identify the vehicle at all) can decode the generic P0xxx codes universally, but often display manufacturer-specific codes as raw numbers with no description, which is exactly when you need the description most. If you drive anything other than the most common domestic vehicles, or if you want accurate decoding of those P1 codes, VIN auto-read is worth paying for.
OEM / Enhanced Coverage Beyond Basic OBD2
Universal OBD2 is required by law to cover emissions-related powertrain systems — the engine and, to a degree, the transmission. It does not cover the rest of the car. If you want to read ABS codes, airbag (SRS) codes, TPMS, body control modules, or detailed transmission sub-codes, you need a tool with OEM or enhanced coverage for your specific make. This is the dividing line between a tool that can tell you why the check engine light is on and a tool that can tell you why the ABS, airbag, or traction-control lights are on. Enhanced coverage is usually make-specific and priced accordingly — a tool with deep coverage for your brand costs more than a universal reader, but it is the difference between diagnosing a brake or safety system yourself and paying shop diagnostic time. Decide which systems you actually need before paying for breadth you will never use.
Vehicle Compatibility — Universal vs. Make-Specific Depth
Every OBD2-compliant vehicle sold in the US since 1996 will talk to any OBD2 tool at the basic level — that part is standardized by law and you do not need to worry about it. Where compatibility actually varies is depth. Some tools advertise broad universal coverage that is genuinely shallow on every make, while others go deep on one or two brands and stay basic on the rest. If you own and work on multiple vehicles from different manufacturers, prioritize a tool with solid all-around coverage. If you are a one-brand household — all Toyotas, all Fords, all GM — a tool with deep enhanced coverage for that single make will out-diagnose a broad-but-shallow universal tool every time. Match the tool's depth profile to your actual fleet, not to a feature list.
Software Update Cadence for New Model Years
A scan tool is only as current as its code library, and cars change every model year. Manufacturers add new modules, new codes, and new communication protocols constantly, so a tool that shipped three years ago with no update path will increasingly fail to decode codes on newer vehicles and may not communicate with the latest modules at all. Before buying, check whether the tool receives software updates, how often, and whether updates are free or subscription-based. Free lifetime updates are the gold standard and worth a premium. A cheap tool with no update path is fine for an older vehicle you plan to keep, but a poor investment if you buy newer cars — you will outgrow its code library within a few years. Treat update cadence as part of the purchase price, not an afterthought.
Frequently Asked Questions
Does my car have to be running to use an OBD2 scanner?
What does a flashing check engine light mean versus a solid one?
Can I read OBD2 codes without a scanner?
Why do I have multiple codes at once?
What's the difference between a code reader and a scan tool?
Related Articles
About the Reviewer

Mike Reeves, ASE Master Technician
A.A.S. Automotive Technology, Universal Technical Institute (UTI)
Mike Reeves is an ASE Master Technician with 15 years of hands-on experience in automotive repair and diagnostics. He earned his A.A.S. in Automotive Technology from UTI and runs his own independent shop in Denver, Colorado. Mike founded RevRated to help everyday car owners make smarter parts decisions -- every recommendation comes from real-world testing in his garage.