How to Change Brake Pads: A Master Tech's Complete Walkthrough (2026)
An ASE Master Tech's full brake pad guide: front and rear procedure, the three rear caliper designs, EPB service mode and relearn, real torque ranges, bedding in, and rotor minimum thickness.
Updated
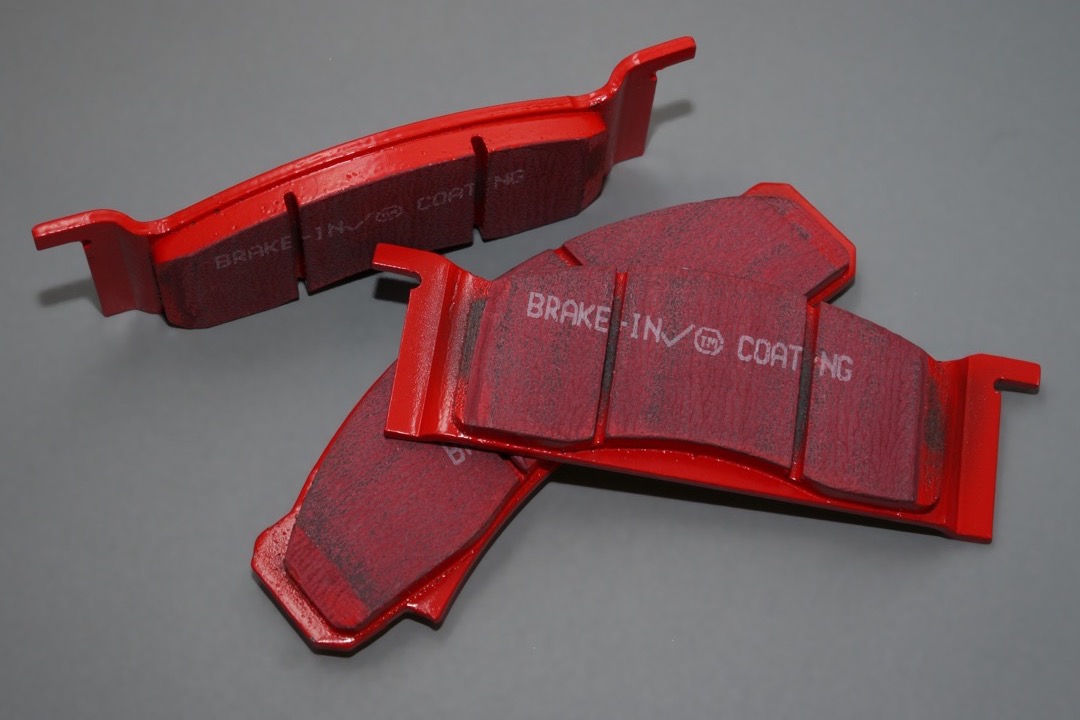
Brake pads are the most commonly attempted first-time major DIY repair on a car, and they are also the job I see done wrong more than any other. Not catastrophically wrong, usually. The pads go in, the wheel goes back on, the car stops. But six months later the same customer is back with an inside pad worn to the backing plate, a squeal that will not go away, or a pulsation through the pedal that was not there before. In almost every one of those cases the pads themselves were fine. What went wrong happened around them.
The job itself is genuinely within reach of a careful home mechanic. There is nothing mysterious about a disc brake. Two bolts hold a bracket to the knuckle, two more hold the caliper to the bracket, the pads slide in a channel, and a hydraulic piston squeezes them against a spinning iron disc. What separates a brake job from a brake repair is the handful of details around that simple picture: cleaning and greasing the slide pins, replacing the hardware, knowing which of the three rear caliper designs you are looking at before you touch it, and putting a torque wrench on the fasteners that hold your brakes to your car.
This guide covers the whole job front and rear, including the electronic parking brake procedure that most articles either skip or get dangerously wrong. Read the whole thing before you jack the car up, because two of the decisions you need to make happen before you buy parts.
Brake Pad Replacement at a Glance
Time required: Two to three hours per axle for a first-timer working carefully. An experienced hand does a front axle in about 45 minutes. Budget the full afternoon the first time and do not plan anything after it.
Difficulty: Moderate. The mechanical work is straightforward, but this is a safety-critical system with real torque specs and no acceptable margin for guessing.
Tools: Floor jack, jack stands, wheel chocks, breaker bar, socket set, torque wrench, C-clamp or piston spreader, wire brush, and either a wind-back cube tool or a bidirectional scan tool depending on your rear caliper design.
What it does: The pads are the sacrificial friction surface that converts your car’s kinetic energy into heat. They are designed to wear out. Replacing them at the right time is the difference between a routine service and grinding a caliper piston into a rotor face.
When it is due: Roughly 3mm, about an eighth of an inch, of remaining friction material above the backing plate. The wear indicator squeal most cars have is a small spring steel tab that starts contacting the rotor at approximately that threshold, so if you are hearing an intermittent metallic chirp that goes away when you press the pedal, that is the audible version of the same measurement.
When NOT to DIY: If the caliper is leaking, if a slide pin is seized solid, if you find a damaged brake hose or hard line, if the pedal already goes soft or sinks under steady pressure, or if you do not own a torque wrench. Any of those means the job is bigger than pads.
Before You Touch Anything: Is This a Job You Should Do?
I would rather someone read this section and decide to book the car in than read the rest and get halfway through. Brakes reward honesty about what you are equipped to handle.
Pads only, or pads and rotors. Make this call before you order parts. Pull a wheel, look at the rotor, and measure it. If the friction surface is deeply grooved, has a lip at the outer edge you can catch a fingernail on, shows blue heat discoloration, or has rust pitting from sitting, you need rotors too. Installing fresh pads against a scored rotor guarantees noise and a pedal that never feels quite right, because the new pad cannot lay down an even transfer film on an uneven surface. There is a full section on measuring rotors further down.
A seized caliper changes everything. Before you commit, look at the wear pattern on the old pads. If the inner pad is dramatically thinner than the outer pad on the same wheel, the caliper is not floating properly. Sometimes that is just dry slide pins, which you can service. Sometimes the pin is corroded solid in its bore or the piston is sticking in its seal, and then you are replacing a caliper. A caliper that will not retract with the correct tool, or a pin that will not come out with reasonable persuasion, is where the job stops being a pad change.
Contaminated brake fluid is its own problem. Open the reservoir and look. Clean brake fluid is pale straw or light amber. Dark brown, cloudy, or visibly sedimented fluid means it has absorbed moisture and needs flushing, which is a separate job with its own procedure. You can still change the pads, but note it and address it.
No torque wrench means do not start. I will say this more than once because it matters more than anything else on this page. The caliper bracket bolts hold the brake to the steering knuckle. There is no feel-based substitute for a calibrated tool on that fastener. If you do not have one, a decent torque wrench costs a fraction of what a shop charges for one brake job and you will use it for the rest of the car’s life.
Be honest about the working environment. You need level, solid ground. Not a slope, not gravel, not soft asphalt on a hot day. If your only option is a driveway with a grade, that alone is a reason to have the work done.
Tools and Materials
Lifting and safety: A floor jack rated well above the corner weight of your vehicle, a pair of jack stands rated for the same, and wheel chocks for the axle staying on the ground. A low-profile floor jack makes life considerably easier on anything with modest ground clearance, and the difference between a good jack and a bad one is mostly how confident you feel while the car is in the air.
Fasteners: A socket set with metric sockets, a breaker bar for the lug nuts, and a ratchet. Most of this job lives in the 10mm to 21mm range plus whatever your lug size is. A comprehensive socket set or a complete mechanic tool set covers everything here with room to spare. Some caliper bolts use Torx or hex heads rather than a standard hex, so check before you start. An impact wrench is genuinely useful for breaking loose stubborn lug nuts and spinning them off quickly, but understand the boundary: it is a removal tool. Never use an impact for final tightening of lug nuts or any brake fastener. Everything that goes back on gets a torque wrench.
Torque wrench: A click-type covering roughly 20 to 150 lb-ft handles every fastener in a brake job. This is not optional equipment.
Piston retraction, and this is where vehicles differ:
- A C-clamp or a dedicated piston spreader for front calipers and standard push-in rear calipers.
- A brake caliper wind-back tool, the cube-style set with interchangeable adapter faces, for screw-in rear calipers. The adapters engage the notches or pins molded into the piston face so you can rotate and press at the same time. The cheap cube kits are perfectly adequate and cover most vehicles.
- A bidirectional scan tool with an electronic parking brake service function for EPB-equipped rear brakes. This is a hard requirement, not a convenience. A basic code reader cannot command the actuators. Look specifically for EPB service, maintenance mode, or caliper retract in the tool’s function list, and confirm coverage for your make. Our guide to the best OBD2 scanners breaks down which readers actually have bidirectional control and which are code readers with marketing.
Consumables and cleanup: High-temperature rubber-safe synthetic or silicone brake caliper grease, brake parts cleaner, a wire brush, a bungee cord or a purpose-made caliper hook, a turkey baster or syringe for brake fluid, nitrile gloves, and eye protection. A stack of microfiber towels is worth having on hand, and since the wheels will be off and the barrels are the filthiest they will ever be accessible, a bottle of decent wheel cleaner turns a maintenance job into a detail with about ten extra minutes of effort.
Parts: Pads for the full axle, hardware kit (usually included with quality pads), rotors if your measurements call for them, and rotor retaining screws if yours uses them and they get damaged during removal.
Safety: Lifting the Car Properly
More people get hurt during the lifting phase of a brake job than during the brake job. The procedure is not complicated and it is not negotiable.
Park on level, solid ground. Transmission in park or in gear for a manual. Engine off. Keys out.
Chock the wheels on the axle staying down. Both sides, in front of and behind the tire if you have four chocks. A parking brake alone is not a chock, and on the rear axle you may need to release the parking brake anyway.
Crack the lug nuts before lifting, while the tire is on the ground. A quarter turn each, just enough to break them loose. Trying to break a torqued lug nut with the wheel in the air either spins the wheel or rocks the car off the stand.
Lift at the manufacturer’s jack point. Your owner’s manual shows them. On unibody vehicles they are reinforced pinch weld seams behind the front wheels and ahead of the rears. Putting a jack under a floor pan or a control arm bushing bends things that are expensive to straighten.
Jack stands take the weight. Always. The floor jack lifts the car and the jack stands hold it. A hydraulic jack is a lifting device with a seal that can bypass, and I have watched one settle. Place the stands on a solid, rated lift point, lower the car onto them, and then push the car firmly at the fender to confirm it does not shift before any part of you goes near it.
Work one axle at a time. Do both fronts, put the wheels back on, lower it, then do both rears. Fewer corners in the air at once means a more stable car, and it also keeps you from mixing up left and right hardware.
Keep the removed wheel under the car as a backstop, laid flat under a frame rail. It costs nothing and it is the difference between a bad day and a fatal one if a stand ever kicks out.
Step-by-Step: Front Brake Pads
Step 1 - Check the Brake Fluid Level First
Open the hood and look at the brake fluid reservoir before you touch anything else. When you compress the caliper pistons back into their bores, the fluid they displace goes backward up the lines and into that reservoir. If it is already at or near the MAX line, it will overflow. Draw some out with a turkey baster or a syringe into a sealed container and discard it properly. Brake fluid strips paint on contact and it does it fast, so anything that spills gets flushed with water immediately. Wear gloves and eye protection.
Step 2 - Remove the Wheel and Assess
With the lugs already cracked and the car safely on stands, take the wheel off and set it under the car. Now look at what you have. Note the thickness of the inner and outer pads and whether they match. Look at the rotor surface. Look at the caliper for any wetness. Look at the slide pin boots for cracks or tears, and look at the brake hose for cracking, bulging, or chafe marks. Take a photo of the assembly before you take anything apart. That photo answers questions about clip orientation that your memory will not.
Step 3 - Remove the Caliper from the Bracket
The caliper is held to the bracket by two guide pin bolts, usually accessed from behind, often 12mm to 14mm, and sometimes a Torx or hex head. Hold the slide pin itself with an open-end wrench if it wants to turn with the bolt. Back both out and set them somewhere clean.
Now lift the caliper off the pads. It may need a gentle rock to break free. Once it is loose, do not let it hang on the brake hose. That hose has an internal lining that can be damaged by the weight and the bend, and the damage is invisible from the outside. A hose with a collapsed internal lining can act as a one-way valve, holding pressure in the caliper so the brake drags, or it can fail later at speed. Support the caliper with a bungee cord, a purpose-made hook, or a loop of mechanic’s wire hung from the coil spring or strut.
Step 4 - Remove the Old Pads and Hardware
The pads slide out of the bracket. Note how they sit and which way any wear sensor faces before you pull them. Then pop the abutment clips out of the bracket. They are usually just spring-fit and come out with a flathead screwdriver.
Look at the old pads properly before you throw them away. Inner and outer worn evenly means the caliper was floating correctly. Inner worn much more than outer means the caliper is not releasing or the pins are dry. Tapered wear front to back on a single pad points to a sticking pad in the bracket, usually because of corroded hardware. This is free diagnostic information about the health of the caliper, and it tells you whether cleaning and greasing will fix it or whether you need a caliper.
Step 5 - Service the Slide Pins
This step is skipped more than any other and it is the leading cause of comeback failures. Pull each slide pin out of its bore. Wipe the old grease off, clean the pin with brake cleaner, and inspect it for pitting or corrosion. Clean the inside of the bore with a rag on a screwdriver or a small brush. Inspect the rubber boots: a cracked or torn boot lets water in and the pin will seize again within a year, so replace the boots if they are damaged.
Apply a thin, even film of high-temperature rubber-safe synthetic caliper grease to the pin and slide it back into the bore. It should move in and out smoothly with light finger pressure and it should not bind at any point in its travel. If it binds, it is not clean enough or it is corroded and needs replacing. Do not use copper anti-seize here. It is not compatible with the boot rubber over time and any of it that migrates to the friction surface contaminates the pad.
Step 6 - Clean the Bracket and Fit New Hardware
Wire brush the abutment surfaces of the bracket where the clips seat. Rust builds up under those clips and lifts them, which pinches the pad and stops it sliding. Get the surface down to clean metal, wipe it, and fit the new abutment clips from the hardware kit. They should snap into place and sit flat.
Put a small amount of caliper grease on the clip faces where the pad ears will ride and on the pad backing plate contact points. Nothing goes on the friction material or the rotor face.
Step 7 - Rotor Decision and Replacement
If your measurements said the rotor stays, clean the friction surface thoroughly with brake cleaner and a rag to remove the old transfer film and any oil from your hands. If the rotor is being replaced, remove the retaining screw if fitted (an impact driver helps enormously with those, they are usually seized), and pull the rotor off. Rusted-on rotors often need a few strikes with a dead blow hammer on the hat, never on the friction surface. Some have threaded jack holes for pushing them off.
Wire brush the hub face before fitting the new rotor. Rust or debris on the hub mounting face is a genuine cause of runout, which you feel later as a pulsation and blame on the rotor. New rotors ship with a protective oil coating that must be washed off completely with brake cleaner before installation, or the pads will glaze on first use.
Step 8 - Compress the Caliper Piston
For a front caliper, place a C-clamp with the screw against the piston face and the fixed jaw against the back of the caliper body, with one of the old pads as a spacer to spread the load evenly across the piston. Tighten slowly and watch the fluid reservoir. The piston should retract smoothly all the way into its bore. If it takes serious force or will not move, stop: that is a sticking piston and the caliper needs replacing.
Some vehicles have multi-piston front calipers where a spreader tool works better than a clamp because it pushes both pistons simultaneously.
Step 9 - Install the New Pads
Slide the new pads into the bracket, ears riding on the greased clips. They should slip in with light hand pressure and slide freely once seated. If a pad has to be forced in, something is wrong: either the clips are not seated flat or the bracket still has corrosion under them. Make sure any wear sensor tab is on the correct pad and facing the correct direction, which for most vehicles is the inner pad with the tab toward the trailing edge. Your photo from step 2 settles this.
Step 10 - Reinstall the Caliper and Torque Everything
Lower the caliper over the new pads, line up the guide pin bolts, and start them by hand to avoid cross-threading. Then torque them to spec with the torque wrench, not by feel. Guide pins are a low-torque fastener and they thread into aluminum on many vehicles.
If you removed the caliper bracket from the knuckle (for a rotor change), those bolts are a completely different and much higher spec. Some manufacturers specify them as torque-to-yield single-use bolts, so check your service data before reusing them.
Step 11 - Repeat on the Other Side, Then Refit the Wheels
Do the matching wheel on the same axle. Then mount the wheels, hand-start every lug nut to avoid cross-threading, and snug them in a star pattern with the wheel in the air. Lower the car until the tire just touches and the wheel cannot spin, then torque the lug nuts to spec in a star pattern, in two passes: about half torque all the way around, then full torque all the way around. Lower fully and remove the jack.
Step 12 - Pump the Pedal Before the Car Moves
This is the step that turns a good brake job into a driveway accident when skipped. With the engine off, press the brake pedal slowly and firmly. The first press will go far down, because you pushed the pistons all the way back and there is clearance to take up. Keep pumping until the pedal comes up firm and high, which usually takes five to fifteen strokes. Then start the engine and confirm it is still firm with vacuum assist.
Press it steadily and normally. Do not stomp it repeatedly to the floor. A master cylinder piston that has spent a decade traveling only in the top of its bore can tear a seal when it is suddenly dragged across the corroded lower section, and then you have a brake system that will not hold pressure and a much bigger job.
Check the fluid level one more time and top up to MAX with the correct DOT specification for your vehicle, which is printed on the reservoir cap.
Rear Brakes Are Not the Same Job
This is where most guides fall over. Rear disc brakes come in three fundamentally different designs, and the procedure for compressing the piston is completely different for each. Using the wrong one destroys a caliper. Identify which family you have before you take anything apart by looking at the back of the caliper.
Standard Push-In Rear Pistons
Some vehicles use a plain floating rear caliper with no parking brake mechanism integrated into it, usually because the parking brake is a separate small drum brake inside the rotor hat. If there is no cable and no electrical connector going into the caliper body, this is what you have.
The procedure is identical to the front: C-clamp or spreader, press the piston straight back, watch the fluid level. Nothing special required.
One thing to check while you are in there: if the parking brake is a drum-in-hat design, the rotor will not come off if the parking brake shoes are adjusted out or rusted against the drum surface. Back the adjuster off through the access hole in the rotor face before fighting it. And with the rotor off, look at the shoes. They rarely wear out but they do rust and delaminate on cars that sit.
Screw-In Rear Pistons (Cable Parking Brake)
If you see a steel cable running into a lever on the back of the rear caliper, the parking brake mechanism lives inside the caliper and acts on the piston through a screw. This is extremely common on sedans and crossovers from roughly the mid-1990s onward.
These pistons do not push in. They screw in. Inside the caliper is a threaded shaft and a nut assembly. To retract the piston you have to rotate it while applying inward pressure, which walks it back down the threads. On the large majority of vehicles the rotation is clockwise as you face the piston, but confirm against your service data because there are left-hand-thread exceptions.
Use a brake caliper wind-back tool. The cube-style kits come with a set of adapter plates carrying different pin and notch patterns, and you select the one that matches the recesses molded into your piston face. The tool applies inward pressure through a screw mechanism while you rotate, which is exactly the combination the design requires.
Force-compressing one of these with a C-clamp strips the internal threads. The damage is not always immediately obvious. What happens next is that the piston does not hold position properly, the parking brake never adjusts correctly, and the caliper has to be replaced. I have seen this exact failure more times than I can count, always from someone who reached for a C-clamp because that is what worked on the front.
Two more details on this design. The piston usually has to be rotated so its notches line up with the corresponding pin or tab on the back of the new inner pad. If the notches are not clocked correctly, the pad does not sit flat and the piston can chew the backing plate. And after installation, the parking brake needs to be applied and released several times to let the internal self-adjuster take up the new clearance, then the cable adjustment should be checked.
Electronic Parking Brake Calipers
If there is an electrical connector and a small motor housing bolted to the back of the rear caliper, you have an electronic parking brake. This design is now standard on most new vehicles and it is the one that costs people the most money.
The motor drives the piston out through a worm gear and a spindle. That gear train is a powered, one-way mechanism. It is not designed to be back-driven mechanically, and forcing the piston in with a clamp or a wind-back tool strips the worm gear or the spindle threads. The caliper is then scrap, and EPB calipers are meaningfully more expensive than conventional ones.
The correct procedure has three parts and all three are mandatory.
First, enter service mode. Before anything comes apart, the EPB module must be commanded into service, maintenance, or retract mode. This fully retracts the actuator and then locks the system out so it cannot re-apply while the caliper is off the car, which is important because an EPB that self-applies with the caliper in your hand is a genuine injury risk. A handful of vehicles have a manufacturer sequence through the instrument cluster or infotainment menus that does this, and it is worth checking your owner’s manual first. Most require a scan tool.
Second, use a scan tool with actual bidirectional control. This is the single most important tool decision on this page. A basic code reader that pulls and clears DTCs cannot do this, because entering service mode means sending a command to the module rather than reading data from it. You need a tool listing EPB service, EPB maintenance mode, or caliper retraction among its special functions, with confirmed coverage for your make and model. Coverage varies significantly between tools and between brands. Our roundup of the best OBD2 scanners identifies which units have genuine bidirectional EPB functions and which are code readers.
Third, re-initialize afterward, and this is the part almost nobody covers. Once the new pads are installed and the caliper is torqued back down, the system has to be taken out of service mode and re-initialized so the module relearns the actuator’s new home position against the thicker pads and re-calibrates its apply travel. Skip this and one of two things happens. Either the parking brake applies against the wrong reference and drags continuously, which cooks the new pads and the rotor within a few hundred miles, or it under-applies and does not hold the car on a grade. Both are done through the same scan tool that put the system into service mode. Some vehicles also require a short drive cycle with several parking brake applications for the adaptation to complete.
After re-initialization, test the parking brake before you drive anywhere: apply it, confirm the dash indicator, release it, and confirm the indicator goes out. Then on a gentle slope, confirm it actually holds the car.
Torque Specs: What Actually Needs a Torque Wrench
Three families of fasteners in a brake job carry a torque spec, and they carry very different numbers. Confusing them is a real failure mode, particularly the two caliper fasteners, which sit inches apart and are wildly different values.
| Fastener | Typical range | Notes |
|---|---|---|
| Caliper guide pin / slider bolts | About 18 to 35 lb-ft | Japanese and Korean compacts often 18 to 25. Domestic trucks and SUVs often 25 to 35. Frequently threaded into aluminum. |
| Caliper bracket / carrier-to-knuckle bolts | About 65 to 135 lb-ft | Passenger car front commonly 65 to 90. Trucks and SUVs commonly 100 to 135 or higher. Sometimes torque-to-yield and single use. |
| Wheel lug nuts | About 80 to 100 lb-ft passenger car, 100 to 140 lb-ft light truck and SUV | Star pattern, two passes. Check the door jamb sticker or owner’s manual. |
Every number in that table is a typical range, not your vehicle’s spec. Torque values are model-specific and sometimes differ between trim levels of the same car. Confirm against your vehicle’s own service data before you tighten anything. Lug torque in particular is often printed on the driver’s door jamb sticker or in the owner’s manual, and that is the authoritative source for your car.
The guide pin and the bracket bolt are not the same value, and this is the mistake that matters. They are the two fasteners you handle most in this job, they sit close together, and they can differ by a factor of four or more. Putting bracket-bolt torque on a guide pin threaded into an aluminum caliper ear strips it instantly. Putting guide-pin torque on a bracket bolt leaves the assembly that holds your brake to the knuckle dangerously loose. If you take only one thing from this page, take that.
A few practical points on using the wrench. Torque specs assume clean, dry threads unless the manufacturer specifies otherwise, so wire brush the bolt threads and the female threads before assembly. Pull the wrench smoothly to the click rather than jerking it, and stop at the first click without giving it an extra pull. Store a click-type wrench wound back to its lowest setting so the spring does not take a set and lose calibration. And once you have one on the shelf, use it for tire rotations too, because overtightened lug nuts are one of the most common causes of the rotor runout that people call warped rotors.
Bedding In New Pads
New pads do not work properly out of the box, and this is the step that gets skipped most often because the car seems to stop fine when you back out of the driveway. It will stop better, more consistently, and more quietly if you bed the pads in properly. This is what shops mean when they talk about break-in, and there is real physics behind it.
Why it matters. Friction in a disc brake is not primarily pad rubbing on iron. It is pad material rubbing against a microscopically thin layer of pad material that has transferred onto the rotor face. Bedding is the controlled process of laying that transfer layer down evenly across the entire swept area. Do it properly and you get consistent bite, quiet operation, and predictable pedal feel. Do it badly, or not at all, and the transfer film goes down in patches, which you feel as a pulsation and usually misdiagnose as a warped rotor. A large share of rotors replaced for warping are actually rotors with uneven deposits.
The procedure. Find a quiet, straight road with no traffic behind you. From about 35 mph, brake firmly and smoothly down to around 5 mph without coming to a complete stop, then accelerate back up. Repeat that six to ten times. You want moderate to firm pressure, enough to feel deceleration clearly, not an emergency stop. Then drive at moderate speed for a minute or two to let air move over the rotors.
Next, do two or three harder stops from around 55 mph down to about 15 mph, again without stopping completely. By the end of this you may smell the pads and that is normal. Then drive normally for five to ten minutes with as little braking as you can manage, so everything cools evenly.
Never come to a complete stop during the bedding cycle if you can avoid it, and this is the reason: holding a stationary pad against a rotor that is at bedding temperature presses a concentrated deposit into that one spot. That deposit is a raised high point you will feel through the pedal on every stop for the life of the rotor.
Do not park with the parking brake set while the rotors are hot. Same failure mechanism, worse, because the pressure stays on for hours. After bedding, and after any hard driving, park in gear or in park on level ground and let things cool before setting the parking brake. On an EPB-equipped vehicle where the parking brake applies automatically when you shift into park, drive gently for the last few minutes before you arrive.
Pad chemistry changes the specifics. Ceramic compounds generally bed in with less aggression and reach their working feel quickly, but they can feel slightly wooden for the first couple of hundred miles. Semi-metallic compounds want a more thorough bed-in with more heat, and they typically need higher operating temperature before showing their full bite, which is why they can feel less confident on a first cold morning stop. Some performance and track compounds have a specific manufacturer bed-in procedure printed in the box that supersedes anything here. If the box has instructions, follow the box.
Expect the first few hundred miles to feel slightly different from what you are used to, and expect some minor noise as everything settles. Persistent squealing after several hundred miles is not break-in, it is usually hardware or lubrication, and it means going back in.
If you are choosing compounds and want the trade-offs laid out by driving type, our roundup of the best brake pads covers ceramic versus semi-metallic in practical terms rather than marketing terms.
Reading Your Rotors: Minimum Thickness, Resurface or Replace
The rotor decision is a measurement, not an opinion, and the measurement is easy to take.
Find the spec on the rotor itself. Every rotor sold in the US has its minimum thickness cast or stamped into the hat, the raised center section, usually marked MIN TH, MIN THK, or listed as a discard thickness in millimeters. Sometimes it is on the outer edge instead. There is no universal number and anyone who quotes one is guessing. A compact car rotor and a three-quarter-ton truck rotor have nothing in common. Find yours.
Measure with a micrometer, not calipers. A rotor wears a groove into its face, so a standard caliper measuring across the outer edge reads the unworn lip rather than the friction surface. A micrometer, ideally one with a pointed or ball anvil that can reach into the swept area, gives the real number. Measure at four to six points around the rotor, roughly half an inch in from the outer edge, and use the smallest reading. While you are there, note the spread between your highest and lowest readings, because significant variation is thickness variation and it causes pulsation on its own.
Then apply the decision rule. If the measurement is at or below the stamped minimum, the rotor is finished. Machining cannot add metal. If it is above minimum but a resurfacing pass would leave it within about 0.060 inch of the discard spec, replace it instead. A rotor that thin has less thermal mass, which means it heats faster, cools slower, and is far more likely to develop the deposits and distortion that cause pulsation. It also will not survive the life of the pads you are installing, which means doing the job twice.
The practical reality is that most modern rotors are not resurfaceable at all. Manufacturers have reduced rotor mass steadily for weight and cost, and a great many rotors leave the factory only a few thousandths above their own discard spec. There is nothing to cut. That is why the industry shifted to replacing rotors as a wear item alongside pads, and why replacement rotors have become relatively inexpensive.
Replace regardless of measurement if you find deep scoring you can catch a fingernail in, heat checking (fine radial cracks in the friction surface, often near the vane slots), blue or straw-colored heat discoloration, a raised lip at the outer edge tall enough to catch on, rust pitting on the friction face from a vehicle that sat, or any crack of any size. Any crack means the rotor comes off the car and does not go back on.
Always replace rotors in axle pairs, same reasoning as pads. Mismatched rotor conditions across an axle means mismatched braking force.
The Mistakes That Turn a Brake Job Into a Brake Repair
Skipping the slide pins. This is number one by a wide margin. Dry or corroded pins stop the caliper from floating, which loads the inside pad far harder than the outside pad. The customer comes back in six months with an inner pad worn to the backing plate and a rotor scored on one face. Clean, inspect, and re-grease both pins every time, and replace any boot that is cracked or torn.
Reusing the old hardware. Anti-rattle clips are stamped steel that loses tension and hides corrosion underneath. A pad that cannot slide freely in its bracket squeals, drags, and wears unevenly. The kit costs a fraction of what a caliper costs. Fit it.
Using copper anti-seize on brake hardware. It shows up constantly in forum advice and it is the wrong product. It is not formulated to sit against caliper boot rubber long term, and any transfer to the friction surface permanently contaminates the pad. Use a high-temperature rubber-safe synthetic or silicone caliper grease, on slide pins, pad ears, abutment clips, and backing plate contact points only. Never on the friction face and never on the rotor.
Hanging the caliper by its brake hose. The hose has a reinforced internal lining, and the weight of a caliper plus a tight bend can damage that lining without leaving any visible mark on the outside. The failure shows up later, either as a caliper that drags because the damaged lining traps pressure, or as a hose that lets go under hard braking. Use a hook, a bungee, or a wire loop over the spring.
Forcing a screw-in or EPB piston. A C-clamp on a screw-in rear caliper strips the internal threads. A C-clamp on an EPB caliper strips the worm gear. Both are new-caliper mistakes made in about four seconds. Identify the design first.
Forgetting the EPB re-initialization. Getting into service mode is the part people research. Coming back out and letting the module relearn pad thickness is the part they forget, and the consequence is a parking brake that drags and eats the new pads or one that will not hold the car on a hill.
Not pumping the pedal before driving. The first press after a pad change goes to the floor because the pistons were fully retracted. Pump it to a firm pedal with the car stationary, and do it with normal steady pressure rather than repeatedly stomping it, which can tear a master cylinder seal that has not traveled that far in years.
Guessing at torque. Guide pins and bracket bolts are different values by a large multiple, and lug nuts have their own. Overtightened lugs distort rotors. Undertightened bracket bolts let the brake move on the knuckle. A torque wrench removes all of it from the realm of opinion.
Doing one side only. Both sides of an axle, always. Mismatched friction across an axle makes the car pull under hard braking.
Getting anything oily on the friction surface. Brake cleaner is cheap. Wipe new rotors free of their shipping coating, keep greasy fingers off pad faces, and clean anything that gets contaminated before it sees heat. A contaminated pad glazes and never fully recovers.
What the Shop Charges Versus Doing It Yourself
The economics here are better than almost any other DIY job on a car, and it is not close. A shop brake job bills two things: parts at a substantial markup over what you can buy the same parts for, and labor at an hourly rate for work that takes an experienced tech well under an hour per axle. Doing it yourself removes the labor line entirely and lets you buy the parts at retail, and the savings on a single axle typically cover the cost of a torque wrench and a jack stand set outright. From the second brake job onward, the tools are already paid for and it is pure savings, repeated every time the pads wear out for as long as you own cars.
There is a quality argument too, and I say this as someone who runs a shop. When you do it yourself you know the slide pins were cleaned and greased, because you did it. You know the hardware kit went in, because you fitted it. You know the fasteners were torqued rather than run down with an impact gun, because you used a wrench. Those are exactly the steps that get compressed when a technician is paid by the flat-rate hour and the job pays 0.8 hours. I am not accusing anyone of cutting corners, but I know what the pressure of a flat-rate book does to a brake job, and the difference between a fast one and a thorough one is entirely in the details this guide spends its time on.
The other real return is diagnostic. Having the wheels off and looking at every corner of the car once or twice a year catches things nobody would otherwise see until they became expensive: a weeping shock, a cracked CV boot, a tire wearing on one shoulder, a rusted brake line. Our essential tools for DIY car maintenance guide lays out the kit that makes those inspections routine, and the car maintenance schedule puts brake inspection in context with everything else the car needs. If you already do your own oil changes, brakes are the natural next step up.
Where a shop genuinely earns its money is the work beyond pads: a hydraulic repair, a seized caliper on a rusty vehicle where the bolts snap, a brake line replacement, an ABS fault, or a full fluid flush with a bleeder. Knowing where your line is drawn is part of doing this well.
Final Thoughts from the Shop
If you take three things from this page, take these.
Identify your rear caliper design before you buy a single part. Push-in, screw-in, or electronic. That one answer determines your tools, your procedure, and whether the job ends with a working car or a destroyed caliper. It takes thirty seconds of looking at the back of the caliper.
Service the slide pins and replace the hardware every time. These are the two cheapest steps in the job and they prevent the two most common failures I see come back, which are uneven pad wear and persistent squeal. A hardware kit costs a fraction of what a caliper costs, and a tube of caliper grease lasts you years.
Torque everything, and know that the guide pin and the bracket bolt are different numbers. This is the safety-critical part. There is no experienced feel that substitutes for a calibrated wrench on the bolts that hold your brakes to your car, and confirming the values against your own vehicle’s service data takes less time than looking for a socket.
Beyond that, take your time, work one axle at a time, keep the car on stands rather than a jack, and do not talk yourself past something that looks wrong. A leaking caliper, a seized pin, or a bulging hose is the job telling you it is bigger than pads, and there is no shame in loading it up and letting someone else finish it. Choosing quality friction material for how you actually drive matters more than most people think, and our best brake pads roundup covers what is worth installing.
Do this once carefully and you will never look at a brake quote the same way again. Do it well and the car will stop better than it did when it left the shop last time, because you will have done the parts of the job that the flat-rate clock does not pay for.
Buyer's Guide
Six things decide whether this job goes smoothly on your specific vehicle or turns into a Saturday you regret. Work through all six before you buy a single part, because every one of them changes either what you need to purchase or whether you should be doing the job at all.
Which Rear Caliper Design You Have
This is the question that determines the entire shape of the rear brake job, and it has three possible answers. Standard push-in rear calipers behave exactly like the front: the piston compresses straight back into its bore with a C-clamp or a spreader, and the job is no harder than a front brake job. Screw-in rear calipers, found on a great many vehicles with a cable-operated parking brake integrated into the rear caliper, require the piston to be rotated as it is pressed, typically clockwise, using a wind-back cube tool with the correct adapter face to engage the notches or pins in the piston. Force-compressing one of these strips the internal threads and ruins the caliper. Electronic parking brake calipers have a motor bolted to the back and must be commanded into service or retract mode with a scan tool before the piston can be moved at all, then re-initialized afterward. Identify which one you have before you order parts. Look at the back of the rear caliper: a cable running into it means screw-in, an electrical connector and a motor housing means EPB, neither means push-in. Getting this wrong is the difference between a two-hour job and a new caliper.
Pads Only, or Pads and Rotors
Decide this before you start, not halfway through with the wheel off and the parts store closed. Find the minimum thickness cast into the rotor hat, measure the rotor with a micrometer at several points, and compare. If the rotor is at or under the discard spec it must be replaced. If machining it would leave it within roughly 0.060 inch of that spec, replace it rather than resurface, because a rotor that thin cannot manage heat and will not last the life of the new pads. Beyond the measurement, replace on condition: deep scoring you can catch a fingernail in, heat checking, blue discoloration, a pronounced edge lip, or rust pitting on the friction face all mean the rotor is done regardless of what the micrometer says. Most modern rotors are cast too close to minimum to survive a machining pass anyway, which is why the industry has largely moved to replacing them. Buying rotors up front costs less than a second trip and a second afternoon, and new pads bedded onto a scored rotor will never develop the even transfer film they need.
The Torque Wrench Question
If you do not own a torque wrench and are not willing to buy one, do not start this job. That is not gatekeeping, it is the one hard prerequisite. The caliper bracket bolts are what physically hold the brake assembly to the steering knuckle, and they are torqued high, commonly in the range of 65 to 135 lb-ft depending on the vehicle. Undertighten them and the bracket works loose under repeated braking loads. Overtighten and you stretch or snap a bolt that is threaded into an expensive casting. Guide pins are much lower, typically around 18 to 35 lb-ft, and stripping one of those in an aluminum caliper ear is its own bad afternoon. Lug nuts have their own spec and their own consequences, since overtightening them is a leading cause of warped rotors and stretched studs. A click-type wrench covering roughly 20 to 150 lb-ft handles every fastener in this job. Every number here is a typical range and must be confirmed against your vehicle's own service data, with lug torque cross-checked against the door jamb or owner's manual.
The Right Pad Compound for How You Actually Drive
Pad compound changes the character of the brakes more than any other choice you make here, and the right answer depends on the vehicle and the driver rather than on price. Ceramic compounds run quiet, produce light-colored dust that does not bake onto wheels, and are the sensible default for a commuter car or family sedan driven normally. They can feel slightly less aggressive when cold and they are not the right choice for sustained heavy loads. Semi-metallic compounds bite harder, tolerate heat far better, and are the correct choice for a truck that tows, a heavy SUV, mountain driving, or anything carrying real weight. They trade that for more noise, more visible dust, and somewhat faster rotor wear. Organic and low-metallic compounds sit between the two and suit light vehicles driven gently. Whatever you choose, buy the pair for the axle from a single manufacturer and a single product line, because mixing compounds across an axle produces uneven bite. And do not switch compounds without expecting a break-in period where the feel is different from what you are used to.
Hardware and Lubricant
The hardware kit is the cheapest part of this job and the most frequently skipped, which is why brake noise complaints are so common after a DIY pad change. Anti-rattle clips and abutment hardware are thin stamped steel that loses spring tension over tens of thousands of heat cycles and traps corrosion underneath itself. A pad riding on a rusted, flattened clip cannot slide freely in the bracket, so it drags, squeals, and wears unevenly. Replace them with the new pads, every time. Most quality pad sets include them. On lubricant, use a high-temperature synthetic or silicone-based brake caliper grease that is explicitly rated as rubber-safe, applied to the slide pins, the pad ears where they contact the abutment clips, and the backing plate contact points. Do not use copper anti-seize on brake hardware. It is not formulated for long-term contact with caliper boot rubber, and any migration onto the friction surface contaminates the pad permanently. Nothing goes on the friction face or the rotor. If grease touches either one, clean it with brake cleaner before it sees heat.
Knowing When to Stop and Call a Shop
Several discoveries during a brake job mean the work has grown past a pad replacement, and recognizing them is worth more than any amount of enthusiasm. A caliper piston that will not retract with the correct tool, or a slide pin seized solidly in its bore, means a stuck caliper that needs replacing rather than servicing. Any wetness on the caliper body, the inside of the wheel, or the inner face of the tire points to a leaking piston seal or a weeping hose, and a hydraulic leak in a brake system is not something to drive on. A brake hose that is cracked, bulging, chafed, or swollen needs replacement and a full system bleed afterward. A brake fluid reservoir with dark, cloudy fluid or visible sediment means the fluid is contaminated and overdue for a flush. A rotor that will not come off after the retaining screws are out and it has been struck properly is often a seized hub or a rusted parking brake shoe inside a hat-style rotor. And if you find damage to a hard line, a wheel bearing with play, or a bolt that has stripped its threads in the knuckle, stop there. Brakes are the one system where getting it mostly right is not a passing grade.
Frequently Asked Questions
What are the most common mistakes when changing brake pads?
What should you do immediately after changing brake pads?
Should you replace brake pads on both sides at once, or all four?
How do you know if your rotors need resurfacing or replacing?
Do rear brakes with an electronic parking brake need a special tool?
Related Articles
7 Best Brake Pads of 2026
maintenance-parts
Car Maintenance Schedule: What to Replace and When (2026 Guide)
maintenance-parts
How to Change a Flat Tire: A Master Tech's Roadside Walkthrough (2026)
maintenance-parts
Essential Tools for DIY Car Maintenance: An ASE Master Tech's Honest Guide (2026)
tools-car-owners
How to Change Spark Plugs: An ASE Master Tech's Step-by-Step Guide (2026)
maintenance-parts
About the Reviewer
Mike Reeves, ASE Master Technician
A.A.S. Automotive Technology, Universal Technical Institute (UTI)
Mike Reeves is an ASE Master Technician with 15 years of hands-on experience in automotive repair and diagnostics. He earned his A.A.S. in Automotive Technology from UTI and runs his own independent shop in Denver, Colorado. Mike founded RevRated to help everyday car owners make smarter parts decisions -- every recommendation comes from real-world testing in his garage.