How to Prepare Your Car for a Long Road Trip: An ASE Master Tech's Pre-Trip Inspection (2026)
An ASE Master Tech's complete guide to preparing your car for a long road trip — the two-week timeline, the tire, fluid, cooling, battery, and brake checks that prevent breakdowns, loaded-vehicle and towing prep, and what NOT to do the night before you leave.
Updated
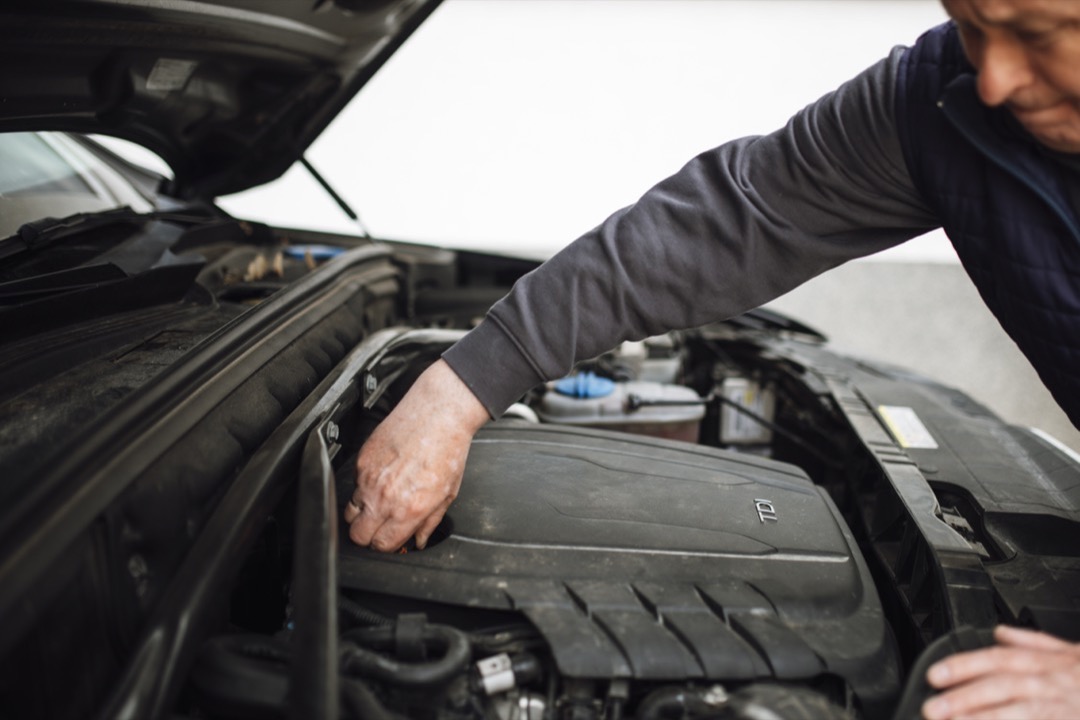
The worst road-trip call I ever took came in on a Saturday in July. A family of five, three states into a drive to a national park, sitting on the shoulder of a two-lane highway with the temperature gauge pinned and steam rolling out from under the hood. The dad had done everything right about the trip except the car — routes planned, hotels booked, a cooler packed with snacks — and never once opened the hood before they left. A heater hose that had been quietly weeping for months finally split under the sustained heat of a long climb, dumped the coolant, and cooked the engine before he could get stopped. The tow, the hotel while they waited, the rental to finish the trip, and eventually the engine work ran into thousands of dollars. The hose was an eleven-dollar part I could have handed him across the counter two weeks earlier, and the split was visible to anyone who squeezed it.
That is the thing about preparing a car for a long trip: almost every failure that strands a family on the side of the road was visible, predictable, and cheap to prevent before they left. A road trip does not create new problems — it takes the marginal components you have been getting away with around town and subjects them to the three things they cannot survive: sustained high speed, sustained heat, and hundreds of extra pounds of load, for hours at a time, far from any shop that knows your car.
I am Mike Reeves, an ASE Master Technician with over twenty years on the shop floor, and this is the pre-trip preparation I walk every customer through before a big drive. It is not the packing list — for the gear, the emergency kit, and what to load in the trunk, see our full road trip essentials checklist, which covers all of that in order. This guide is about the car itself: the mechanical inspection, the fluids, the systems that fail on the highway, and the honest decisions about what to fix now versus what can wait. Do this once, two weeks before you leave, and your car becomes the part of the trip you never have to think about.
Pre-Trip Prep at a Glance
The whole inspection in one scannable table. Detail by section follows — skip to whatever matters most for your car and route.
| System | What to Check | DIY or Shop | When |
|---|---|---|---|
| Tires — pressure | Set cold to door-jamb spec (loaded pressure if packing heavy) | DIY — gauge and inflator | Morning you leave |
| Tires — tread | Above 4/32”, even wear across the tread | DIY — quarter test | Two weeks out |
| Tires — age and condition | DOT date code under 6 years, no bulges or cracks | DIY — visual | Two weeks out |
| Spare tire | Inflated, present, and the tools are in the car | DIY — check pressure | Two weeks out |
| Engine oil | Change if due or coming due mid-trip; top off if low | DIY or shop | One week out |
| Coolant | Full, correct color, correct freeze/boil protection | DIY visual + tester | Two weeks out |
| Brake fluid | Full, not dark; flush if over 2 years old | DIY or shop | Two weeks out |
| Transmission fluid | Correct level, clean, especially if towing | DIY or shop | Two weeks out |
| Washer fluid | Full — you will use more than you think | DIY — top off | Morning you leave |
| Battery | Load test, clean tight terminals, under 5 years old | DIY (free at parts store) | Two weeks out |
| Brakes | Pad thickness above 4mm, no pulsing or noise | DIY visual or shop | Two weeks out |
| Belts and hoses | No cracks, glazing, soft spots, or weeping | DIY — visual and squeeze | Two weeks out |
| Air conditioning | Blows genuinely cold on a hot day | DIY test, shop repair | Two weeks out |
| Lights | All exterior lights, high and low beam, brake, signals | DIY — walk-around | Two weeks out |
| Wipers and glass | Clean sweep, no streaking, no chips spreading | DIY — replace blades | Two weeks out |
| Check engine light | Read any codes; diagnose before leaving | DIY scanner or parts store | Two weeks out |
| Shakedown drive | 20–40 local miles to confirm all repairs | DIY | 2–3 days out |
Now the detail.
Start Two Weeks Out, Not the Night Before
The single most important decision about preparing your car is when you do it, and the answer is two weeks before departure — not the night before, and not the morning of. The reason is simple: the inspection itself takes about an hour, but the repairs it might uncover need lead time you do not have if you inspect the night before.
Here is the rhythm I recommend. Two weeks out, do the full inspection below and schedule any shop work you cannot do yourself — good shops book up, and walking in on Thursday needing brakes by Saturday is how you end up overpaying or leaving on parts you do not trust. One week out, complete the DIY repairs and any fluid changes, so anything fresh has time to be driven and rechecked. Two or three days out, take a short shakedown drive of 20 to 40 local miles to confirm every repair is holding — no leaks, no noises, no warning lights — because you want to discover a bad drain plug or an air pocket in the cooling system in your own town, not on a mountain pass. The morning you leave, recheck tire pressures and fluid levels while everything is cold.
That sequence is the whole reason to prepare early: it converts “the car broke down on the trip” into “the car needed a hose, and I replaced it on a Tuesday.” A proper maintenance schedule tells you what should already be current; the pre-trip inspection catches what slipped through.
Tires: The Biggest Road-Trip Failure Point
If you do nothing else on this list, do the tires. More highway breakdowns and roadside emergencies trace back to tires than to any other single system, and every one of the failure modes — underinflation, worn tread, old rubber, ignored sidewall damage — gets dramatically worse under the exact conditions a road trip creates: high speed, high heat, and a heavy load, for hours.
Pressure — Cold, to the Door-Jamb Number
Set your tire pressure when the tires are cold, before you have driven anywhere, using the number on the sticker inside the driver’s door jamb — not the number molded into the tire sidewall, which is the maximum the tire can hold, not what your car wants. If you are loading the car heavily or towing, check whether your manual lists a higher loaded-vehicle pressure and use that. A tire loses about a pound of pressure a month just sitting, more as temperatures swing, and an underinflated tire on a loaded car in summer heat builds heat until the structure fails. Temperature matters more than people realize: tire pressure moves roughly a pound for every 10 degrees of ambient change, so a car aired up in a cool 50-degree morning garage is meaningfully low by the time it is sitting on 95-degree desert pavement, and vice versa. If your trip crosses a big temperature or elevation swing, recheck the pressures at the far end — do not treat it as a one-time setting. A good digital tire pressure gauge and a portable inflator in the car mean you can reset pressures anywhere on the trip, not just in the driveway — and you will want to, because heat and altitude both move the numbers. Our full tire pressure guide walks through exactly why the door-jamb number is the one that matters.
Tread, Age, and Sidewalls
Check tread depth with a quarter — insert it upside down, and if you can see the top of Washington’s head, you are below 4/32 of an inch and the tire is done for a long wet-weather trip. Look for uneven wear across the tread, which points to alignment or pressure problems worth fixing before a long drive. Then check age: every tire has a DOT date code on the sidewall ending in four digits — the week and year it was made — and rubber degrades with time whether you drive on it or not. Any tire past six years old should be replaced before a road trip regardless of how much tread is left, because old rubber fails from the inside. Finally, run your hand around each sidewall feeling for bulges, cracks, or embedded objects. A bulge is a broken belt and a blowout waiting for the right pothole.
The Spare You Forgot You Have
Check the spare. It lives under the trunk floor or under the truck bed slowly losing air for years, and the moment you need it on the side of a highway is the worst possible time to find out it is flat. Confirm it holds pressure, confirm the jack and lug wrench are actually in the car, and if your car came with an inflator-and-sealant kit instead of a spare, make sure the sealant has not expired. One thing most drivers never learn until it is too late: if your spare is a compact “donut,” it is not a real tire. Those are rated for roughly 50 miles per hour and about 70 miles of use — enough to limp to a tire shop, not enough to cross a state. If you are heading into remote country on a donut, the plan has to be “get to the nearest town and buy a real tire,” not “drive on it to the destination.”
Fluids: Change What’s Due, Top Off the Rest
A road trip is a bad time to be low on anything the engine depends on. Go through the fluids in order.
Engine Oil — Do the Math, Not the Worry
Do not reflexively change good oil because you are nervous. First, pull the dipstick and read what is on it — this is a free diagnostic most people skip. Clean amber-to-brown oil at the right level is healthy. Oil that looks like a chocolate milkshake, milky and light-colored, means coolant is getting into the oil, which points to a head-gasket or cooler failure — that is a do-not-drive condition, not a road-trip condition, and it needs diagnosis before you go anywhere. Assuming the oil is healthy, look at your interval and your trip length and do the arithmetic: if you will finish the trip comfortably inside your oil-change interval, leave it alone — highway miles are the easiest miles an engine ever does. If the trip will push you past the interval, change it about a week out so you can confirm there are no leaks from the drain plug or filter before you rely on it. If you do change it, use the correct viscosity from your manual and a quality filter; a fresh full synthetic with a good oil filter gives you the longest runway and the best cold-start protection if your route hits mountains or cold nights. If you do your own, our DIY oil change guide covers it step by step.
Coolant — The Long-Climb Killer
The cooling system is what fails on long grades in summer, and it is the failure that cooks engines. Check that the coolant reservoir is between the min and max marks when the engine is cold, that the coolant is clean and the correct color for your car (not rusty, not muddy, no floating particles), and that it is providing the right freeze and boil protection — a cheap tester or refractometer tells you in seconds. If the coolant is old, dark, or you cannot remember the last flush, do it before the trip. Squeeze the radiator hoses cold: they should be firm, not mushy or rock-hard, and they should not be weeping at the clamps — a weeping heater hose is exactly what stranded that family from the top of this article. Top off or replace with the correct coolant and antifreeze specification for your car; mixing types is its own expensive mistake.
Brake and Transmission Fluid
Brake fluid absorbs moisture over time, which lowers its boiling point, and a long mountain descent under a loaded car is precisely when you do not want brake fluid boiling. If it has been more than two years since a flush, do it before the trip; if the fluid in the reservoir is dark, that is your answer. Transmission fluid matters most if you are towing or loading heavy — check the level and condition per your manual, and if it is low or burnt-smelling, address it before you ask the transmission to pull a loaded car over a pass. Also top off the washer fluid; between bugs, road spray, and rain you will use more than you expect, and a smeared windshield at highway speed is a real safety problem.
Battery: “It Started Fine” Is Not a Test
The number one cause of “the car just died” calls is a marginal battery, and the fact that it started fine in your driveway this morning tells you almost nothing. A battery that reads a healthy voltage at rest can still collapse under load, and heat is as hard on batteries as cold — a summer road trip is a genuine test.
Get a load test, which most auto parts stores do free in about ten minutes. It applies a real cranking load and watches whether the voltage holds. While you are there, clean the terminals if there is any corrosion and make sure the clamps are tight — a lot of “dead battery” no-starts are actually just a loose or corroded connection. If the battery is more than five years old, or the load test comes back marginal, replace it before the trip rather than gambling on it in an unfamiliar parking lot. And regardless of battery condition, carry a portable jump starter — a lithium jump pack the size of a paperback means you are never dependent on a stranger’s cables in an empty lot. If you have never used one, our guide to jump starting a car safely walks through it.
Brakes: Stopping a Loaded Car on a Grade
Your brakes have to stop a heavier car than usual, and on a long descent they have to do it repeatedly without overheating. This is not the time for marginal pads. Look through the wheel spokes at the brake pads — if you can see less than about a quarter inch (4mm) of pad material against the rotor, they are getting thin. Take note of any pulsing through the pedal (warped rotors), any grinding or squealing (worn pads or hardware), or a pedal that feels soft or sinks (a hydraulic or fluid problem). Any of those needs attention before a trip, and brake work is one of the honest shop jobs if you are not equipped for it. If you do need pads, do it early enough to bed them in with a couple hundred local miles — fresh brake pads need a heat cycle or two to reach full bite, and you do not want to learn that on the first mountain grade.
Belts, Hoses, and the AC You’ll Depend On
Open the hood and look at the serpentine belt: cracks across the ribs, glazing (a shiny, hard surface), or fraying edges all mean it is due, and a belt that snaps on the highway takes your charging and often your water pump with it. Press down on the belt at the longest span between two pulleys — a healthy belt gives about half an inch and springs back; if it deflects much more than that, the tensioner is weak and the belt is slipping, which is its own overheating and charging problem. Squeeze every hose you can reach, cold — they should be firm and springy, not mushy (breaking down inside) or rock-hard (baked and brittle). Look for weeping or crusty residue at the clamps and connections. On an older car these rubber parts are the classic road-trip failures, because heat and age are exactly what kill them and a long summer drive delivers both.
Then test the air conditioning on a hot day before you commit to a long summer drive with a full car. It should blow genuinely cold within a minute, not just cool-ish. Weak AC on a 95-degree interstate with kids in the back is more than a comfort problem — it is a fatigue and safety problem for the driver. AC service is a shop job, but catching it two weeks out means you can get it fixed instead of suffering through the trip.
Lights, Wipers, and Visibility
Do a walk-around with the car running and someone to help, or use a wall or garage door as a mirror: check both headlights on low and high beam, both tail lights, brake lights, reverse lights, all four turn signals, and the license plate light. A burned-out bulb is a cheap fix and a common reason for getting pulled over in an unfamiliar state. Replace windshield wipers that streak or chatter — you will drive through weather you did not plan for, and a smeared windshield into a setting sun or a downpour is genuinely dangerous. Fill the washer reservoir, clean the inside of the glass (interior film is what causes the worst glare), and if you have a chip in the windshield, get it filled before the trip so highway vibration and temperature swings do not spread it into a crack.
Read the Check Engine Light Before You Leave
If your check engine light is on, do not guess and do not ignore it — read the code before you leave. Most auto parts stores will scan it free, or you can read it yourself with an OBD2 scanner in the driveway. A steady light with a benign, known code (a minor evap fault, for instance) is usually a “fix it when you get back” problem. A flashing light means an active misfire that can destroy your catalytic converter within minutes and is a stop-now condition. Any code touching misfires, cooling, or the transmission should be diagnosed and fixed before a long drive. Five minutes with a scanner removes all the guessing about whether that light is trivial or trip-ending.
Match the Prep to the Load and the Route
Two variables change everything and most checklists ignore both. The first is load. A fully packed car with passengers, a roof box, and a loaded trunk can weigh hundreds of pounds more than your daily commute, and that weight raises tire pressure and heat, lengthens braking distance, and makes the engine and transmission work harder on grades. If you are loading heavy or towing, move to the manufacturer’s loaded-vehicle tire pressures, take the cooling and transmission checks seriously, make sure the brakes are in genuinely good shape, and mind your weight distribution — a tail-heavy car or a badly balanced trailer gets unstable at highway speed.
The second is the route. Mountains mean sustained load on the cooling system going up and sustained heat in the brakes coming down, so both need to be right. Desert heat in summer is the hardest test your cooling system, tires, and battery will ever face. Cold or high altitude asks more of your battery and your oil. Pull up your actual route — elevation, expected temperatures, how remote the empty stretches are — and weight your inspection toward whatever that terrain will stress. The prep that gets a car across flat Midwest interstate in October is not the prep that gets it over the Rockies in July with four people and a rooftop carrier.
What NOT to Do Right Before a Road Trip
Just as important as the checklist is the short list of things not to do in the final days:
- Do not schedule major mechanical work for the day before you leave. Fresh repairs occasionally need a follow-up, and you want to find that out at home. Do the work a week out and drive it locally first.
- Do not mount brand-new tires the morning of departure. New tires have a slippery mold-release film for the first 50 to 100 miles and need a gentle break-in; put them on early and drive them locally before the highway.
- Do not do a fresh brake job and leave immediately. New pads need a couple hundred miles to bed in — do it early enough to seat them before you rely on them on a grade.
- Do not top off with the wrong fluid in a hurry. Mixing incompatible coolant types or using the wrong brake fluid causes expensive damage. If you are not sure, use exactly what the manual specifies.
- Do not overload past the door-jamb weight rating just because there is physical space. Exceeding the vehicle’s load rating overstresses tires, brakes, and suspension.
- Do not pack a can of aerosol tire sealant as your only flat fix. The Fix-a-Flat approach coats the inside of the tire and frequently ruins the TPMS pressure sensor, which is a costly replacement, and it makes a proper plug repair harder afterward. A ten-dollar tire plug kit and a 12-volt inflator fix most punctures cleanly and leave the sensor alone.
The In-Car Setup and Emergency Kit
Once the car itself is ready, spend a few minutes on the cabin so the drive is safe and comfortable. Clean it out — a car vacuum and a quick wipe-down make a long drive far more pleasant and let you actually find things. Set up navigation and charging so nobody is fumbling with a phone at 75 miles an hour: a solid phone mount and enough charging for every device keeps the driver’s eyes on the road. Many road trippers also add a dash cam for the drive, which is worth having if anything happens on an unfamiliar highway. And make sure a real roadside emergency kit is in the trunk — a jump pack, a tire plug kit and inflator, a light, and basic tools. For the complete gear and packing list, including the full emergency kit and everything to load for the passengers, follow our road trip essentials checklist — this guide got the car ready; that one gets you ready.
Final Word from the Shop
Preparing a car for a long trip is not complicated and it is not expensive — it is an hour of inspection two weeks out and the discipline to fix what you find while you still have time. Every stranded family I have helped over the counter had a car that told them what was wrong before they left: a weeping hose, a marginal battery, a bald tire, a brake pulse they had been ignoring. The road trip did not break the car. The road trip just collected on maintenance that had been overdue.
Do the inspection early, fix what is due, take a short shakedown drive, and recheck your tires cold the morning you leave. Do that, and the car becomes the one part of the trip you never think about — which, after twenty years under hoods, is exactly how I want a customer’s car to be when they pull out of the driveway with the whole family aboard. Safe travels.
Buyer's Guide
How much preparation your car actually needs before a long trip depends on six things. Read these first — they tell you which sections of the inspection matter most for your specific car, route, and load.
Vehicle Age and Mileage
A three-year-old car with 30,000 miles and a full dealer service history needs a light pre-trip check — tires, fluid levels, a battery test, and a visual once-over. A ten-year-old car with 140,000 miles needs the full inspection and an honest look at the wear items that fail with age: original belts and hoses that have gone hard and cracked, a battery that is almost certainly on borrowed time, brake components that have seen a lot of heat cycles, and suspension parts that get exercised hard on long drives. The failures I see strand people on road trips are disproportionately in older, higher-mileage cars where a marginal component that was tolerable around town finally let go at highway speed and highway heat. If your car is past 100,000 miles, budget more time for the inspection and take the belts, hoses, and cooling system seriously — those are the classic older-car road-trip failures. Newer cars mostly need you to confirm nothing is due and top off what is low.
Trip Distance and Duration
A 300-mile weekend trip and a 3,000-mile cross-country haul are different risk levels, and your prep should scale with the exposure. On a short trip you are rarely more than a couple hours from home or a familiar shop, so the cost of a small problem is low. On a long trip you will be in unfamiliar territory, possibly in remote stretches with no cell service and no nearby dealer, and every mile is a mile farther from help — so the value of catching a problem before you leave goes way up. Long trips also mean your maintenance intervals matter: a 3,000-mile trip can push you clean through an oil-change interval or a tire-rotation interval mid-drive, so you need to look ahead on your maintenance schedule and get ahead of anything that will come due on the road. The longer and more remote the trip, the more the inspection shifts from 'nice to have' to 'the thing standing between you and a very bad day.'
Route Terrain and Climate
Where you are driving changes what breaks. A flat interstate run in mild weather is the gentlest thing you can ask of a car. A route that climbs mountain passes puts sustained heavy load on the engine, cooling system, transmission, and brakes — long climbs cook the cooling system and long descents cook the brakes, so both need to be in genuinely good shape, not just passable. A route through desert heat in summer is the hardest test your cooling system, tires, and battery will ever face; heat is what turns a marginal component into a failed one. A route through cold or high altitude asks more of your battery and your oil's cold-flow. Look at your actual route — elevation profile, expected temperatures, remoteness — and weight your inspection toward the systems that terrain will stress. Mountains mean brakes and cooling; deserts mean cooling, tires, and battery; cold means battery and oil.
Vehicle Load and Towing
How heavily you load the car is one of the biggest and most-ignored variables. A fully packed car with four passengers, a loaded roof box, and a trunk full of gear can weigh 600 to 1,000 pounds more than your normal solo commute, and that weight raises tire pressure and heat, lengthens braking distance, and makes the engine and transmission work harder on grades. Towing multiplies all of that. If you are loading heavy or towing, you need to move to the manufacturer's loaded-vehicle tire pressures, take the cooling and transmission checks seriously, and make sure your brakes are in real (not marginal) condition. You also need to think about weight distribution — an overloaded rear or a badly balanced trailer changes how the car handles at highway speed. Match your prep to the loaded weight of the vehicle as it will actually travel, not to how it feels empty in your driveway.
Your DIY Skill and Tools
Most of the pre-trip inspection is DIY-friendly with basic tools and an hour in the driveway — checking tire pressure and tread, topping off and inspecting fluids, testing the battery, and doing a visual on belts, hoses, brakes through the wheel spokes, and lights. Some of the repairs the inspection uncovers are also DIY: an oil change, wiper blades, air filters, a battery swap. Others are honest shop jobs: brake work if you are not equipped for it, cooling-system flushes with air-bleed procedures, AC service, and anything involving the transmission. The point of doing the inspection two weeks out is that it gives you the option to DIY the easy repairs and schedule the shop for the rest without a time crunch. Know which side of that line you are on before you start, so you can book the shop early if you need it — good shops fill up, and 'I need this before Friday' is not a position you want to negotiate from.
How Long Since the Last Real Service
If your car was fully serviced within the last few thousand miles — oil, filters, a multi-point inspection, tires rotated and set — your pre-trip prep is mostly a confirmation pass. If it has been a while, or if you honestly cannot remember the last time anything beyond fuel went into the car, treat the pre-trip inspection as a catch-up service and budget accordingly. Pull up your maintenance schedule and see what is due or overdue, because a road trip is the worst possible time to discover you skipped a timing-belt interval or a transmission service two years ago. The pre-trip window is a good forcing function for the maintenance you have been putting off — better to face the backlog in your driveway with two weeks of runway than on the shoulder of an interstate. Cars that get regular service need a light pre-trip check; cars that get neglected need the trip to be the reason they finally get caught up.
Frequently Asked Questions
How far in advance should I get my car ready for a road trip?
What is the single most important thing to check before a long drive?
Should I change my oil right before a road trip?
Do I need to prepare my car differently if I am towing or loading it heavily?
My check engine light is on but the car runs fine — is it safe to take a road trip?
Related Articles
Road Trip Essentials Checklist: An ASE Master Tech's Pre-Trip Inspection and Gear List (2026)
roadside-safety
How to Jump Start a Car Safely: A Step-by-Step Guide From an ASE Master Tech (2026)
roadside-safety
How to Change Your Own Oil: A Step-by-Step Guide from an ASE Master Tech (2026)
maintenance-parts
Tire Pressure Guide: What PSI Your Car Actually Needs (2026)
tires-wheels
How to Winterize Your Car: A 20-Point ASE Technician's Checklist (2026)
roadside-safety
About the Reviewer

Mike Reeves, ASE Master Technician
A.A.S. Automotive Technology, Universal Technical Institute (UTI)
Mike Reeves is an ASE Master Technician with 15 years of hands-on experience in automotive repair and diagnostics. He earned his A.A.S. in Automotive Technology from UTI and runs his own independent shop in Denver, Colorado. Mike founded RevRated to help everyday car owners make smarter parts decisions -- every recommendation comes from real-world testing in his garage.