How to Fix a Windshield Chip: A Master Tech's DIY Repair Guide (2026)
By Mike Reeves, ASE Master Technician Updated
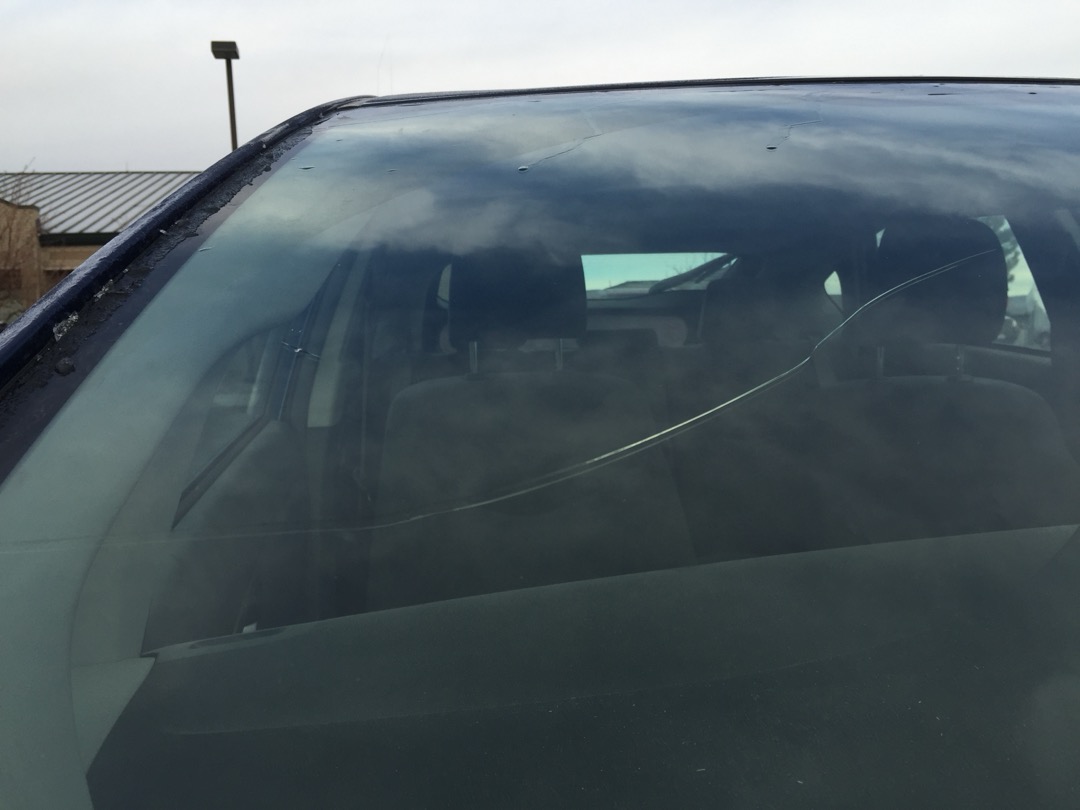
Rock chips are the most common glass damage I see in my shop, and here in Denver they come with the territory: gravel trucks, sanded winter roads, and temperature swings that can run 40 degrees between morning and afternoon. Most of those chips could have been fixed in half an hour with a kit that costs less than an oil change. Instead, a lot of them come in a few months later as a crack running across the driver’s side, and now the conversation is about a new windshield.
A chip repair injects clear resin into the break, pulls the air out, and cures the resin hard so the break stops growing. Done early, on the right kind of damage, it is one of the best-value repairs a car owner can do at home. Done on the wrong damage, it wastes a weekend and can make a professional repair harder.
This guide covers how to tell whether your chip is repairable, how to do the repair step by step, how temperature affects the result, what insurance usually covers, and when the right answer is a new windshield. If you already know the chip qualifies and just need a kit, our tested roundup of the best windshield repair kits compares the bridge, syringe and vacuum styles.
Windshield Chip Repair at a Glance
Time required: About 30 to 60 minutes, most of it waiting for the resin to soak in and cure.
Difficulty: Easy. The skill is in the prep and patience, not in strength.
Tools: A windshield repair kit (resin, bridge or pedestal, curing strips, razor blade), a push pin, clean microfiber towels, clear packing tape for the days before the repair, and sunshine or a UV curing light.
When it works: A small bullseye, half-moon or star chip, about the size of a quarter or smaller, on the outside layer of glass, away from the edges and outside the area right in front of the driver.
When NOT to DIY: A crack longer than a few inches, damage you can feel on the inside of the glass, damage near the camera or sensors behind the mirror, a chip at the edge of the glass, or a chip that has been packed with dirt for months.
Can You Fix It Yourself? Check These Four Things First
Size. AAA’s quick check is a good one: a chip about the width of a quarter or smaller, or a crack short enough for a dollar bill to cover completely, is generally a repair candidate. For home kits I am stricter on cracks. Safelite advises against using a DIY kit on a crack longer than an inch or two, and that matches what I see. Short cracks fill poorly by hand, and long ones need shop equipment.
Depth. A windshield is two sheets of glass bonded to a plastic layer in the middle. A rock chip normally only damages the outer sheet. Run your fingers over the same spot from inside the car. If you can feel damage on the inner surface, or the plastic layer looks torn or cloudy, the windshield needs replacing.
Location. The industry repair standard for laminated windshields (ANSI/ROLAGS 002) describes a driver’s primary viewing area: a strip 12 inches wide, centered on the steering wheel, running from the bottom to the top of the wiper sweep. Even a good repair leaves a faint mark, and the standard sets much tighter limits for repairs inside that strip. My advice for home repairs is simple: if the chip sits in that strip, let a glass shop decide. Chips close to the edge of the windshield are the other problem area. The glass is under more stress there, and many shops will not repair damage within a couple of inches of the edge.
Condition. The resin needs a clean, dry break to bond to. A chip that has been driven on through rain, road spray and car washes for months is often too contaminated for any repair to look good. It may still be worth repairing to stop it spreading, but expect a visible mark.
Chip Types and What Each One Needs
Knowing which type of break you have tells you how hard the repair will be. The limits below are the professional limits from the ROLAGS standard. Home kits work best well inside them.
| Damage type | What it looks like | Professional repair limit | Home kit verdict |
|---|---|---|---|
| Bullseye | Round crater with a dark ring around it | Up to 1 inch | Best candidate for DIY |
| Half-moon | Partial bullseye, shaped like a half circle | Up to 1 inch | Good candidate |
| Star break | Small impact point with short cracks radiating out | Up to 3 inches across | Small ones only; the legs are hard to fill |
| Combination break | Bullseye with cracks running from it | Body up to 2 inches | Possible if small; take your time |
| Surface pit | Tiny pit with no cracks | Pit size limits apply | Easy, often just a drop of resin |
| Crack | A single line, often grown from a chip | Up to 14 inches | Short ones at most; longer goes to a shop |
The standard also lists damage that should not be repaired at all, whatever the size: damage through both layers of glass, damage on the inner layer, three or more long cracks from one impact point, contamination that cannot be cleaned out, cracks that reach the edge, and damage where repair could affect a camera, rain sensor or heads-up display.
How to Fix a Windshield Chip, Step by Step
Every kit differs a little, so read your kit’s instructions before you start and follow its resin quantities and timings where they differ from mine. This is the sequence for the common bridge or pedestal kit.
Step 1: Park in the shade and check the glass temperature
Work with the car in the shade or a garage. Resin starts to cure in sunlight, and if it cures before it soaks into the break, the repair fails. The glass should be neither hot nor cold to the touch. Check your kit’s label for its temperature range and stick to it.
Step 2: Clean the break
Use a push pin to lift out any loose glass from the impact point. Clean the glass around the chip and dry it completely. Keep liquids out of the break itself: water or glass cleaner trapped in the chip blocks the resin. If the chip got wet recently, give it time to dry out in a warm garage before you continue.
Step 3: Mount the bridge or pedestal
Center the bridge or adhesive pedestal directly over the impact point, so the resin chamber sits right on top of it. Press the suction cups or adhesive seal down firmly and check that the seal touches the glass all the way around. A bridge that sits crooked lets resin leak out instead of being forced into the break.
Step 4: Add the resin and seat the injector
Add the number of resin drops your kit calls for, then thread in the injector or plunger until it seats against the glass. Snug is enough. Overtightening the injector is the most common way a DIY repair goes wrong, because the extra pressure can push a new crack out from the chip.
Step 5: Work the air out
This is the step that decides whether the repair looks good. Depending on the kit, you either pull the plunger back to create a vacuum or let the injector hold pressure for several minutes. Watch the chip closely: the dark, silvery look of air in the break should fade as resin replaces it. Many kits have you alternate between vacuum and pressure a few times. If you can still see air pockets in the legs of a star break, give it more time before you move on.
Step 6: Remove the bridge and cover the repair
Take off the bridge, put a final drop of resin on the impact point, and lay a curing strip over it. Press the strip flat with the edge of the razor blade so no air bubbles are left under it.
Step 7: Cure the resin
Move the car into direct sunlight, or switch on a UV curing light held over the repair. Kit makers commonly call for around 15 minutes in strong sun and up to an hour on a cloudy day. Do not cut it short: resin that has not fully cured stays soft and peels out.
Step 8: Scrape the surface flush
Peel off the curing strip and shave off the excess resin with the kit’s razor blade, holding it as the instructions show so you scrape the resin and not the glass. The surface should feel smooth when you run a fingernail over it. Avoid the car wash for a day and keep the wipers off the area until the repair has had time to settle.
Temperature and Curing: Where Most Repairs Fail
Most failed home repairs I see were done in the wrong conditions, not with the wrong kit. The kit makers themselves don’t agree on exact numbers. Permatex calls for the glass to be in the shade at roughly 50 to 75 degrees Fahrenheit, while Rain-X gives about 40 degrees as a guideline and stresses that its resin needs strong direct sunlight to cure. The safe approach covers both: apply in the shade on moderate glass, then cure in the sun or under UV.
On a hot summer day, the danger is the resin curing too fast and the glass expanding around a chip under strain. Park in the shade for an hour first. In winter, the danger is the opposite. Cold glass makes resin thick and slow, and the usual fix, heat, is exactly what spreads chips. Let the car warm up in a garage, or run the heater on low with the vents aimed away from the windshield. Never point the defroster on high at a cold, chipped windshield.
Why Chips Spread, and How to Protect One Today
A chip is a weak point that concentrates stress, and anything that flexes or heats the glass unevenly can turn it into a crack. Safelite lists the usual causes, and they match what I see in the shop: the outside of the glass cooling while a warm cabin heats the inside, the defroster blasting hot air at frozen glass, wipers dragging over ice, slammed doors, and water freezing inside the chip and expanding. Potholes and body flex add to it.
If you can’t repair the chip today, protect it:
- Cover the chip with a piece of clear packing tape to keep water and grit out. It is not a repair, just a way to keep the break clean.
- Keep hot and cold air off the glass, and warm the car gradually in winter.
- Use a plastic ice scraper instead of the wipers to clear frost, and keep the scraper away from the chip itself.
- Park in a garage or the shade, and use a windshield sun shade on hot days to keep the inside of the glass from heating up.
- Replace worn wiper blades. A blade with torn rubber or an exposed metal frame drags grit across the glass, and our guide to the best windshield wipers covers which blades hold up.
- Skip automatic car washes until the chip is repaired, and close doors gently.
DIY Repair, Shop Repair or Replacement
Here is how the three options compare, with costs in relative terms because glass prices vary widely by car and region.
| Option | Relative cost | Time | Best for |
|---|---|---|---|
| DIY kit | Lowest, about the price of a cheap lunch out | 30 to 60 minutes | Small, fresh chips outside the driver’s view |
| Shop or mobile repair | Several times a kit, often covered by insurance | Under an hour | Larger chips, star breaks, short cracks, chips in awkward spots |
| Windshield replacement | Often ten times a shop repair or more | Half a day or longer with calibration | Long cracks, edge cracks, inner-layer damage, damage in the driver’s view |
A professional repair is better than a kit mainly because of the equipment. Shop systems pull a stronger vacuum, they can gently flex the glass to open the legs of a star break, and they can warm or cool the glass into the resin’s range. If your chip is larger than a quarter or sits anywhere you would struggle to see around a faint mark, the shop is worth it.
Insurance and Deductibles
If you carry comprehensive coverage, call your insurer before you buy a kit. Many insurers waive the deductible for a chip repair, because paying for a repair now is far cheaper than paying for a windshield later. Progressive, for one, says it charges no deductible for repairable windshield damage on comprehensive policies.
Three states go further by law. Florida, Kentucky and South Carolina waive the comprehensive deductible for windshield damage, and several others require insurers to offer a glass option. South Carolina lawmakers have debated ending that waiver, so read your policy at renewal rather than assuming. Liability-only and collision-only policies do not cover glass at all.
Two cautions. Ask for a repair, not a replacement, when the chip qualifies; the repair is better for the car and for your premiums over time. And be skeptical of anyone who approaches you in a parking lot offering a free windshield repair. AAA warns that these offers are often aimed at your insurance payout, and the work is not always good.
When Replacement Is the Right Call
Some damage should not be repaired: a crack longer than about a foot, a crack that reaches the edge, damage through both layers, damage in the driver’s primary viewing area that a shop won’t repair, and anything near the camera, rain sensor or heads-up display. In those cases, replace the windshield.
On most newer cars, replacement now includes recalibrating the driver-assistance cameras that look through the windshield for lane keeping and automatic emergency braking. Safelite describes two methods, a static calibration with a target set in front of the car and a dynamic calibration on the road, and some cars need both. A 2023 AAA study found that the calibration portion made up about a quarter of an average windshield replacement bill. AAA also warns that replacement glass not built to the original specification can prevent the cameras from calibrating properly, so ask the shop what glass it is fitting and whether calibration is included.
That calibration cost is the best argument for repairing a chip early. A chip repair on the outer layer normally does not involve the cameras, though you should confirm with the shop if the chip is anywhere near the mirror. Letting that chip grow into a crack turns a half-hour job into a replacement plus calibration.
Inspections and Commercial Vehicles
State inspection rules for windshield damage vary, and some states fail cracks or chips in the driver’s view. If your state inspects, check its rules before your inspection date and repair the chip first. Trucks and buses run under federal rules: 49 CFR 393.60 allows damage that a disc 3/4 inch in diameter can cover, as long as it is not within 3 inches of other damage. Fleet drivers should repair chips before they outgrow that limit.
Common Mistakes
- Waiting months to repair, so dirt and water fill the break.
- Applying resin in direct sun, so it cures before it soaks in.
- Overtightening the injector and cracking the glass further.
- Cleaning the chip with water or glass cleaner and trapping liquid inside.
- Rushing the vacuum and pressure cycles and leaving air in the legs.
- Curing on a cloudy day without a UV light, leaving soft resin.
- Using the defroster on high to warm the glass in winter.
- Trying to repair damage in the driver’s view or at the edge of the glass.
Final Thoughts from the Shop
Fixing a windshield chip is one of the few car repairs where speed matters more than skill. A fresh chip, a clean break, moderate glass and a little patience gets you a repair that holds for the life of the windshield. A chip left to sit through a winter becomes either an ugly repair or a replacement bill.
Keep a kit in the glove box so the repair happens the week the rock hits, not the month after. Our roundup of the best windshield repair kits shows which kits suit which damage type, and if you are getting the car ready for cold weather anyway, our guide to winterizing your car covers the rest of the list.
Frequently Asked Questions
Can I fix a windshield chip myself?
How long can I drive with a chipped windshield?
Does insurance pay to fix a windshield chip?
Will a windshield chip disappear after repair?
Can I repair a windshield chip in cold weather?
Related Articles
7 Best Windshield Repair Kits of 2026
car-care-detailing
What Windshield Wipers Do I Need? A Mechanic's Guide to Size, Type, and Fit (2026)
maintenance-parts
How to Choose the Right Car Wax for Your Paint Type (2026): An ASE Master Tech's Guide
car-care-detailing
How to Remove Scratches From Car Paint: An ASE Master Tech's Guide (2026)
car-care-detailing
How to Wash Your Car Without Scratching the Paint: An ASE Master Tech's Guide (2026)
car-care-detailing
About the Reviewer

Mike Reeves, ASE Master Technician
A.A.S. Automotive Technology, Universal Technical Institute (UTI)
Mike Reeves is an ASE Master Technician with 15 years of hands-on experience in automotive repair and diagnostics. He earned his A.A.S. in Automotive Technology from UTI and runs his own independent shop in Denver, Colorado. Mike founded RevRated to help everyday car owners make smarter parts decisions. He judges every pick the way he would for a customer's car: specs, fitment and what owners report over time.