How to Wash Your Car Without Scratching the Paint: An ASE Master Tech's Guide (2026)
An ASE Master Tech explains the physics of swirl marks and the exact wash technique that prevents them — two-bucket method, foam pre-soak, straight-line motion, and the drying mistakes that scratch more paint than the wash itself.
Updated
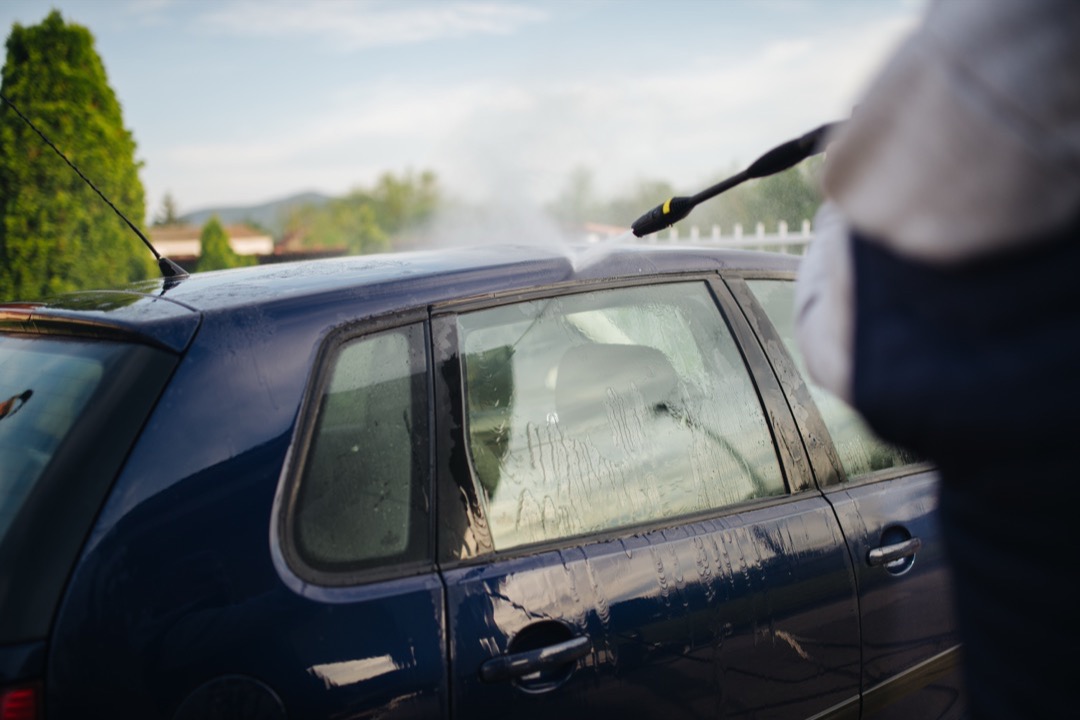
I have spent a lot of my career inspecting paint, and I can tell you the single most common self-inflicted damage I see is not from gravel, keys, or shopping carts. It is from washing. A customer once brought in a two-year-old black sedan convinced someone had “buffed it wrong” at a dealer — the whole car had that spider-web haze under the shop lights. Nobody had buffed it. He had been running it through a brush tunnel every week and drying it with a bath towel from the linen closet. Every one of those swirls was put there by cleaning the car.
That is the paradox of paint care: the act you perform to keep the finish nice is the one most likely to ruin it. The good news is that washing without scratching is not a rare talent. It is a short list of rules grounded in what is physically happening between your mitt and the clear coat. Understand the mechanism and the technique becomes obvious. Here is how to wash your car so it stays glossy instead of slowly hazing over.
Why Washing Is the #1 Cause of Swirl Marks
To wash without scratching, you first have to understand what a “scratch” even is on modern paint. Your car’s finish is layered: primer, color coat, and on top of it all a clear coat — a transparent, protective layer only about 1.5 to 2 mils thick. That is roughly 40 to 50 microns, or about half the thickness of a sheet of printer paper. Everything you see as gloss, depth, and shine is light passing cleanly through that thin, smooth clear layer and reflecting back.
Swirl marks are thousands of microscopic scratches in that clear coat. Individually they are far too small to see. Collectively, under a point light source like direct sun or a single shop bulb, they scatter reflected light in every direction instead of returning it cleanly — and your eye reads that scatter as a hazy, cobweb sheen. They are not damage in the color coat and they are not deep. They are shallow micro-abrasion, and almost all of them come from a single mechanism: a hard grit particle trapped between wash media and paint, dragged across the surface.
That is the whole physics of it. Silica dust, brake dust, and road sand are harder than clear coat. When one of those particles is caught under your mitt or towel and you move, it plows a tiny trench. Move in a circle and you carve a curved gouge — which is exactly why the textbook pattern is circular “swirls.” Every rule that follows exists to do one of two things: keep grit away from the paint entirely, or make sure any grit that does reach the surface slides harmlessly instead of digging in. Lubricity handles the sliding; technique handles the keeping-away. Master both and swirls simply stop happening.
What You’ll Need
You can wash a car safely with a modest, one-time kit. The leverage is enormous — this gear is the difference between a wash that protects paint and one that abrades it:
- A microfiber or chenille wash mitt (buy two — one for uppers, one for the dirtier lowers). Never a sponge or brush.
- Two buckets with grit guards — one for soap, one for rinse water.
- A pH-neutral car wash soap. Our best car wash soaps guide ranks the formulations that clean without stripping protection or lubricity.
- A pre-wash tool — at minimum a hose, ideally a foam gun or foam cannon.
- Plush, high-GSM microfiber drying towels. A good set of microfiber towels is one of the most leveraged purchases in the whole kit, because drying is where most swirls are born.
- A dedicated wheel brush and wheel-only mitt that never touch paint.
That is the entire list. Notice there is no sponge, no chamois, no dish soap, and no bath towel — the four things most likely to be sitting in a garage and the four most likely to scratch a car.
Step 1 — Rinse First, Never Touch Dry Dirt
The most important rule in scratch-free washing happens before any soap: never let a mitt, towel, or hand touch dry, dirty paint. Dry grit sitting on the surface is loose and removable with water alone. The moment you wipe it dry — even a “quick once-over” with a waterless spray on a genuinely dirty car — you press that grit into the clear coat and drag it.
Start with a thorough hose rinse, top to bottom, to flush off every particle that water can carry away on its own. Get into the lower panels, the rocker seams, and behind the wheels where grit collects. This single step removes the majority of loose contamination for free, before you introduce any contact at all. If you take nothing else from this guide, take this: water first, hands never on dry dirt.
Step 2 — Foam or Pre-Soak to Lift Grit Before Contact
A rinse removes loose grit; a pre-soak removes bonded grime. Laying down a clinging layer of foam and letting it dwell for a few minutes softens and lifts the road film, bug residue, and grime that a plain rinse leaves behind — so that when your mitt finally touches the paint, most of what would have scratched it is already gone or floating in suspension.
A foam cannon on a pressure washer produces the thickest, longest-dwelling foam and is the ideal. A foam gun on a regular garden hose is the affordable version and works well. Even a pump-sprayer pre-wash solution beats going straight from rinse to contact. Apply, let it sit (in shade, never letting it dry), and rinse it off before you pick up the mitt. The goal of the entire pre-wash sequence is simple: reduce how much work — and how much friction — the contact wash has to do.
Step 3 — The Two-Bucket Method (and Why the Grit Guard Actually Works)
Here is the technique that separates paint that stays glossy from paint that hazes over. Fill one bucket with your pH-neutral soap solution and a second with clean rinse water. Put a grit guard in the bottom of each.
Load the mitt from the soap bucket, wash one section of the car, then — before reloading with soap — plunge the mitt into the rinse bucket and agitate it against the grit guard. This releases the grit you just picked up into the rinse water. Then reload from the clean soap bucket for the next section.
The grit guard is the part nobody explains. It is a raised plastic lattice sitting an inch or two off the bottom of the bucket. When you press and rub the mitt against it, the grit shakes loose and falls through the lattice to the bottom, where the water is calm. The lattice blocks the turbulence of the next dunk from stirring that settled grit back up into the mitt. Without a grit guard, every dunk re-suspends the dirt and reloads it onto your mitt — meaning a single-bucket wash is literally rubbing the car with the grit you keep collecting. The two-bucket method with guards breaks that cycle. It is the highest-value habit in the entire routine.
Step 4 — Wash Top-to-Bottom, Straight Lines Only
Two rules govern the actual wash motion, and both come straight from the physics of grit and gravity.
Work top to bottom. The roof and upper glass carry mostly light dust. The rocker panels, lower doors, and rear bumper carry the real grit — sand, brake dust, and road spray thrown up by the tires. If you wash the dirty lower panels first, you load your mitt with that heavy grit and then carry it up onto the cleaner upper panels, scratching them. Working top-down keeps the mitt cleanest where the paint is most visible, and saves the gritty lowers for last. This is exactly why you keep a second, dedicated mitt for the bottom of the car — so the grit down there never migrates up.
Straight lines, never circles. Wash front-to-back in straight, overlapping passes — never in tight circular motions. If a trapped particle is going to mark the paint despite your best effort, a straight-line scratch is a single thin line that catches light from only one angle and is nearly invisible. A circular motion turns that same particle into a curved gouge, and hundreds of them overlapping is precisely the spider-web swirl pattern that ruins a finish under sunlight. Straight lines spread any potential marring into the least visible form possible.
Keep the paint lubricated the whole time — if a section starts to feel like it is dragging, re-soap it. That drag is friction, and friction is what scratches.
Step 5 — Dry Without Dragging
Drying causes more swirls than washing, and it is the step people rush. A wet car left to air-dry spots; a car dried with pressure and a thin towel gets scratched. The fix is technique plus the right towel.
Use a thick, high-GSM plush microfiber drying towel — the twist-loop or waffle-weave kind, not a thin glass towel and absolutely not a cotton bath towel (cotton loops are relatively coarse and trap grit against the paint). The correct motion is blotting, or at most a single gentle drag with no downward pressure, letting the towel’s absorbency do the work instead of your arm. Lay the towel on the panel, lift, move to the next spot. A quality drying towel holds so much water that you rarely need more than a light pass.
Two drying towels minimum — one for uppers, one for lowers — so you never move rocker-panel grit onto the roof. A leaf blower or dedicated car dryer is the pro move for pushing water out of mirrors, trim seams, and door handles where it hides and drips out later as spots. And keep drying towels spotless: a single grit particle embedded in a drying towel will draw a clean, visible line across an entire panel in one pass. Launder them separately from everything else.
Common Mistakes That Cause Scratches
If you are seeing swirls after you wash, one of these is almost always the culprit. This is the reverse-diagnosis list I walk customers through:
- Dish soap or all-purpose cleaner. It strips wax and lubricity, leaving a high-friction surface that marks on the next contact. Use pH-neutral car soap only. (Full reasoning in the FAQ below.)
- A sponge, brush, or chamois on the paint. None of them lift grit away from the surface; they trap it against the clear coat. Microfiber mitt, always.
- Single-bucket washing. No rinse bucket and no grit guard means you reload grit onto the mitt every dunk. This is the most common technique error there is.
- Washing in circles. Turns every trapped particle into a curved swirl instead of an invisible straight line.
- Drying with pressure or a cotton towel. The number-one drying mistake. Blot with high-GSM microfiber; never press or scrub.
- Reusing a dropped mitt or towel. Anything that touches the ground picks up concrete grit instantly and becomes sandpaper. Drop it, retire it until it is washed.
- Automatic brush tunnels. Those brushes carry grit from hundreds of dirty cars a day and drag it across your clear coat. This alone accounts for more swirled finishes than any other single cause.
- Washing hot paint in direct sun. Flash-drying soap and water forces you to scrub off spots, reintroducing friction.
Get these eight out of your routine and you have eliminated essentially every way a home wash puts scratches in paint.
Wash Frequency and Seasonal Contaminants
Technique should flex with what is actually landing on the car, because different contaminants demand different care. Summer dust and pollen are relatively soft — a thorough rinse removes most of it, and the risk is mainly letting it cake before a rushed wash. Spring tree sap and bird droppings are the etchers; both eat into clear coat within a day or two in the sun and must come off immediately with a wet detailing spray and a soft microfiber, never a dry wipe. Winter road salt and brine are the corrosive, high-frequency threat — they demand weekly washing in the salt belt, with extra attention to the lower panels and undercarriage where salt collects and keeps working.
The counterintuitive principle underneath all of it: washing more often, done correctly, scratches paint less. The less contamination you let accumulate, the less grit is present to drag during any given wash. The damage comes from infrequent washing followed by an aggressive attempt to blast off weeks of caked grime in one pass. Steady, gentle, frequent maintenance beats occasional heroics every time.
If Your Paint Is Already Swirled
If the damage is done — you inherited a swirled car or learned these lessons the hard way — the swirls are not permanent. Because they live in the clear coat and are shallow, they can be polished out. Light swirls often come out with a good-by-hand scratch remover; our best car scratch removers guide covers the products that genuinely work on clear-coat marring versus the ones that just fill and hide it temporarily. Deeper, more widespread swirling is a job for a dual-action polisher and a proper correction pass — the best car polishers guide covers machines matched to beginner-through-advanced skill levels, and I would strongly suggest starting on an inconspicuous panel because clear coat is thin and you only get so many corrections before it is gone.
Once the paint is corrected — or if it is already in good shape — lock it in with protection. A coat of wax or sealant does more than add shine: it lays down the slick, sacrificial layer that lowers wash friction and keeps future grit sliding instead of digging. The best car wax guide covers the options, and pairing a decontamination step with it makes the protection bond properly — if the paint still feels rough after washing, a clay bar kit removes the bonded contamination that washing alone leaves behind. For the full spa treatment from wash through protection, the complete step-by-step detailing walkthrough puts the whole sequence together.
Buyer's Guide
The wash itself is only as gentle as the gear you use and the conditions you work in. These six factors decide whether a wash protects your paint or slowly destroys it. Get them right and scratch-free washing stops being a skill and becomes a habit.
Wash Media — Mitt Material and Fiber Density
This is the single most leveraged decision in the whole routine, because the mitt is the thing physically touching your paint. Never use a sponge, a brush, or an old chamois on raw clear coat. A flat sponge has no way to lift grit off the surface — it traps every particle against the paint and drags it. A quality wash mitt uses deep chenille or microfiber loops that pull grit up and away from the contact face, holding it in the pile where it cannot reach the paint. Fiber density is where price actually buys something real. A cheap mitt has sparse, short loops that fill with grit quickly and then start dragging it; a premium mitt has dense, long loops that hold far more contamination before saturating, plus a soft cuff and no exposed seams or plastic tags that could scratch. You do not need the most expensive mitt made, but the step from a bargain-bin sponge to a genuine microfiber mitt is the difference between swirls and no swirls. Buy two — one for upper panels, one for the dirtier lower panels.
Two Buckets and Grit Guards
The two-bucket method is the backbone of scratch-free washing, and the grit guard is what makes it work. One bucket holds your soap solution; the second holds clean rinse water. After every section, you rinse the mitt in the clean-water bucket before reloading it with soap — so the grit you just picked up goes into the rinse water, not back into your soap. The grit guard is a plastic lattice that sits an inch or two off the bottom of each bucket. When you push the mitt down against it and agitate, released grit falls through the lattice and is trapped below, where the turbulence of dunking cannot stir it back up into the mitt. A single bucket with no guard does the opposite — every dunk reloads the mitt with the grit you just removed, and you spend the whole wash sanding the car with its own dirt. Buckets and guards are cheap and last for years. This is non-negotiable gear, not an upgrade.
pH-Neutral Soap — Not Whatever Foams
A dedicated pH-neutral (pH 6–8) car wash soap does two jobs a household cleaner cannot. It lifts and encapsulates dirt so it rinses away instead of being ground in, and it adds lubricity — a slick film that lets any remaining grit slide across the paint rather than dig in. Lubricity is the quiet hero of scratch prevention; it is why a well-lubricated wash forgives minor technique errors that a dry, under-soaped wash would punish. Dish soap and all-purpose cleaners strip lubricity and protection at the same time, leaving a high-friction surface that marks easily. Look for a formula explicitly labeled pH-neutral and, ideally, wax- or coating-safe if your car has protection you want to keep. Concentrates that you dilute per label are the most economical and let you run a proper thick solution.
Drying Towel Weave and Weight (GSM)
More paint gets scratched during drying than during the wash itself, because people press a thin, cheap towel hard against the paint and drag it. The fix is a thick, plush microfiber drying towel — a high-GSM (grams per square meter) twist-loop or waffle-weave designed to absorb water by blotting, not by wiping. A 500–1200 GSM drying towel holds enough water that you can lay it on a panel, drag it gently once with no downward pressure, or simply blot, and lift the water away. Thin, low-GSM glass or general-purpose towels force you to scrub and press to move the same water, and that pressure is exactly what drives any trapped particle into the clear coat. Keep drying towels immaculate and launder them separately from shop rags — a single embedded grit particle in a drying towel will draw a visible line across a whole panel.
Pre-Wash Capability — Foam or Pressure
The safest contact wash is the one where the paint is already 90% clean before your mitt touches it. That is what a pre-wash step buys you, and how much gear you invest here scales with how dirty your car typically gets. At minimum, a strong hose rinse knocks off loose grit. A foam gun on a garden hose is the affordable step up — it lays down a clinging layer of soap that softens and lifts bonded grime during a few minutes of dwell time. A foam cannon on a pressure washer is the gold standard, producing thick, long-dwelling foam and high-pressure rinsing that removes the most grit before any contact. You do not need the top tier to wash safely, but if you routinely deal with heavy grime — a work truck, a gravel-road commute, a salt-belt winter — the pre-wash gear pays for itself in scratches avoided.
Timing and Temperature — Always Shade, Never Hot Paint
Where and when you wash matters as much as how. Wash in shade, on paint that is cool to the touch, ideally in the morning or evening. Hot paint in direct sun flash-dries soap and water before you can rinse or wipe, and every spot that dries on its own becomes a water spot that then tempts you to scrub — reintroducing the friction and pressure you were trying to avoid. Cool, shaded paint keeps the soap working, keeps the lubricating film intact, and gives you time to work one panel properly before moving on. If your only free time is a hot afternoon and the car has been baking, pull it into a garage or wait for the paint to cool. Forcing a wash on a 130°F panel undoes half of what good technique accomplishes.
The Bottom Line
Washing without scratching is not about buying the most expensive gear or spending your whole Saturday on it. It comes down to a handful of rules that all serve one purpose — keeping grit off the paint and keeping the surface slick enough that stray grit slides instead of digs. Rinse before you touch. Pre-soak to lift grime before contact. Two buckets with grit guards. Straight lines, top to bottom, plenty of lubrication. Blot dry with a plush towel, never press. Skip the brush tunnel and the dish soap.
That is the entire method, and once it becomes routine it takes no longer than the sloppy way that ruins paint. The customer with the swirled black sedan came back a year later with a car that still looked new — two buckets in his garage, a stack of microfiber towels, and a foam gun on the hose. Nothing exotic. Just the right technique applied consistently. Do the same and your paint will still have that clean, deep reflection long after the cars washed carelessly around you have gone hazy and dull.
Frequently Asked Questions
Can I use dish soap to wash my car?
What actually causes swirl marks?
Is washing at home really better than an automatic car wash?
How often should I wash my car?
Is a waterless or rinseless wash safe, or will it scratch the paint?
Related Articles
How to Detail Your Car Like a Pro: An ASE Master Tech's Complete Walkthrough (2026)
car-care-detailing
How to Choose the Right Car Wax for Your Paint Type (2026): An ASE Master Tech's Guide
car-care-detailing
7 Best Car Wash Soaps of 2026
car-care-detailing
7 Best Car Wax of 2026
car-care-detailing
7 Best Car Scratch Removers of 2026
car-care-detailing
About the Reviewer
Mike Reeves, ASE Master Technician
A.A.S. Automotive Technology, Universal Technical Institute (UTI)
Mike Reeves is an ASE Master Technician with 15 years of hands-on experience in automotive repair and diagnostics. He earned his A.A.S. in Automotive Technology from UTI and runs his own independent shop in Denver, Colorado. Mike founded RevRated to help everyday car owners make smarter parts decisions -- every recommendation comes from real-world testing in his garage.