How to Replace an Engine Air Filter: The 10-Minute Job Shops Charge You For (2026)
An ASE Master Tech's complete walkthrough: finding the housing, the three filter designs, which way the filter goes in, the MAF sensor mistake, and how to tell when it actually needs replacing.
Updated
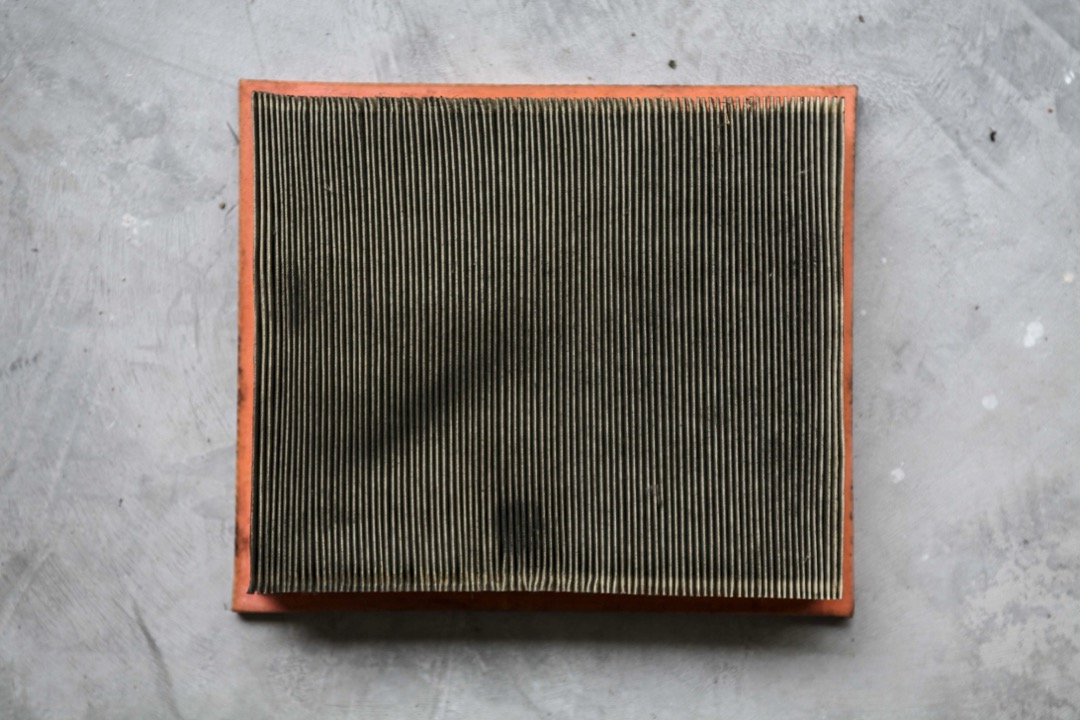
In fifteen years of running a shop I have watched the engine air filter become the most reliably upsold item in the automotive service business. It gets sold at the oil change counter, at the tire shop, at the dealer’s multi-point inspection, and almost always the same way: a technician appears at the waiting-room window holding a grey rectangle of pleated paper, tilts it toward the light, and says it is dirty. It probably is dirty. That is the filter’s job. Whether it is dirty enough to matter is a completely different question, and the markup between the counter price and what the part costs is one of the widest in routine maintenance.
Here is the part that makes the upsell worth resisting. On the overwhelming majority of vehicles built in the last thirty years, replacing the engine air filter takes less time than the paperwork for the service. There is no fluid to drain, no fastener with a torque spec you can get wrong in a damaging way, and no need to lift the car. If you can open a plastic box, you can do this job. It is the best possible first repair for someone who has never opened their hood with intent, and doing it once tends to make the next job feel possible too.
Engine Air Filter Replacement at a Glance
Time required: 5 to 10 minutes on a modern panel airbox. Allow 20 to 30 minutes the first time, mostly spent finding the housing and getting comfortable with the clips.
Difficulty: The easiest maintenance job on a car. No lifting, no fluids, no torque specs.
Tools: Usually none. A Phillips screwdriver on some vehicles, occasionally a 10mm socket or a Torx bit.
What it does: The engine air filter is the only thing between your combustion chambers and every particle of grit, sand, pollen, and road dust in the air your engine inhales. A modern engine pulls in roughly ten thousand gallons of air for every gallon of fuel burned. All of it goes through this filter.
What it does not do: A fresh filter will not restore lost horsepower or transform fuel economy on a healthy engine. Modern engines with electronic fuel management compensate for gradual intake restriction, so a moderately dirty filter costs you very little. The real reason to replace it on schedule is protecting the engine and the mass airflow sensor from what a failed or bypassed filter lets through.
Find Your Housing First
Before ordering anything, open the hood and identify what you are dealing with. Three designs cover almost everything on the road.
The rectangular panel airbox is the modern standard and what you almost certainly have if your vehicle is newer than about 1995. Look for a black plastic box, roughly the size of a large shoebox, sitting on top of or beside the engine with a wide corrugated tube running from it toward the center of the engine. The lid is held by spring clips you can flip with a thumb, or by four to six Phillips screws.
The cylindrical cartridge housing appears on many European vehicles, some diesel trucks, and a scattering of newer domestic engines. The element is a tall paper cylinder living inside a canister that opens via a threaded cap or a clamped lid. Same idea, slightly more time.
The round drop-in air cleaner is the classic layout on carbureted vehicles built before roughly 1990: a wide steel pan sitting on top of the engine with a wing nut in the middle. Unscrew the wing nut, lift the lid, and the doughnut-shaped element comes straight out.
If you cannot find the box, follow the large intake duct backward from the throttle body. It leads to the airbox by definition. Do not confuse the engine air filter with the cabin air filter, which is a completely separate part that filters the air you breathe rather than the air the engine breathes. That one usually lives behind the glovebox, and our best cabin air filters guide covers those separately.
Step-by-Step Engine Air Filter Replacement
Step 1 - Park, Shut Off, and Let It Cool
Park on level ground, shut the engine off, and take the keys out. If the engine has been running, give it ten minutes. You will be reaching near hot components, and the whole point of this job is that it should be relaxed rather than rushed.
Step 2 - Locate and Open the Housing
Find the airbox using the intake duct as your guide. Release the spring clips by pulling them outward and up with your thumb, or back out the screws with a Phillips driver. Keep the screws somewhere they cannot roll into the engine bay. A magnetic tray, a cup holder, or your pocket all work. Screws lost into the underhood area have a way of turning up rattling behind a heat shield months later.
Some vehicles also have a clamp on the intake duct or a wiring harness clipped across the lid. Loosen or unclip whatever is holding the lid down, but do not disconnect the mass airflow sensor connector unless you have to. If you do, note its orientation.
Step 3 - Photograph the Old Filter Before You Touch It
This is the step people skip and later regret. Take a phone photo of the filter sitting in the housing before removing it. Which face was up, which end was toward the duct, how the seal sat in the groove. Thirty seconds now removes all doubt at reassembly, and it is the single most useful habit for anyone new to under-hood work.
Step 4 - Lift the Old Filter Straight Out
Pull the filter straight up and out, keeping it level. Tilting a heavily loaded filter dumps accumulated dirt off the pleats and directly into the open housing, which is exactly where you do not want it. Hold it over a trash bag on the way out if it is filthy.
Step 5 - Inspect the Old Filter Properly
Hold it up against the sun or a bright work light and look through it from the clean side. If light comes through between the pleats, it still had service life. If the face is essentially opaque, it was overdue. Also check for torn pleats, a crushed or hardened seal, and any sign of rodent nesting. Any of those means unfiltered air was reaching the engine.
Note whether the clean side, the face that pointed toward the engine, is dirty. It should be nearly spotless. Dirt there means air was bypassing the filter around a bad seal, which is a housing problem rather than a filter problem.
Step 6 - Clean Out the Empty Housing
The bottom of the airbox collects leaves, seed pods, sand, and insects. Vacuum it out with a shop vac or wipe it with a damp microfiber towel. Do not blow compressed air into the housing while the intake tube is connected, because that pushes debris straight down the duct toward the throttle body. If you use compressed air, remove the duct first or aim outward. A small vacuum is the safer tool here, and a decent car vacuum handles this along with the interior work. Wipe the sealing surface on the lid and the groove in the base clean too, since a gritty sealing surface is what causes the leaks in the first place.
Step 7 - Seat the New Filter Flat
Drop the new filter into the groove with the rubber or foam seal facing up toward the lid, matching your photo. Press gently around the entire perimeter and confirm it sits flat, with no corner riding up on the housing lip. This is the moment that decides whether the job was done correctly. A filter sitting crooked leaves a gap, and unfiltered air through a gap is worse for the engine than the used filter you just removed.
If the new filter does not want to sit flat, stop and compare it to the old one side by side. Wrong part number is the most common cause, and forcing the lid shut over a filter that does not fit is how housings crack.
Step 8 - Close Up, Then Check Your Work
Set the lid on, make sure the filter’s seal is compressed evenly all the way around, and snap the clips or start the screws by hand before tightening. Plastic airbox screws need to be snug and nothing more. Overtightening strips the plastic bosses, and a stripped boss means the lid never seals properly again.
Reconnect anything you unclipped, including the mass airflow sensor connector if you moved it. Start the engine and listen. A correctly closed airbox is silent. A whistling or sucking noise at idle means the lid is not sealed and something is pinched or misaligned. Shut it off and look again.
Which Way Does the Filter Go In?
This is the question that generates the most anxiety and deserves a direct answer.
For flat rectangular panel filters, which is what nearly every modern car uses, there is no wrong rotation. The pleats are identical on both faces, there is no directional arrow, and the filter works the same either way around. What matters is that the sealing edge faces up toward the lid and the filter sits flat and fully seated in its groove. If you are worried about orientation on a panel filter, you are worrying about the wrong thing. Worry about whether it is seated flat.
For cylindrical, conical, and some cartridge filters, orientation can matter, and the manufacturer marks it. Look for a printed arrow on the filter body or frame. The arrow indicates airflow direction, which means it points toward the engine, away from the intake opening. Some cartridge filters also have a specific end that seats against a rubber base.
If you already installed it and you are second-guessing, the check is simple. Open the box back up and look at the seal. If the seal is compressed evenly against the lid all the way around, the filter is in correctly. There is no performance symptom that reveals a backwards panel filter, because there is no such thing.
How to Tell When It Actually Needs Replacing
Manufacturers publish intervals in the range of 15,000 to 30,000 miles, and every one of those numbers assumes a driving environment that may or may not resemble yours. The interval is a prompt to inspect, not a rule to obey.
The light test settles it. Pull the filter, hold it up to the sun or a bright shop light, and look through it from the clean side. Visible light between the pleats means the filter is still flowing. A face that blocks light almost completely means it is loaded and should be replaced.
Surface appearance alone is not evidence. A filter can look thoroughly grey and dirty on the intake face while still transmitting plenty of light, because a filter accumulating dirt is a filter doing its job. This is exactly the gap that the waiting-room upsell exploits. When a service advisor holds a filter up for you, ask them to hold it against the light instead of against the wall.
Replace it immediately, regardless of the light test, if you find a torn pleat, a crushed or hardened seal, oil saturation, standing water, or nesting material. Those all mean the filter is no longer a barrier.
The habit worth building is inspecting at every other oil change, which costs you two minutes while the hood is already open. If you do your own oil changes, our DIY oil change guide covers that job end to end, and the filter check folds naturally into it. Our car maintenance schedule lays out where air filter inspection sits relative to every other milestone service.
The Mistakes That Turn a 10-Minute Job Into a Repair Bill
Dropping debris into the open intake. With the filter out, the duct to the engine is wide open. Anything that falls in there, a screw, a leaf, a bolt, goes toward the throttle body. This is the only genuine risk in the whole procedure. Keep hardware controlled and do not blow compressed air into an open, connected housing.
Disturbing the mass airflow sensor. The MAF sensor sits in the intake tract just downstream of the filter, and its sensing element is a fine wire or film that contaminates easily. Do not touch it, do not wipe it with a rag, and do not spray anything into it except purpose-made MAF cleaner. A contaminated MAF causes rough idle, hesitation, poor fuel economy, and a check-engine light. If a light appears after intake work, a scan tool will usually point straight at it, and our best OBD2 scanners guide covers the readers that pull those codes without a shop visit. Our how to read OBD2 codes walkthrough explains how to interpret what you find.
Over-oiling a reusable filter. Owners who switch to washable cotton gauze filters often re-oil generously after cleaning, and excess oil migrates downstream onto the MAF sensor. This is the most common way a well-intentioned upgrade creates a driveability problem. If you run a reusable filter, oil it sparingly and let it wick for the full time the manufacturer specifies before installing.
Overtightening the housing screws. They thread into plastic. Snug is the specification. A stripped boss means a lid that never seals again and a housing that needs replacing.
Installing the wrong filter and forcing it. If it does not drop into the groove and sit flat, it is the wrong part. Forcing the lid down over a filter that does not fit cracks the housing and guarantees a leak path.
Assuming a new filter will fix a performance complaint. If the car was hesitating, misfiring, or running rough before, a clean filter will not resolve it. Those symptoms point elsewhere, most often ignition or fuel delivery. Our best spark plugs guide covers the ignition side, and fuel injector cleaners address deposit-related driveability issues.
What the Shop Charges Versus Doing It Yourself
The parts markup is where the money is. A dealer or quick-lube counter typically charges two to three times the retail price of the filter itself, then adds a labor line for a job that takes a technician about ninety seconds. Across the ownership life of a vehicle, at roughly one filter every two years, that difference adds up to real money for work you can do in your driveway between other errands.
More valuable than the savings is what you get from doing it: you know the filter is the right part, you know it is seated correctly, and you know what the inside of your airbox looks like. That last one matters more than it sounds. Owners who have looked in their own airbox notice water intrusion, oil pooling, and rodent activity early, when those are small problems.
When you are buying, the part choice is straightforward. A quality paper or synthetic filter from an established manufacturer is the right answer for a daily driver, and our best engine air filters roundup covers the ones worth installing along with the fitment considerations that catch people out. If you are building out a basic tool kit at the same time, our essential tools for DIY car maintenance guide lists what actually earns its place in a home garage.
Final Thoughts from the Shop
Of everything a car owner can learn to do themselves, this is the one I recommend starting with. There is no way to hurt yourself, no fluid to spill, no fastener that can strip something expensive, and no lifting equipment involved. The failure modes are all recoverable and mostly obvious. If you get it wrong, you open the box and try again.
Three things carry over to every job after this one. Photograph before disassembly, because a photo answers questions your memory will not. Keep loose hardware controlled, because the engine bay swallows anything you set down. And when a part will not fit the way it should, stop and check the part number instead of applying force. Those three habits are most of what separates careful work from expensive work.
Do this one on a Saturday morning with the radio on. It takes ten minutes, it saves a service-counter markup you will otherwise pay every couple of years, and by the end of it you will have looked at a part of your car that most owners never see. That is a reasonable trade for a job with a plastic clip as its hardest fastener.
Buyer's Guide
Six things decide how easy this job is on your specific vehicle and whether the filter you buy is worth installing. Sort these out before you open the hood and the work itself takes minutes.
Which Housing Design Your Vehicle Uses
Three designs cover essentially every vehicle on the road, and they set the difficulty of the job. The rectangular panel airbox is the modern standard: a black plastic clamshell sitting on or beside the engine, connected to the throttle body by a large corrugated duct, secured by two to six spring clips or Phillips screws. This is a five-minute job with no tools or one screwdriver. The cylindrical cartridge housing shows up on many European vehicles and some trucks, where the element is a tall cylinder inside a canister with a threaded or clamped cap, sometimes requiring a socket to open. Still simple, just slower. The round drop-in air cleaner is the classic carbureted layout on pre-1990 vehicles: a large chrome or black steel pan on top of the engine with a wing nut in the center, holding a doughnut-shaped element. Pop the hood before you buy anything and identify which one you have, because it determines both the part number and how much time to set aside.
Getting the Right Part Number
Engine air filters are vehicle-specific and often engine-specific within the same model, which is where most first-time orders go wrong. A 2018 model with a 2.0-liter engine and the same model with a 3.5-liter frequently use different filters, and mid-cycle refreshes sometimes change the airbox without changing the badge. Buy by year, make, model, and engine displacement together, never by model alone. The most reliable verification is to remove the old filter first and read the part number printed on its frame, then cross-reference. Second best is a parts-store fitment lookup with the engine size selected. If you already have the new filter in hand, lay it on top of the old one before installing: same length, same width, same depth, same seal profile. A filter that is close but not exact will either refuse to seat or will leave a gap that lets dirt bypass the media entirely, which is worse than the dirty filter you just removed.
Filter Media Type and What It Actually Buys You
Standard pleated cellulose paper is what came with the car and what the engine was calibrated around. It offers the best filtration efficiency for the money and is the correct default for a daily driver. Synthetic and blended media filters cost somewhat more and generally hold more dirt before restricting flow, which extends service life in dusty conditions, and they tolerate moisture better than paper. Oiled cotton gauze reusable filters are the category to think carefully about. They flow more air and can be washed and reused for the life of the vehicle, which appeals to a lot of owners. The trade-offs are real: filtration efficiency on fine particles is measurably lower than a quality paper filter, and over-oiling after cleaning is a known cause of mass airflow sensor contamination and driveability faults. On a naturally aspirated daily driver the airflow gain is not something you can feel. Reusable filters make sense on a modified engine where intake restriction is genuinely a limiting factor and the owner will follow the cleaning procedure carefully. For everyone else, a good paper or synthetic filter is the better engineering choice.
Your Actual Driving Environment
The single largest variable in filter life is the air the engine breathes, and it varies more than most owners realize. Paved suburban and highway commuting in a temperate region is the easy case where a factory interval of 20,000 to 30,000 miles is realistic. Regular gravel or dirt road driving is the hard case, and it is not close: a filter can go from new to fully loaded in a few thousand miles behind a truck on a dry county road. Construction and agricultural areas fall in between and vary by season. Heavy pollen regions load filters seasonally in a way that reverses if you inspect after the season ends. Extended idling in stop-and-go traffic pulls a surprising amount of brake dust and road grit through the intake. If two or more of these describe your normal week, cut the manufacturer interval roughly in half and inspect rather than assume. Filters are inexpensive and engines are not.
Tools You Need (Usually None)
The honest answer for most vehicles is that you need nothing beyond your hands. Spring-clip airboxes open without tools. Where tools are needed, the list is short: a Phillips screwdriver for screw-secured lids, a 7mm, 8mm, or 10mm socket or nut driver for hose clamps and some housing fasteners, and occasionally a T25 or T30 Torx bit on European vehicles. A shop vacuum or a can of compressed air is genuinely useful for clearing leaves and grit out of the empty housing, and a microfiber towel handles the rest. If you are building a basic under-hood kit from nothing, a small socket set and a screwdriver set cover this job plus most other beginner maintenance. A torque wrench is not required here, which is one of the reasons this is such a good first job. Nothing in the airbox has a meaningful torque spec beyond snug.
Knowing When the Job Is Not Just a Filter
A few discoveries during a filter change mean the underlying problem needs attention rather than a new part. Oil pooled in the bottom of the airbox or coating the filter media points to a PCV system pushing oil mist into the intake, or on a turbocharged engine, potentially a failing turbo seal. Water in the housing means a drain or seal has failed and the box is collecting rain, which will destroy filters repeatedly until it is fixed. Rodent nesting material, which is more common than people expect on vehicles that sit, means checking wiring harnesses in the same area before closing the hood. A filter that is dirty on the clean side, the side facing the engine, means dirt has bypassed the seal and the housing or the lid is not sealing correctly. And a check-engine light that appeared around the same time as intake work usually points at the mass airflow sensor rather than the filter itself. In each case, replacing the filter without addressing the cause means doing it again shortly.
Frequently Asked Questions
Can I really replace an engine air filter myself?
How often do you really need to change an engine air filter?
Which way does the engine air filter go in?
How can I tell if my air filter is dirty enough to replace?
Will an auto parts store replace the air filter for me?
Related Articles
7 Best Engine Air Filters of 2026
maintenance-parts
7 Best Cabin Air Filters of 2026
maintenance-parts
Car Maintenance Schedule: What to Replace and When (2026 Guide)
maintenance-parts
How to Change Your Own Oil: A Step-by-Step Guide from an ASE Master Tech (2026)
maintenance-parts
7 Best OBD2 Scanners of 2026
car-electronics
About the Reviewer

Mike Reeves, ASE Master Technician
A.A.S. Automotive Technology, Universal Technical Institute (UTI)
Mike Reeves is an ASE Master Technician with 15 years of hands-on experience in automotive repair and diagnostics. He earned his A.A.S. in Automotive Technology from UTI and runs his own independent shop in Denver, Colorado. Mike founded RevRated to help everyday car owners make smarter parts decisions -- every recommendation comes from real-world testing in his garage.