Car Detailing at Home for Beginners: A Simple DIY Starter Guide (2026)
An ASE Master Tech's beginner-friendly guide to detailing your car at home — the exact starter kit to buy first, a simple repeatable routine, and the mistakes that undo your work. No pro tools or experience needed.
Updated
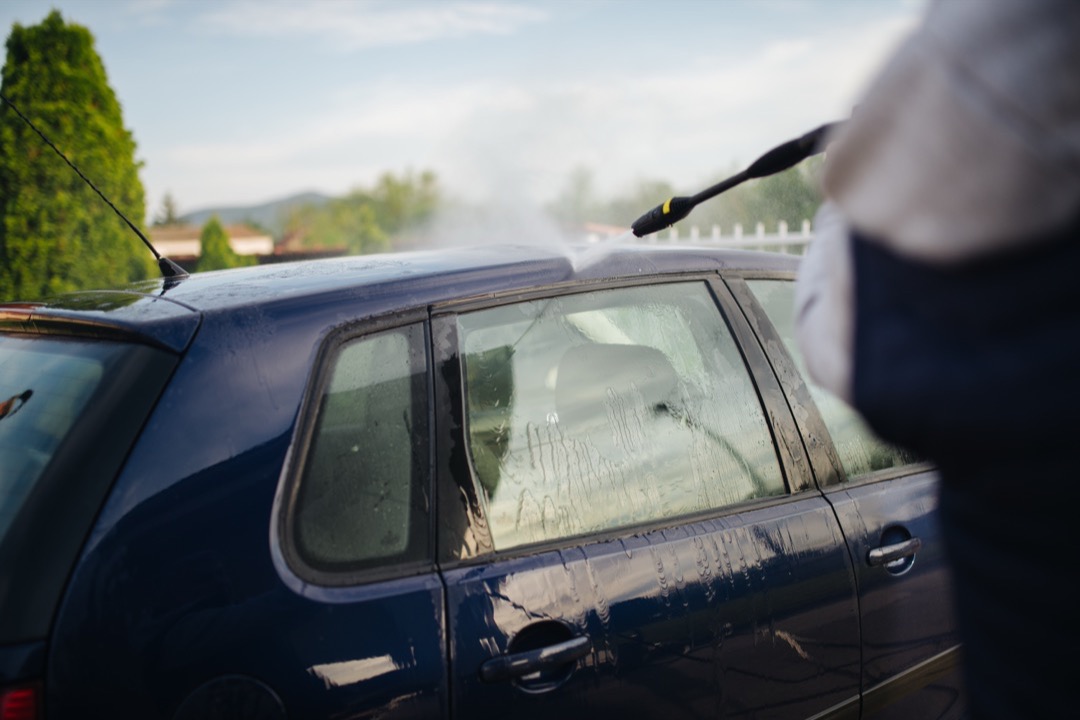
The first time most people think about detailing their own car, they open a browser, see a professional pull a rotary polisher across a panel and talk about “iron removers” and “paint correction,” and quietly decide it is not for them. I get it. I have spent my career around this work, and the online detailing world does a genuinely bad job of telling beginners the truth: you do not need any of that to make your car look dramatically better in an afternoon.
Here is the honest version. Detailing your car at home comes down to three things a complete beginner can do well on the first try — wash it carefully, protect the paint, and clean the inside properly. That is it. Everything else you see online — the clay bars, the machine polishers, the fifteen-bottle chemical kits — is advanced or optional, and chasing it before you have the basics is exactly how beginners waste money and get discouraged. This guide is the starting point I wish more people got: the small kit to buy first, the simple repeatable routine, and the handful of mistakes to avoid. Master this, and the fancy stuff is there whenever you want to grow into it.
What “Detailing” Actually Means (and What It Doesn’t)
Before you spend a dollar, get the vocabulary straight, because the word “detailing” gets thrown around to mean everything from a five-minute wipe-down to a two-day paint restoration.
A wash is maintenance — removing loose dirt and road film from the outside of the car. You do it every week or two. A detail is the deeper, less frequent process that restores and protects the whole vehicle, inside and out. A beginner’s detail has three parts: a careful wash, a coat of protection on the paint, and a proper interior clean. That is a complete, legitimate detail, and it is entirely within reach on your first attempt.
What detailing does not have to include, especially at the start: paint correction, machine polishing, clay bar decontamination, engine bay cleaning, or a cabinet full of specialized chemicals. Those are real steps that experienced detailers use, and you can absolutely grow into them — our full step-by-step detailing walkthrough covers the complete professional sequence when you are ready. But treating them as prerequisites is the number-one reason beginners never start. You are not doing it wrong by keeping it simple. Simple, done consistently, beats elaborate done once.
The Beginner’s Starter Kit — What to Buy First
The instinct every beginner has is to buy the biggest “ultimate detailing kit” they can find. Don’t. Half those bottles solve problems you do not have yet, and you will be afraid to use most of them on the wrong surface. Here is the small, genuinely useful core to start with — a one-time purchase that lasts years:
- A pH-neutral car wash soap. Never dish soap — it strips protection and lubricity and leaves paint scratching easily. Our best car wash soaps guide ranks the formulas that clean without stripping.
- Two buckets with grit guards — one for soap, one for rinse water. This single habit prevents most wash scratches.
- A microfiber or chenille wash mitt (buy two — one for upper panels, one for the dirtier lowers). Never a sponge or an old brush.
- A generous stack of microfiber towels, sorted by job — plush ones for drying and buffing wax, general ones for interior. A good set of microfiber towels is one of the cheapest, most leveraged purchases in the whole hobby.
- One all-purpose interior cleaner — a single versatile bottle handles the dash, plastics, console, and most upholstery. The best car interior cleaners guide covers the safe, effective options.
- A spray sealant or spray wax — the beginner-friendly way to protect paint without the streaking that paste wax causes first-timers.
That is the whole starter list, and notice what is not on it: no machine polisher, no clay bar, no foam cannon, no ten specialized sprays. You add those later, one at a time, when you hit a specific need. Start here, learn the routine on your own car, and let your kit grow with your skill instead of ahead of it.
The Simple Home Detailing Routine
With the kit in hand, the routine is a short, repeatable sequence. Do it in this order — the order exists to keep grit off your paint and to avoid re-dirtying anything you have already cleaned.
1. Wheels and tires first. The wheels are the filthiest part of the car — brake dust, road grime, and grit that will contaminate everything if you do them later. Use a dedicated wheel mitt and brush that never touch the paint, and clean them before you wash the body so any splash lands on still-dirty panels.
2. Rinse the whole car. Hose it down top to bottom to flush off every particle water can carry away on its own. This is the most important step for avoiding scratches: never let a mitt touch dry, dirty paint. Dry grit that you wipe becomes a scratch; the same grit rinsed off first is gone for free.
3. Wash with the two-bucket method. Load the mitt from the soap bucket, wash one section, then rinse the mitt in the clean-water bucket against the grit guard before reloading with soap. Work top to bottom (the lower panels hold the most grit) and in straight lines, never circles — if a stray particle does mark the paint, a straight line is nearly invisible while a circular motion creates the classic swirl haze. If you want the full physics and technique, our guide on how to wash a car without scratching the paint breaks it down step by step.
4. Dry by blotting, not dragging. More paint gets scratched during drying than washing. Use a plush microfiber drying towel and blot, or drag gently with no downward pressure. Never a cotton bath towel — its coarse loops trap grit and scratch.
5. Protect the paint. On the clean, dry car, mist a spray sealant onto one panel, spread it with one microfiber towel, and buff it off with a second. It beads water, resists grime, and makes your next wash safer by lowering surface friction. This is the step that turns a clean car into a detailed one.
That five-step sequence is a complete exterior detail, and none of it requires a skill you do not already have. Do it once and the car will look better than most driveway washes ever manage.
The Interior — The Half Beginners Skip
Here is a truth from years of handing cars back to customers: people judge a car’s cleanliness by the interior far more than the paint, and it is the half beginners neglect. A gleaming exterior with a gritty, dusty cabin still feels dirty. Give the inside the same attention.
Work top to bottom here too. Clear everything out — floor mats, trash, the stuff in the door pockets — so you are cleaning empty surfaces. Vacuum thoroughly, using crevice and brush attachments to reach the seat tracks, the gap between seat and console, the cup holders, and the trunk seams where grit hides. A capable car vacuum with good attachments is what separates a quick, satisfying refresh from a job you keep putting off. Then wipe every hard surface — dash, doors, console, steering wheel, shift knob — with your all-purpose interior cleaner and a clean microfiber, working into the vents and seams with a detailing brush. Finish with the glass, using a dedicated glass towel so you do not smear cleaner residue.
That is a professional-feeling interior with one cleaner, a vacuum, and a few towels. No specialized arsenal required — versatility and thoroughness beat a shelf of single-purpose bottles every time.
Beginner Mistakes That Undo Your Work
Almost every disappointing home detail traces back to one of these. Avoid them and you have skipped the whole beginner learning curve:
- Using dish soap or all-purpose cleaner on the paint. It strips wax and lubricity and leaves a high-friction surface that scratches on the next wash. pH-neutral car soap only.
- A sponge, brush, or single bucket. All three trap and re-apply grit. Microfiber mitt plus two buckets with grit guards, always.
- Washing in direct sun on hot paint. Soap and water flash-dry into spots you then scrub off, reintroducing friction. Work in the shade on cool paint.
- Drying with a cotton bath towel. The most common drying mistake — coarse cotton loops drag grit. Blot with plush microfiber.
- Buying a machine polisher on day one. Clear coat is thin and a machine in inexperienced hands can burn through it. Leave paint correction until you have real experience.
- Over-buying chemicals before learning the basics. A wall of bottles you are afraid to use is wasted money. Start with the core kit and add deliberately.
How Often — and When to Level Up
Different parts of the routine run on different clocks. A wash every one to two weeks (weekly in a salt-belt winter) keeps contamination from building to damaging levels. A quick interior wipe-and-vacuum monthly keeps the high-touch surfaces from getting grimy. A full detail — the wash-protect-interior sequence above — twice a year, ideally once in spring and once in fall, keeps the car genuinely restored. Reapply your spray protection every couple of months or after every few washes; a fresh layer of car wax or sealant is what keeps the paint slick and the shine deep between full details.
Once this routine feels automatic — and it will after three or four times — you will naturally want to go deeper. That is the moment to add the advanced steps: clay bar decontamination when the paint feels rough, a beginner-friendly dual-action polisher when you want to erase swirls, maybe a proper foam cannon. When you get there, the complete pro-level detailing walkthrough lays out the full sequence in order. But there is no rush. Every one of those steps is an upgrade to a foundation you have already built, not a barrier to entry you have to clear first.
Buyer's Guide
Detailing your own car at home is mostly a question of buying the right small kit once and then repeating a simple routine. These six factors decide what a beginner should actually spend money on — and, just as importantly, what to skip until you have some experience. Get the kit right and the results follow.
Start With Wash Gear Before Anything Else
The single highest-value thing a beginner can buy is not a fancy chemical — it is proper wash gear, because a careful wash is the foundation every other step sits on. That means a pH-neutral car wash soap, two buckets with grit guards, and a real microfiber or chenille wash mitt. This gear is inexpensive, lasts for years, and is the difference between a wash that protects your paint and one that slowly scratches it. Resist the pull of the giant all-in-one kit with fifteen bottles; most of those products solve problems you do not have yet. Buy the wash core first, learn to use it well on your own car, and add specialized products only when a specific need shows up. A beginner who masters a good two-bucket wash is already ahead of most people who own a shelf full of detailing sprays they never learned to use.
Microfiber — Buy in Bulk and Sort by Job
Microfiber towels are the most-used and most-underestimated item in detailing, and beginners never buy enough of them. You want a stack, not two — and you want to keep them sorted by job. Plush, high-GSM towels are for drying and for buffing off wax; general-purpose towels are for interior surfaces and cleaner wipe-downs; and dedicated, clearly-marked towels handle dirty jobs like wheels and door jambs so they never touch paint. The reason sorting matters is contamination: a towel that wiped a greasy door jamb will smear that grease across your glass, and a towel dropped on the driveway picks up concrete grit that turns it into sandpaper. Cheap cotton and old bath towels have no place in this — their coarse loops trap grit and scratch. A good set of proper microfiber towels is one of the cheapest and most leveraged purchases in the whole hobby, so buy a generous stack up front and launder them separately from your household laundry.
One Good Interior Cleaner Beats Five Specialized Ones
The interior is where beginners either over-buy or give up, and the fix is the same: start with one quality all-purpose interior cleaner rather than a separate bottle for every surface. A good all-purpose interior cleaner, diluted appropriately, handles the dash, door panels, console, cup holders, plastics, and most fabric and upholstery stains. That single product plus a few dedicated microfiber towels and a detailing brush for the vents and seams gets you 90% of a professional-looking interior. You can add specialized products — a leather conditioner, a glass-specific cleaner, a plastic protectant — as you identify what your specific car needs, but none of them are day-one purchases. Starting with one versatile cleaner keeps costs down and, more importantly, keeps you from being paralyzed by a cabinet full of bottles you are afraid to use on the wrong surface.
A Vacuum You'll Actually Use
Interior detailing lives and dies on the vacuum, and the best vacuum for a beginner is the one that is convenient enough that you actually pick it up. A dedicated car vacuum with strong suction and a set of narrow crevice and brush attachments makes the difference between a quick, satisfying interior refresh and a chore you keep putting off. The attachments matter more than raw power for a car — the tight spaces between seats and console, the seat tracks, the trunk seams, and the cup holders are where the dirt hides, and you need a nozzle that reaches them. A cordless model earns its keep because you will use it far more often than a corded shop vac you have to drag out and plug in. Match the vacuum to your reality: if a tool is annoying to set up, you will skip the interior every time, and the interior is half of what makes a car feel detailed.
Protection: Beginner-Friendly Spray Sealant Over Paste Wax
Applying protection is the step that turns a clean car into a detailed one, and for a beginner a spray sealant or spray wax is far more forgiving than a traditional paste wax. Paste wax rewards technique — thin, even application and careful timing before you buff — and beginners tend to apply it too thick, let it dry too long, and then fight streaks and haze for an hour. A spray-on sealant is close to foolproof: mist it on a clean panel, spread it with one microfiber, and buff it off with a second. It lays down a slick, protective layer that beads water, resists grime, and lowers the friction of your next wash so future grit slides instead of digs. Spray sealants also generally last longer than carnauba paste and are quicker to reapply between details. Once you are comfortable with the process and want maximum depth of shine, a quality paste wax is a natural upgrade — but start with spray protection and get the habit ingrained first.
Skip the Machine Polisher (At First)
The most common beginner mistake is buying a machine polisher before learning the basics, and it is the one purchase with genuine downside risk. Polishing removes a microscopic layer of clear coat to erase swirls and oxidation, and clear coat is only about 40 to 50 microns thick — an aggressive machine in inexperienced hands can burn straight through it and cause damage that costs real money to repair. The reassuring truth is that a beginner does not need to polish at all to get a dramatic result; a proper wash, decontamination, and fresh protection deliver most of the visual improvement people are after. If your paint has light swirls, start by hand with a mild scratch remover on a hidden panel before you ever touch a machine. When you genuinely outgrow hand work, a beginner-friendly dual-action polisher is far safer than a rotary and is a deliberate later step — not part of the starter kit.
The Bottom Line
Detailing your car at home is not a specialist skill locked behind expensive machines and a chemistry degree. It is three things a beginner can do well the first time: wash it carefully, protect the paint, and clean the inside properly. Buy the small core kit once, follow the simple routine, avoid the handful of mistakes that scratch paint and waste money, and repeat it a few times a year.
Do that, and your car will look and feel better than most vehicles that get dragged through a brush tunnel every week — for the cost of a kit that lasts years and an afternoon you would probably enjoy anyway. The pros started exactly here, with a couple of buckets and a stack of microfiber. Get the basics ingrained, and every advanced technique is waiting for you whenever you decide you want it.
Frequently Asked Questions
How much does it cost to start detailing your car at home?
How long does it take a beginner to detail a car at home?
Do I need a pressure washer or foam cannon to detail my car at home?
What is the difference between washing and detailing a car?
Can a beginner polish their own car, or do I need a machine polisher?
Related Articles
About the Reviewer
Mike Reeves, ASE Master Technician
A.A.S. Automotive Technology, Universal Technical Institute (UTI)
Mike Reeves is an ASE Master Technician with 15 years of hands-on experience in automotive repair and diagnostics. He earned his A.A.S. in Automotive Technology from UTI and runs his own independent shop in Denver, Colorado. Mike founded RevRated to help everyday car owners make smarter parts decisions -- every recommendation comes from real-world testing in his garage.